
Easy crochet market bag pattern
Looking for the perfect crochet market bag pattern? This easy pattern is ideal for beginners and comes with a helpful video tutorial! Whether you’re heading to the grocery store, a farmer’s market tote bag, or even the beach, this bag is both stylish and practical.
Go Green with Reusable Bags
Switching to reusable bags is a great way to reduce waste and ditch plastic bags. This reusable crochet bag helps you go green while looking stylish. It’s perfect for carrying fresh produce from the farmer’s market tote bag or essentials from the grocery store.
Crochet Market Bag Pattern details
Here’s a quick overview of the materials, sizing, gauge, and pattern notes before you begin.
Skill Level
Advanced beginner. This market bag pattern uses basic crochet stitches and involves some shaping.
Crochet Project Materials Needed
- Crochet hook size: J-10 6 mm crochet hook
- Yarn: worsted weight cotton yarn
- Yarn needle: Use this to weave in your ends.
- Scissors: Use scissors to fasten off your yarn.
- Stitch marker(s): Use these to help keep track of your stitches.
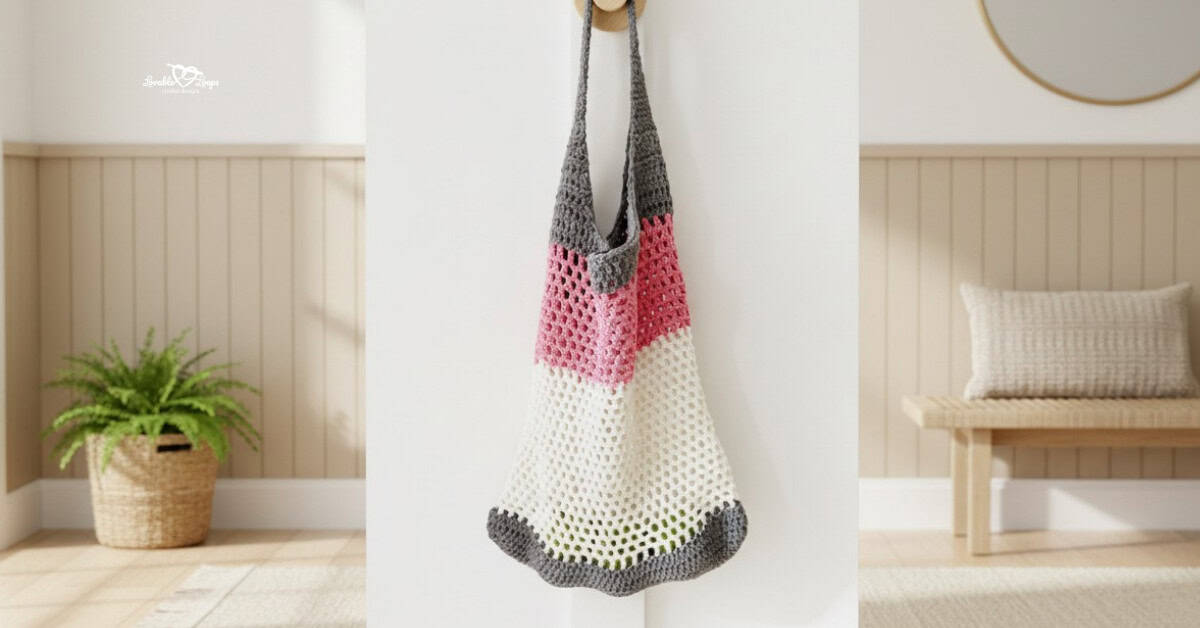
Finished Bag Size
My crochet market bag measure 12 inches wide and 14 inches tall.

Gauge
15 stitches & 8 rows = 4 inches
Crochet Terms
- hdc = half double crochet stitch
- hdc2tog = half double crochet decrease
- ch/chs = chain/chains
- st/sts = stitch/stitches
- sl st = slip stitch
- rem = remaining
Crochet Market Bag Pattern Notes
- The market bag is worked in the round from the bottom up.
- The chain at the beginning of each round does not count as your first stitch.
- Join each round with a slip stitch to the first stitch made in that round.
- Repeat the instructions between the asterisks (*) for the rest of the round.
- The pattern is written in US terms.
Crochet Market Bag Pattern Instructions
Body of the Crochet Market Bag Pattern
Round 1: Ch 42, 2 hdc in 3rd ch from the hook, 2 hdc in next ch, hdc in next 36 chs, 2 hdc in last 2 chs, continue working on backside of chs, 2 hdc in next two chs, hdc in next 36 chs, 2 hdc in each of the last two chs, join (88 stitches)
Round 2: Ch 2, 2 hdc in first two sts, hdc in next 40 sts, 2 hdc in next 4 sts, hdc in next 40 sts, 2 hdc in last two sts, join (96 stitches)
Round 3: Ch 2, 2 hdc in first two sts, hdc in next 44 sts, 2 hdc in next 4 sts, hdc in next 44 sts, 2 hdc in last two sts, join (104 stitches)
Rounds 4 & 5: Ch 2, hdc in each stitch, join (104 stitches)
Round 6: Ch 2, *hdc, ch-1, skip a stitch*, join to the first ch-1 space (ch-1 spaces= 52)
Work into the ch-1 spaces for rounds 7-34.
Rounds 7-34: Ch 2, *hdc, ch-1, skip a stitch*, join to the first ch-1 space (ch-1 spaces= 52)
Round 35: Ch 2, 2 hdc in each ch-1 space, join (104 stitches)
Adding Straps to the Crochet Market Bag Pattern
The strap is worked evenly on both sides and then stitched together in the middle.
Lay your bag flat and use locking stitch markers to mark 20 stitches (for each end of the strap) on each side of the bag.
First Half of the Strap
You are working in the 20 stitches that you marked off.
Row 1: ch 2, hdc2tog, hdc 16, hdc2tog, turn (18 stitches)
Row 2: ch 2, hdc2tog, hdc 14, hdc2tog, turn (16 stitches)
Row 3: ch 2, hdc2tog, hdc 12, hdc2tog, turn (14 stitches)
Row 4: ch 2, hdc2tog, hdc 10, hdc2tog, turn (12 stitches)
Row 5: ch 2, hdc2tog, hdc 8, hdc2tog, turn (10 stitches)
Row 6: ch 2, hdc2tog, hdc 6, hdc2tog, turn (8 stitches)
Row 7: ch 2, hdc2tog, hdc 4, hdc2tog, turn (6 stitches)
Rows 8- 38: ch 2, hdc in each stitch, turn (6 stitches)
Your strap should measure approximately 17 inches.
Second Half of the Strap
Repeat rows 1-38 on the opposite side.
Line up both ends of the strap and single crochet them together.
Finishing the Crochet Market Bag Pattern
Fasten off and then weave in the ends.

More crochet bag and tote patterns
Looking for more useful accessories to make? Browse my favorite crochet bag and tote patterns, including market bags, totes, pouches, and other practical handmade projects for everyday use.
You can also visit my full collection of crochet accessory patterns for even more small projects to wear, use, and gift.
Let’s connect!
I’d love to see what you’re making! Share your finished project and follow along for more free crochet patterns and tutorials.
📌 Don’t forget to pin this pattern for later!
Happy crocheting! 🧶
— Melissa