
Easy crochet leg warmers pattern
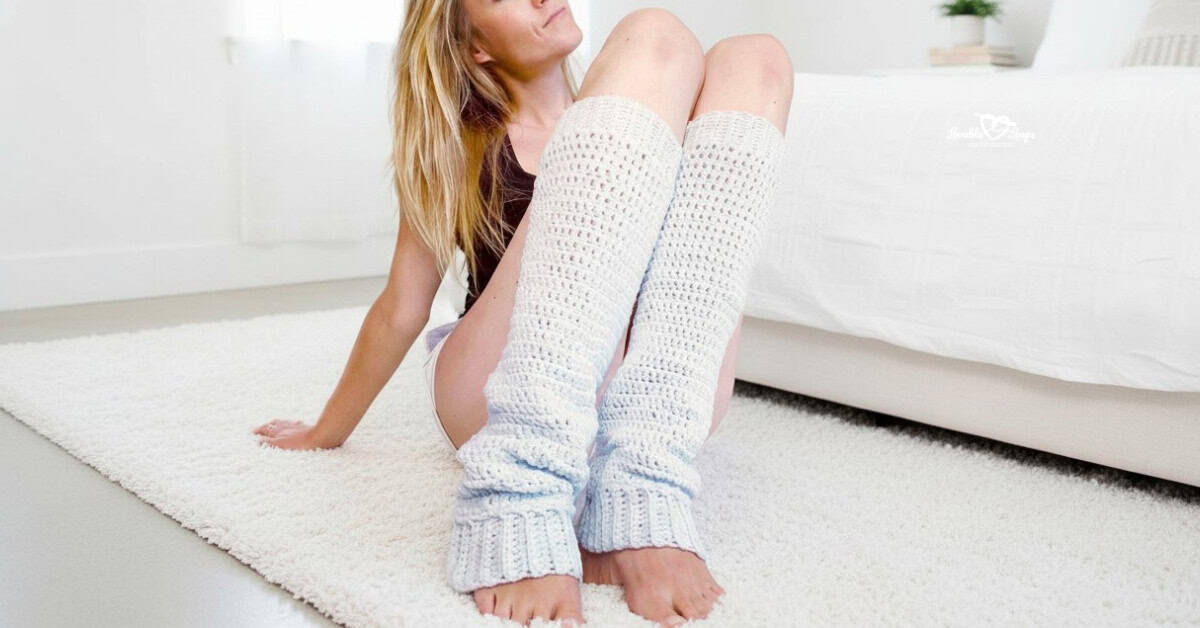
I’m super excited to share my Crochet Leg Warmers pattern with you. These leg warmers are quick and easy to make, and they have cozy ribbing on each end.
They fit most teens and adults, but don’t worry—I included instructions for adjusting the size. Whether you’re new to crochet or have some experience, you’ll love making these comfy leg warmers. Let’s get started and keep our legs warm and stylish! The free crochet pattern is below.

Free Crochet Leg Warmers Pattern
Crochet Project Materials Needed
- Crochet hooks size:
H-8 5 mm crochet hook for leg warmer
G-6 4 mm crochet hook for ribbing - Yarn: Worsted weight yarn (#4). I used Lion Brand’s Feels Like Butta in Ice. My leg warmers each weigh 75 grams/2.65 oz.
- Yarn needle: Use this to weave in your ends.
- Scissors: Use scissors to fasten off your yarn.
- Stitch marker(s): Optional. Use these to help keep track of your stitches.
Crochet Leg Warmers Pattern Information
Skill Level
Beginner. This free pattern is perfect for beginner crocheters. It uses basic single and double crochet stitches in basic form and simple repeats in rounds.
Leg Warmers Sizing
One size fits most teens/adults.
You can adjust this pattern to fit your own leg circumference. You want the ribbing to fit snugly around your leg.
For reference, my leg circumference just below my knee is 12 inches. I made my ribbing 45 rows long to fit snugly around my leg.
Gauge
Ribbing: 17 rows = 4 inches
Leg Warmer: 9 rounds = 4 inches
Crochet Terms
- dc = double crochet
- sc = single crochet
- blo = back loop only
- ch/chs = chain/chains
- st/sts = stitch/stitches
- rnd/rnds = round/rounds
- rem = remaining
Pattern Notes
- The top ribbing and the leg warmer are worked seamlessly.
- The bottom ribbing is made separately and then sewn to the leg warmer.
- The ribbing is worked flat in the back loops only.
- The leg warmers are worked in the round.
- The beginning chain does not count as a stitch.
- Join each round with a slip stitch to the first stitch made in that round.
- Repeat instructions between the asterisks (*) for the rest of the round.
- The pattern is written in US terms.
Crochet Leg Warmers Pattern Instructions
Ribbing for the Crochet Leg Warmers Pattern
Make 2 for each leg warmer (4 total).
G-6 4 mm crochet hook
Row 1: ch 11, sc in the 2nd ch from the hook and in each rem chs, turn (10 stitches)
Row 2: ch 1, sc in each st blo, turn (10 stitches)
Rows 3- 45: repeat row 2 (10 stitches)
You may need to work more or less than 45 rows depending on your own leg circumference.
Fasten off for the first ribbing. For the second ribbing, join in the round.
Crochet Leg Warmers Pattern
H-8 5 mm crochet hook
You are now working in the round.
Rnd 1: ch 2, dc once in each row of the ribbing, join (45 stitches)
You can sew up the seam from the ribbing at any point.
Rnd 2: ch 2, dc in each st, join (45 stitches)
Rnds 3- 32: repeat rnd 2 (45 stitches)
You may need more or less than 32 rounds depending on the length of your shin.
At round 32, my leg warmer, including the top ribbing, measured 16″ long. Fasten off.
Assembling the Crochet Leg Warmers Pattern
Sew the bottom ribbing to the leg warmer. Make sure each stitch (45 stitches) from the leg warmer matches up with a row from the ribbing (45 rows).
Use your tapestry needle to sew the seams for the top and bottom ribbing.
Finishing the Crochet Leg Warmers Pattern
Weave in your ends.

Looking for More Free Crochet Patterns?
If you like my easy crochet leg warmers pattern, you may also like my Basic Beanie, Arm Warmers, and Infinity Scarf patterns.
Let’s Connect!
I’d love to hear from you! Let me know what you think about this pattern. You can find me on social media- Instagram, Facebook, Pinterest, and my YouTube channel. Until then, happy crocheting!