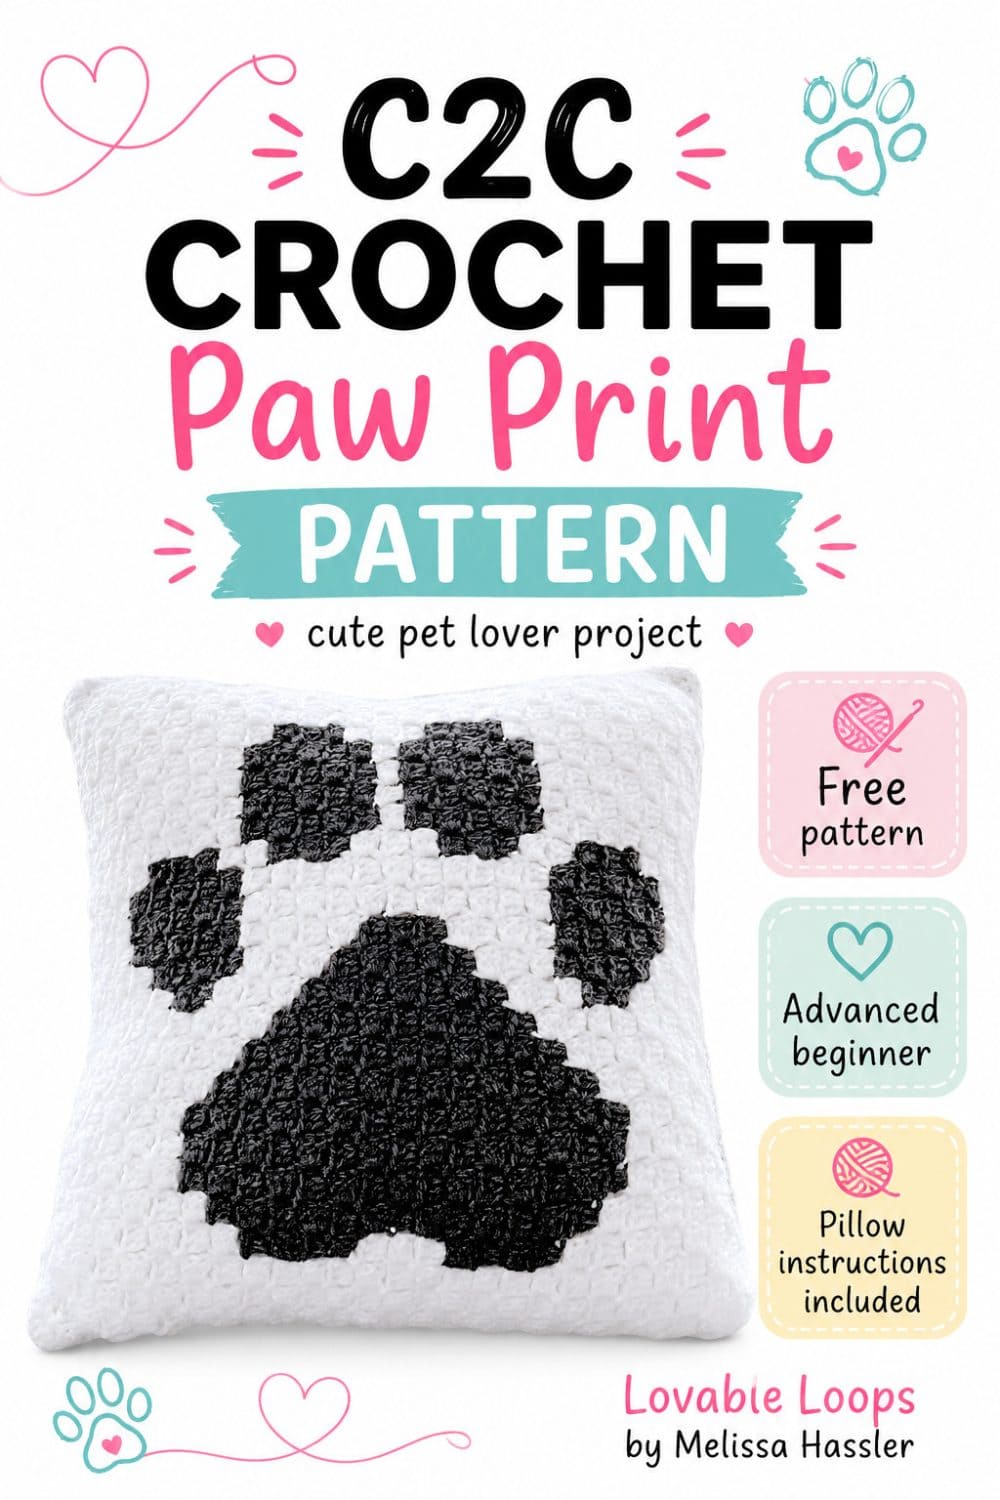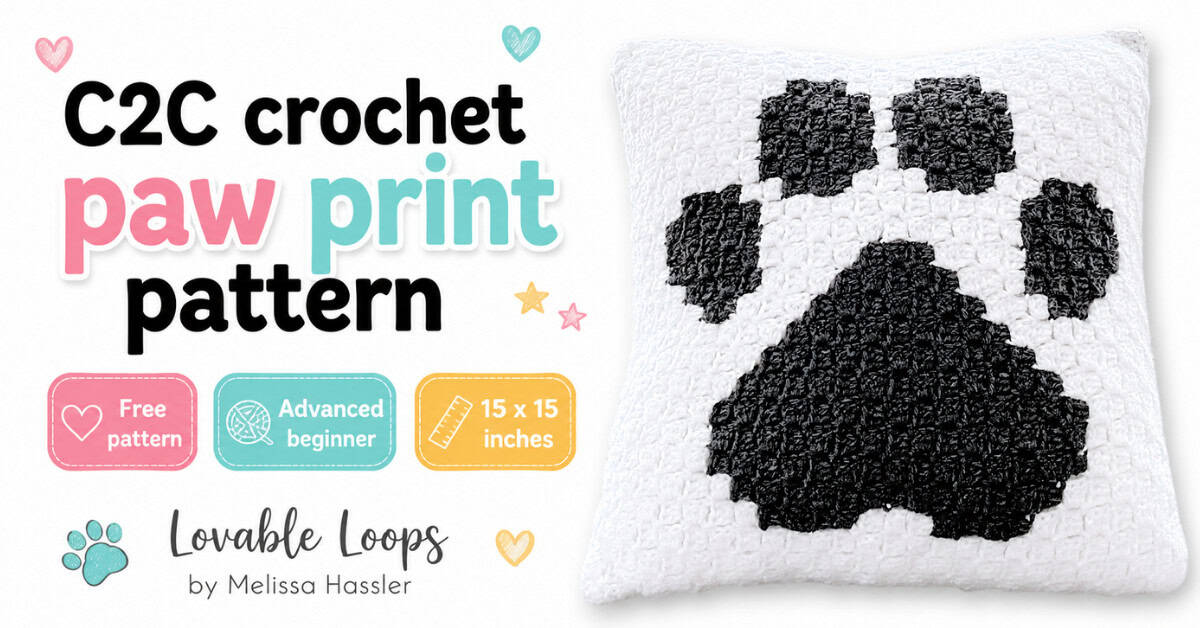
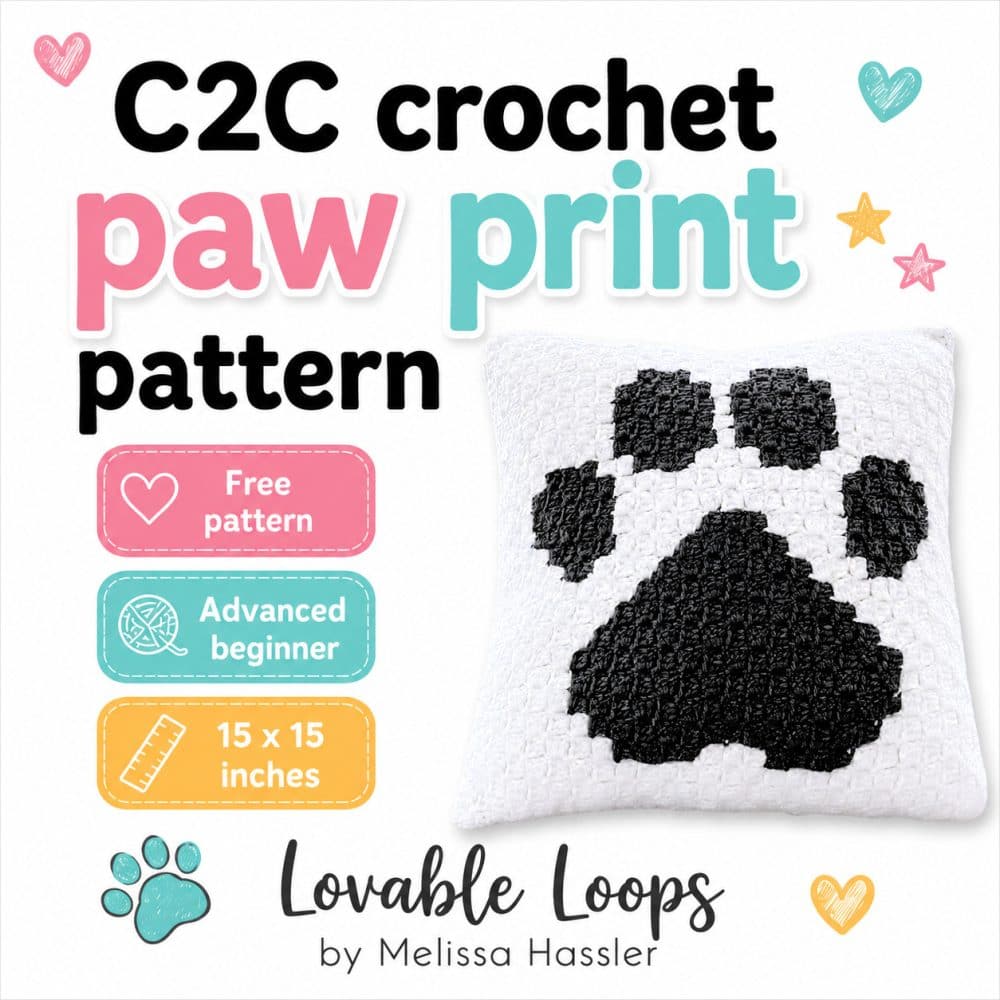
C2C crochet paw print pattern
I’m excited to share my new C2C Paw Print Crochet Pattern with you! This pattern is perfect for all pet lovers and is designed using the corner-to-corner (C2C) technique. I’ll show you how to crochet this adorable paw print square, and I also include instructions on how to turn it into a cozy pillow.
C2C crochet paw print pattern details
Here’s a quick overview of the materials, sizing, gauge, and pattern notes before you begin.
Skill level
Advanced beginners. This crochet square is made using C2C crochet method. It involves color changes.
Materials needed
- Crochet Hook Size: G-6 4 mm
- Yarn: Worsted weight yarn. I used Red Heart Super Saver in white & charcoal.
- Yarn needle: Use this to weave in your ends.
- Scissors: Use scissors to fasten off your yarn.
- Stitch marker(s): Optional. Use these to help keep track of your stitches.
- Pillow insert or Fiber fill: You’ll need one of these for making a pillow.
Finished size
My finished paw print crochet pattern measures 15 inches by 15 inches.
Gauge
8 squares (ch 3 + 3 dc) = 4 inches (10 cm)
Crochet abbreviations
- dc = double crochet
- sc = single crochet
- ch/chs = chain/chains
- st/sts = stitch/stitches
- sl st = slip stitch
C2C crochet technique
- The pattern is made using the c2c technique. You make “squares” in diagonal rows from one corner to the other corner.
- Each square is made of a chain 3 + 3 double crochet.
- Chain 6 to start a new row and chain 3 to start a new square.
- You can follow the picture graph or the written pattern.
- The written pattern tells you how many squares to make of each color and in what order.
Pattern notes
- The pattern is written in US terms.
- ↙ You are working on the “right side”.
- ↗ You are working on the “wrong side”.
- Instructions for making a pillow are included below.
C2C crochet paw print pattern instructions
Make the paw print following the graph or the written instructions.
Graph
Download the paw print crochet pattern graph.
Written instructions
Border: Ch 1, make 2 sc in the side of each square and in each corner make (2 sc, ch-2, 2 sc).
Make a paw print pillow
- Crochet the Back: Make a back for the pillow by following the same instructions as the front, but without the color changes. This will give you a solid square.
- Assemble the Pillow: Lay the front and back squares together with the right sides facing out.
- Stitch Three Sides: Using a yarn needle, stitch three of the sides together, leaving one side open.
- Add Filling: Fill the pillow with a pillow insert or fiber fill to your desired thickness.
- Close the Pillow: Stitch the last side closed to complete your pillow.
Now you have a cozy paw print pillow to enjoy or gift!
Finishing
Weave in all of your ends.

PDF version
View this pattern in my Etsy Shop: Paw Print Crochet Pattern
C2C video tutorial
Need C2C help? I have a step by step C2C tutorial for my mini heart square on my YouTube channel.

More free C2C crochet patterns
For more corner-to-corner designs, browse my collection of free C2C crochet patterns, including mini panels, larger squares, letters, numbers, and blankets. You can also visit my guide on how to read a crochet pattern if you want extra help following written instructions.
Let’s connect!
I’d love to see what you’re making! Share your finished project and follow along for more free crochet patterns and tutorials.
📌 Don’t forget to pin this pattern for later!
Happy crocheting! 🧶
— Melissa