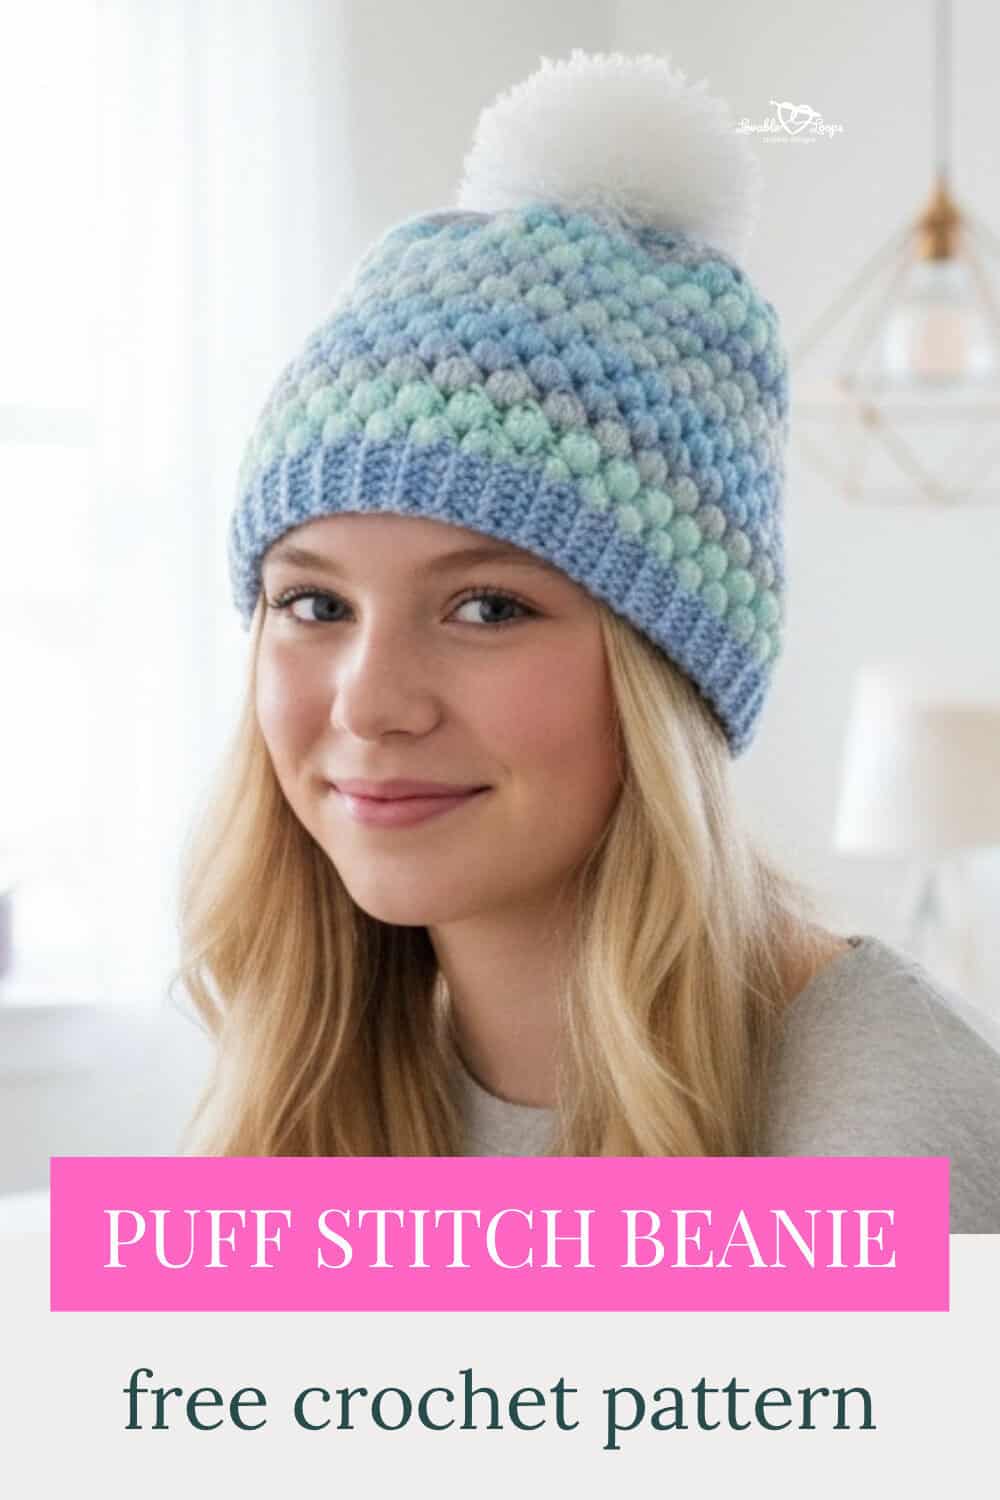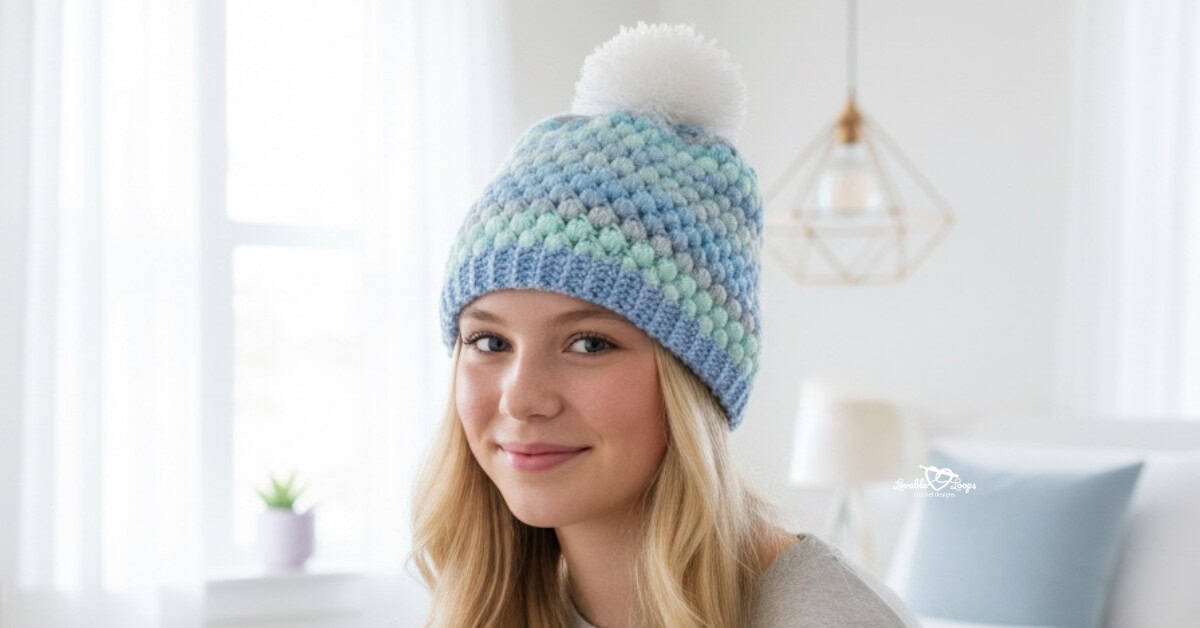
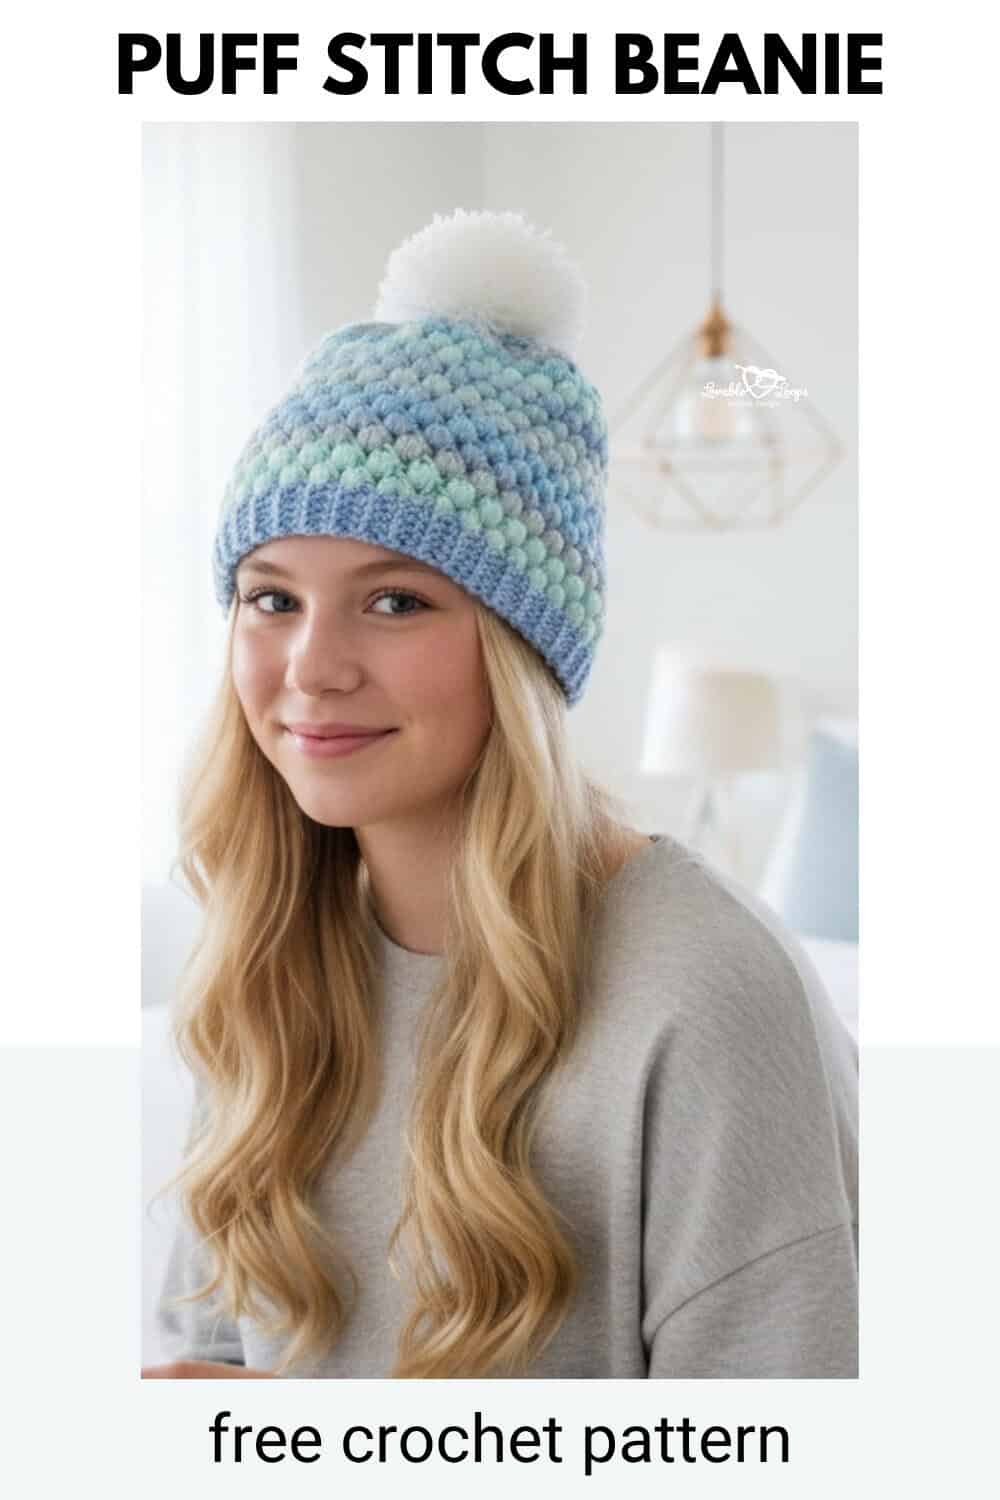
Puff stitch beanie crochet pattern
This puff stitch beanie crochet pattern is an advanced beginner hat with cozy texture, a stretchy ribbed brim, and a warm, comfortable fit. Worked from the bottom up using bulky yarn, it’s designed to fit most teens and adults and makes a stylish winter hat with or without a pom pom.
Quick answer
This puff stitch beanie crochet pattern is an advanced beginner hat worked from the bottom up using bulky weight yarn and a ribbed brim. It is designed to fit most teens and adults and features textured puff stitch rounds finished with a gathered top and optional pom pom.
Best for: Advanced beginners
Style: Bottom-up textured beanie with ribbed brim
Includes: Written instructions, sizing details, gauge, and finishing options
Why you’ll love this pattern
- Cozy puff stitch texture that stands out without being hard to make
- Bulky yarn helps the hat work up quickly
- Ribbed brim gives the beanie a stretchy, comfortable fit
- Great for gifts, winter wear, and stash-friendly crochet
- Easy to customize with or without a pom pom
How the hat is constructed
The brim is worked first in flat rows of single crochet in the back loop only, then joined into a ring. From there, the hat body is worked from the bottom up in continuous rounds using puff stitches. The crown is shaped with decrease rounds, then the top is gathered closed and finished with a pom pom if desired.
Puff stitch beanie crochet pattern details
Here’s a quick overview of the materials, sizing, gauge, and pattern notes before you begin.
Skill level
Advanced beginner — Great for crocheters comfortable with basic stitches, puff stitches, and simple decrease shaping.
Materials needed
- Crochet hook — J-10 (6 mm) or size needed to obtain gauge
- Yarn for the hat — bulky weight yarn
- Yarn for the pom pom — fur yarn
- Yarn needle — to weave in ends and sew the top closed
- Scissors — to cut and fasten off yarn
- Stitch markers — to keep track of stitches and rounds
- Extra-large pom pom maker — to make the pom pom for your hat
Finished size
This hat is designed to fit most teens and adults with a head circumference of 20–23 inches (51–58 cm). The ribbed brim and puff stitch fabric give it a snug, stretchy fit.
Need help with sizing? Check out my crochet hat sizing guide to measure head circumference, use negative ease, and adjust crown diameter and hat height for the best fit.
Gauge
7 puff stitches and 10 rows = 4 inches (10 cm)
Crochet abbreviations
- sc = single crochet stitch
- blo = back loop only
- ps = puff stitch
- dec = decrease
- ch/chs = chain/chains
- st/sts = stitch/stitches
- ch sp = chain space
- rnd/rnds = round/rounds
Pattern notes
- The brim is made first.
- Brim is worked in flat rows and joined in the round.
- The hat is worked in the round from the bottom up.
- The hat is worked in continuous rounds without joining.
- Round 1 is joined. The remaining rounds are worked in continuous rounds without joining.
- The pattern is written in US crochet terms.
Special stitches
Puff Stitch (ps)
- YO, insert hook in next ch sp & pull up a loop (3 loops on hook)
- YO, insert hook in same ch sp and pull up a loop (5 loops on hook)
- YO, insert hook in same ch sp and pull up a loop (7 loops on hook)
- YO, insert hook in same ch sp and pull up a loop (9 loops on hook)
- YO and pull through all 9 loops (1 loop on hook)
- Chain 1 to close the puff stitch
Puff stitch decrease (ps dec)
- YO, insert hook in next ch sp & pull up a loop (3 loops on hook)
- YO, insert hook in same ch sp and pull up a loop (5 loops on hook)
- YO, insert hook in next ch sp and pull up a loop (7 loops on hook)
- YO, insert hook in same ch sp and pull up a loop (9 loops on hook)
- YO and pull through all 9 loops (1 loop on hook)
- Chain 1 to close the puff stitch
Puff stitch beanie crochet pattern instructions
Ready to start the fun part? The puff stitch beanie crochet pattern instructions below will walk you through each step, from making the ribbed brim to shaping the crown and finishing the top. Take your time, follow the stitch counts as you go, and you’ll have a cozy textured beanie before you know it.
Brim instructions
Row 1: Ch 7, sc in 2nd ch from hook and each remaining ch, turn (6 stitches)
Rows 2–64: Ch 1, sc in each st in the back loops only, turn (6 stitches)
Join in the round. Use a yarn needle to sew the seam of the brim.
Hat instructions
Rnd 1: Ch 2, ps in every other row, join (32 stitches)
You will work in continuous rounds for rounds 2–18. Use a stitch marker to mark the first stitch of each round.
Rnds 2–15: ps in each ch sp (32 stitches)
Rnd 16: ps dec around (16 stitches)
Rnd 17: ps dec around (8 stitches)
Rnd 18: ps dec around (4 stitches)
Use your yarn needle to sew the top closed.
Adding a pom pom
- Wind the yarn around both arches.
- Cut the yarn along the middle gap.
- Tie with a piece of scrap yarn.
- Open the arches and remove the pom pom.
- Trim any loose ends.
Attach the pom pom to the top of your hat.
Finishing
Weave in your ends.

Frequently asked questions
Is this puff stitch beanie good for beginners?
This pattern is best for advanced beginners. You should feel comfortable with basic stitches, working in rows and rounds, and following simple shaping before starting.
What size does this hat fit?
It is designed to fit most teens and adults with a head circumference of 20–23 inches (51–58 cm).
Can I make this hat without a pom pom?
Yes. You can leave the pom pom off for a simpler finish, and the hat will still look great.
What yarn works best for this beanie?
A bulky weight yarn works best for this pattern because it helps create a warm hat with great stitch texture and a faster finish.
Why is my hat too tight or too loose?
The most common reasons are gauge and brim length. If your tension is tighter or looser than expected, the finished size can change. Adjusting the number of brim rows is the easiest way to fix the fit.
Is the hat worked in joined rounds or continuous rounds?
Round 1 is joined. The remaining rounds are worked in continuous rounds. Using a stitch marker will help you keep track of the first stitch of each round.
Can I make this puff stitch beanie longer or slouchier?
Yes. Add a few extra rounds before the decrease section if you want a little more height or a softer slouch.
More free crochet hat patterns
Looking for more crochet hat ideas? Browse my full collection of free crochet hat patterns for babies, kids, and adults. You’ll find everything from classic crochet beanies and cozy winter hats to playful animal hats and seasonal designs — all written with clear instructions and helpful sizing details.


Let’s connect!
I’d love to see what you’re making! Share your finished project and follow along for more free crochet patterns and tutorials.
📌 Don’t forget to pin this pattern for later!
Happy crocheting! 🧶
— Melissa