Crochet cactus wall hanging pattern
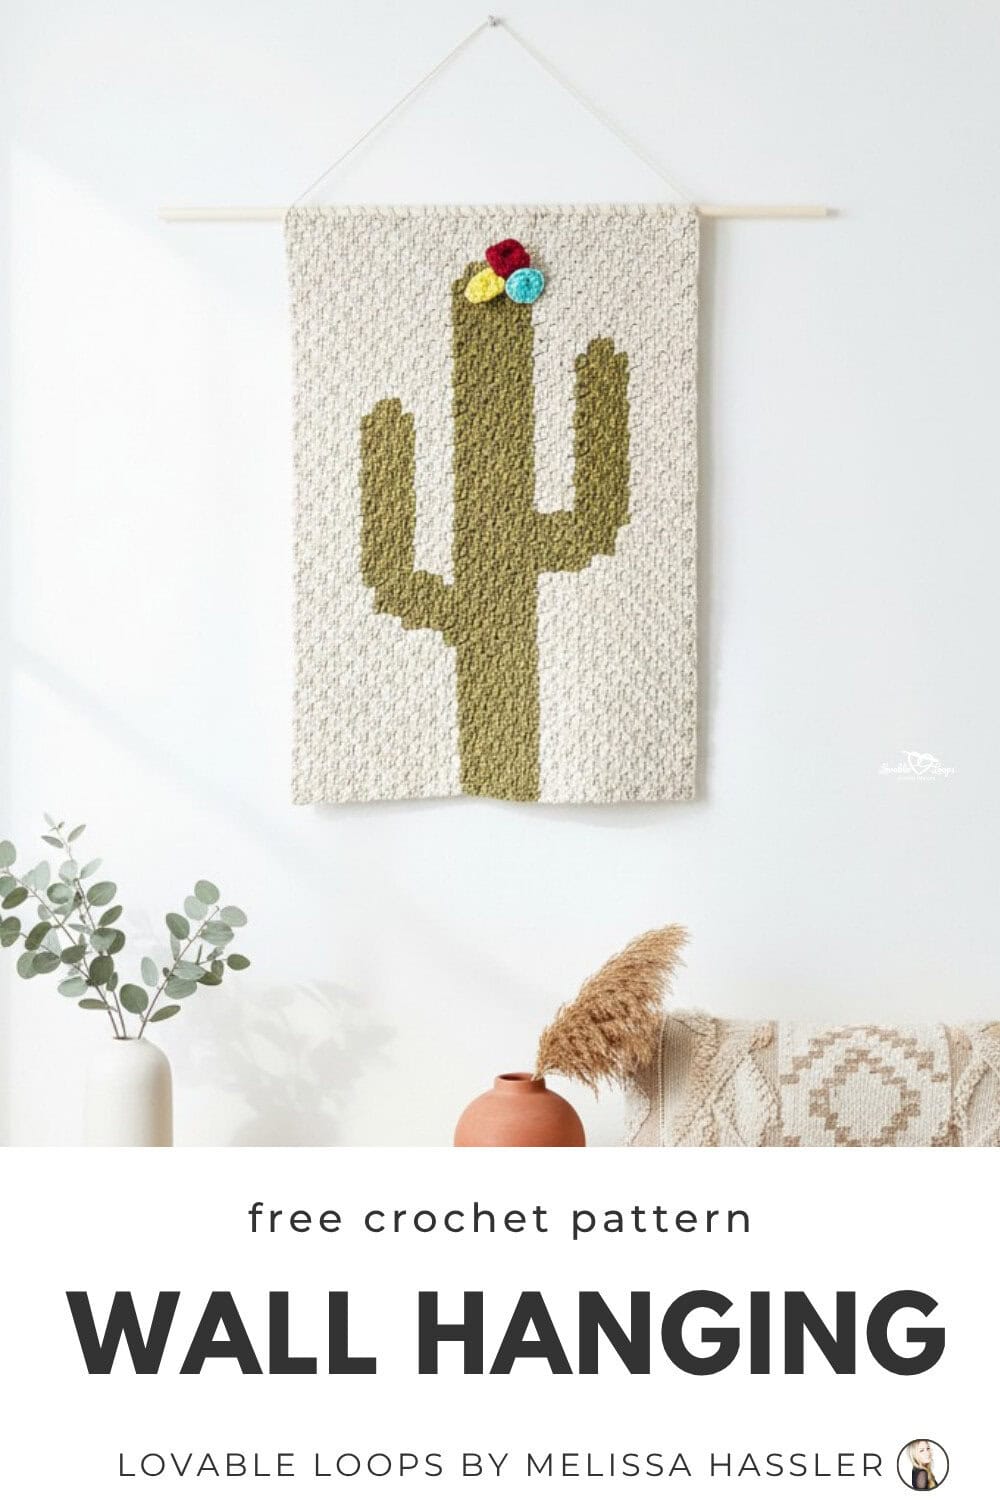
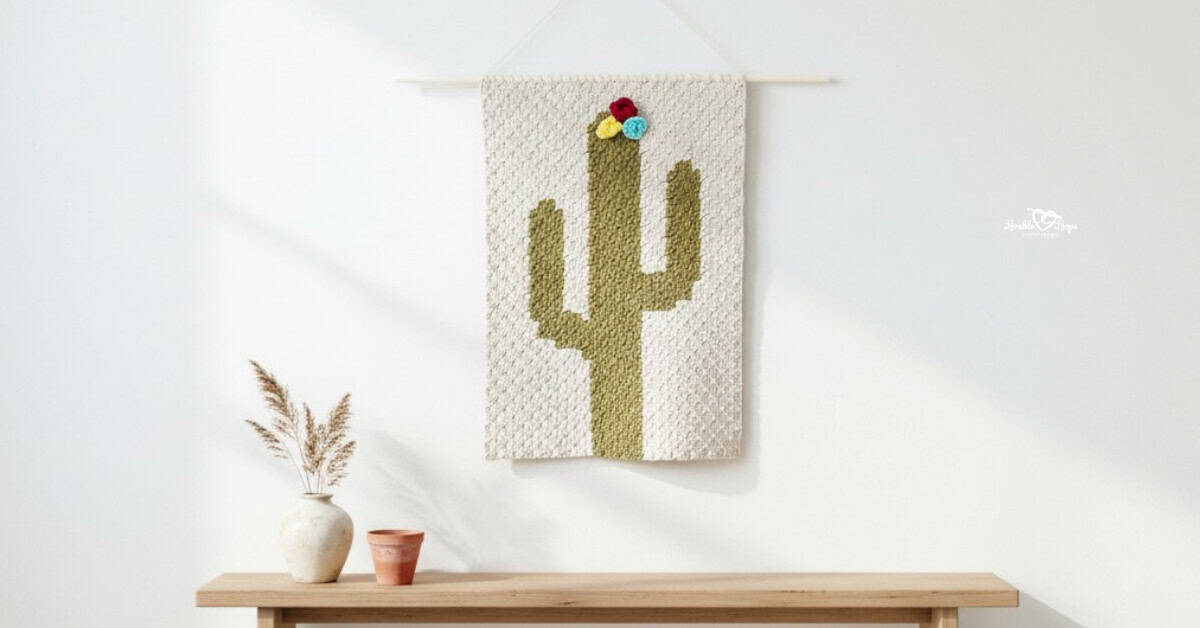
Looking for a fun crochet wall hanging with a bold cactus design? This cactus themed crochet wall hanging pattern is made using the corner-to-corner (C2C) method and adds a cheerful, southwestern-inspired touch to your home décor.
Quick answer
This cactus themed crochet wall hanging pattern is a C2C project designed for advanced beginners. It uses simple stitches and color changes to create a bold cactus design that can be attached to a stick or dowel for display.
Best for: Advanced beginners
Style: C2C crochet wall hanging with cactus design
Includes: Materials, sizing, written instructions, and FAQs
Pattern details
Here’s a quick overview of the materials, sizing, gauge, and pattern notes before you begin.
Skill level
Advanced beginners. This fun wall hanging pattern is made using the corner to corner (c2c) crochet method. It involves color changes.
Materials needed
- Crochet Hook Size: G-6 4 mm hook
- Yarn: Worsted weight yarn
✓ Wall hanging: I used Lion Brand Yarns Pima Cotton in vintage and 24/7 Cotton in bay leaf.
✓ Flowers: I used 24/7 Cotton in magenta and aqua, and Basic Stitch in lemonade. - Yarn needle: Use this to weave in your ends.
- Scissors: Use scissors to fasten off your yarn.
- Stitch marker(s): Use these to help keep track of your stitches.
- Stick or wooden dowel rod: This is for hanging your wall art. You can use a real stick or a dowel rod. You will want it to be a minimum of 17 inches wide.
Finished size
My wall hanging measures 15 inches wide x 20 inches tall (38 cm x 51 cm).
Gauge
7 squares (ch 3 + 3 dc) = 4 inches (10 cm)
For reference, my gauge tends to be on the tighter end. It’s okay if your gauge isn’t the exact same as mine. Just keep in mind that your finished size will be different if your gauge is different.
Crochet abbreviations
- dc = double crochet stitch
- ch/chs = chain/chains
- st/sts = stitch/stitches
- sl st = slip stitch
Corner to corner (c2c) technique
- The pattern is made using the c2c technique of making “squares” back and forth in diagonal rows starting in the bottom right corner and ending in the top left corner.
- Each square is made of a chain 3 + 3 double crochet.
- Chain 6 to start a new row and chain 3 to start a new square.
- You can follow the picture graph or the written pattern.
- The written pattern tells you how many squares to make of each color and in what order.
Pattern notes
- Make the pattern following the picture graph or the written instructions.
- The pattern is written in US crochet terms.
- The flowers are made separately.
Pattern instructions
Crochet the wall hanging following the picture graph or the written instructions.
Written Instructions
↙ Row 1: tan x 1 (1 square)
↗ Row 2: tan x 2 (2 squares)
↙ Row 3: tan x 3 (3 squares)
↗ Row 4: tan x 4 (4 squares)
↙ Row 5: tan x 5 (5 squares)
↗ Row 6: tan x 6 (6 squares)
↙ Row 7: tan x 7 (7 squares)
↗ Row 8: tan x 8 (8 squares)
↙ Row 9: tan x 9 (9 squares)
↗ Row 10: tan x 10 (10 squares)
↙ Row 11: tan x 11 (11 squares)
↗ Row 12: tan x 12 (12 squares)
↙ Row 13: tan x 12, green x 1 (13 squares)
↗ Row 14: green x 2, tan x 12 (14 squares)
↙ Row 15: tan x 12, green x 3 (15 squares)
↗ Row 16: green x 4, tan x 12 (16 squares)
↙ Row 17: tan x 12, green x 5 (17 squares)
↗ Row 18: green x 6, tan x 12 (18 squares)
↙ Row 19: tan x 12, green x 6, tan x 1 (19 squares)
↗ Row 20: tan x 2, green x 6, tan x 12 (20 squares)
↙ Row 21: tan x 12, green x 6, tan x 3 (21 squares)
↗ Row 22: tan x 4, green x 6, tan x 12 (22 squares)
↙ Row 23: tan x 12, green x 6, tan x 5 (23 squares)
↗ Row 24: tan x 6, green x 6, tan x 5, green x 1, tan x 6 (24 squares)
↙ Row 25: tan x 5, green x 4, tan x 3, green x 6, tan x 7 (25 squares)
↗ Row 26: tan x 8, green x 6, tan x 2, green x 5, tan x 5 (26 squares)
↙ Row 27: tan x 5, green x 6, tan x 1, green x 6, tan x 9 (27 squares)
↗ Row 28: tan x 10, green x 13, tan x 5 (28 squares)
↙ Row 29: tan x 5, green x 13, tan x 11 (29 squares)
↗ Row 30: tan x 11, green x 9, tan x 1, green x 4, tan x 5 (30 squares)
Corner: Start decreasing on RS
↙ Row 31: tan x 5, green x 4, tan x 2, green x 8, tan x 11 (30 squares)
↗ Row 32: tan x 10, green x 8, tan x 3, green x 4, tan x 5 (30 squares)
↙ Row 33: tan x 5, green x 4, tan x 3, green x 9, tan x 9 (30 squares)
↗ Row 34: tan x 8, green x 3, tan x 1, green x 6, tan x 3, green x 4, tan x 5 (30 squares)
↙ Row 35: tan x 5, green x 4, tan x 3, green x 6, tan x 1, green x 3, tan x 8 (30 squares)
↗ Row 36: tan x 7, green x 3, tan x 2, green x 6, tan x 3, green x 4, tan x 5 (30 squares)
↙ Row 37: tan x 6, green x 3, tan x 3, green x 6, tan x 3, green x 3, tan x 6 (30 squares)
↗ Row 38: tan x 6, green x 3, tan x 3, green x 6, tan x 3, green x 3, tan x 6 (30 squares)
↙ Row 39: tan x 7, green x 2, tan x 3, green x 6, tan x 3, green x 3, tan x 6 (30 squares)
↗ Row 40: tan x 5, green x 4, tan x 3, green x 6, tan x 12 (30 squares)
Corner: Start decreasing on RS
↙ Row 41: tan x 11, green x 6, tan x 3, green x 4, tan x 5 (29 squares)
↗ Row 42: tan x 5, green x 4, tan x 3, green x 6, tan x 10 (28 squares)
↙ Row 43: tan x 9, green x 6, tan x 3, green x 4, tan x 5 (27 squares)
↗ Row 44: tan x 5, green x 4, tan x 3, green x 6, tan x 8 (26 squares)
↙ Row 45: tan x 7, green x 6, tan x 3, green x 4, tan x 5 (25 squares)
↗ Row 46: tan x 5, green x 4, tan x 3, green x 6, tan x 6 (24 squares)
↙ Row 47: tan x 5, green x 6, tan x 3, green x 4, tan x 5 (23 squares)
↗ Row 48: tan x 5, green x 4, tan x 3, green x 6, tan x 4 (22 squares)
↙ Row 49: tan x 4, green x 5, tan x 4, green x 3, tan x 5 (21 squares)
↗ Row 50: tan x 5, green x 3, tan x 4, green x 5, tan x 3 (20 squares)
↙ Row 51: tan x 3, green x 4, tan x 5, green x 2, tan x 5 (19 squares)
↗ Row 52: tan x 12, green x 3, tan x 3 (18 squares)
↙ Row 53: tan x 3, green x 2, tan x 12 (17 squares)
↗ Row 54: tan x 16 (16 squares)
↙ Row 55: tan x 15 (15 squares)
↗ Row 56: tan x 14 (14 squares)
↙ Row 57: tan x 13 (13 squares)
↗ Row 58: tan x 12 (12 squares)
↙ Row 59: tan x 11 (11 squares)
↗ Row 60: tan x 10 (10 squares)
↙ Row 61: tan x 9 (9 squares)
↗ Row 62: tan x 8 (8 squares)
↙ Row 63: tan x 7 (7 squares)
↗ Row 64: tan x 6 (6 squares)
↙ Row 65: tan x 5 (5 squares)
↗ Row 66: tan x 4 (4 squares)
↙ Row 67: tan x 3 (3 squares)
↗ Row 68: tan x 2 (2 squares)
↙ Row 69: tan x 1 (1 square)
Adding the flowers
I made three flowers in different colors for my wall art. Make a starting chain of 29.
- Make 4 dc in the 3rd ch from the hook.
- Skip a ch, slip stitch in the next ch.
- Skip a ch, 4 dc in the next ch.
- Skip a ch, slip stitch in the next ch.
- Repeat steps 3 & 4 until you get to the last two ch spaces.
- Skip a stitch, slip stitch in the last ch. Fasten off, leaving a long yarn tail.
Curl your work starting from the center of the rose working outward.
Sew the scallops to each other with the yarn tail and a tapestry needle. Then, attach each flower to your wall art.
Attaching the stick/dowel rod
Use a tapestry needle to sew your wall art to the stick. You will sew around the stick/dowel rod and through the tops of the c2c squares.
Finishing
Fasten off and then weave in all of your ends.
PDF version
View this pattern in my Etsy Shop: Cactus Wall Hanging Pattern
More free crochet patterns?
If you liked this easy crochet wall art pattern, you may also like these other crochet projects: cactus trails blanket, basic beanie, neon hearts bag, unicorn blanket, cactus & longhorn wall hanging, and my woodland wall hanging.
Let’s connect!
I’d love to see what you’re making! Share your finished project and follow along for more free crochet patterns and tutorials.
📌 Don’t forget to pin this pattern for later!
Happy crocheting! 🧶
— Melissa