Chunky crochet beanie pattern
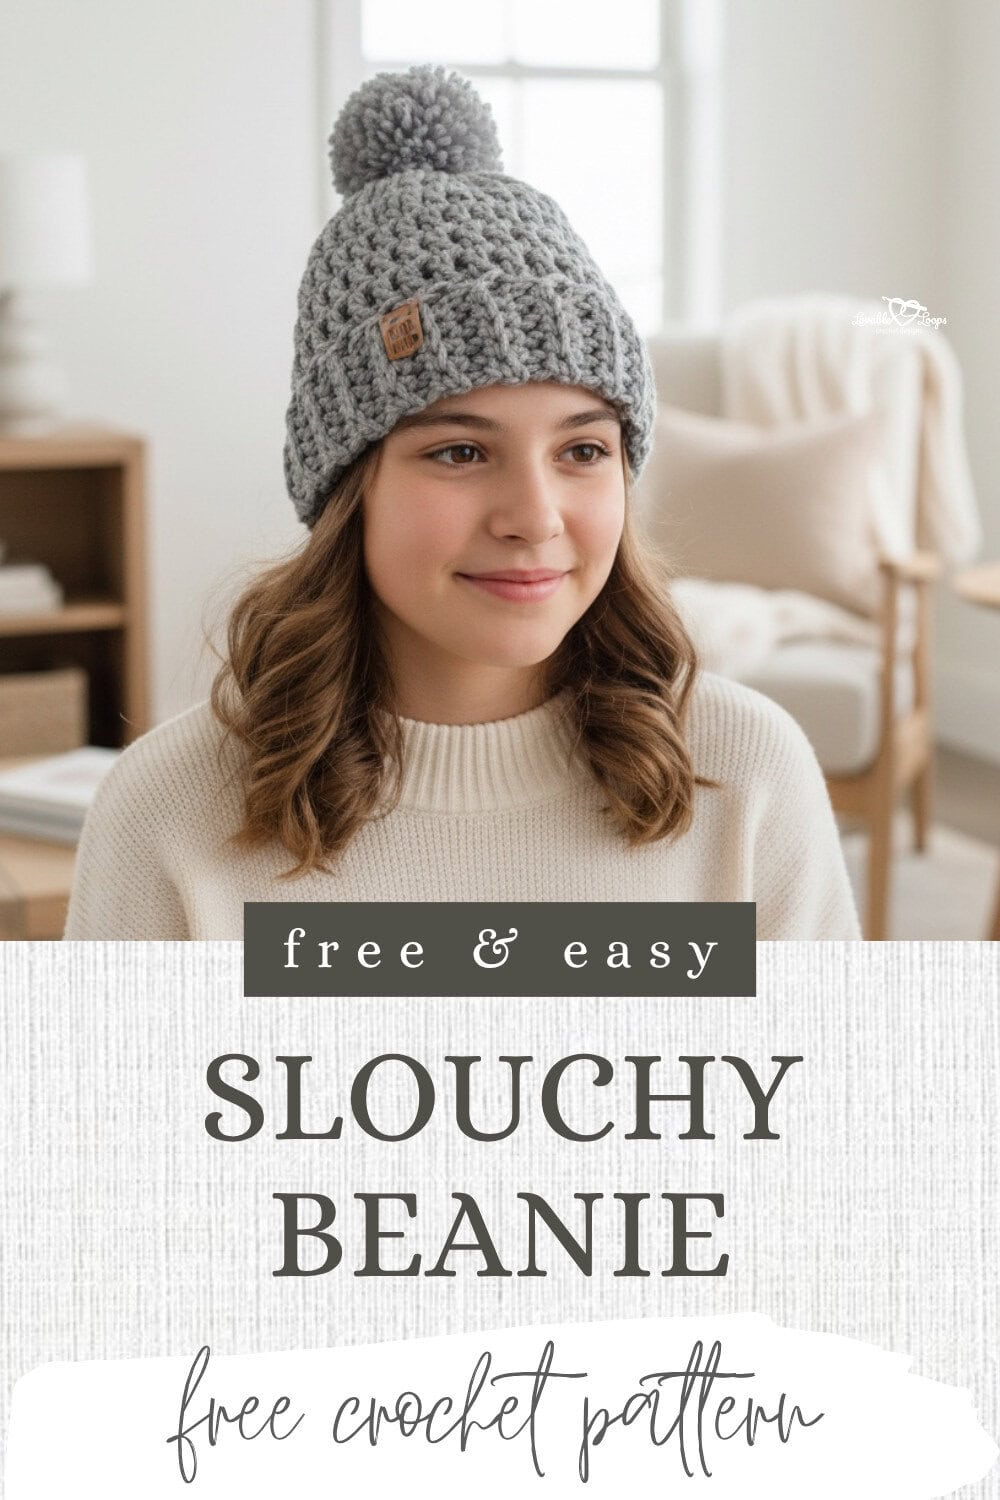
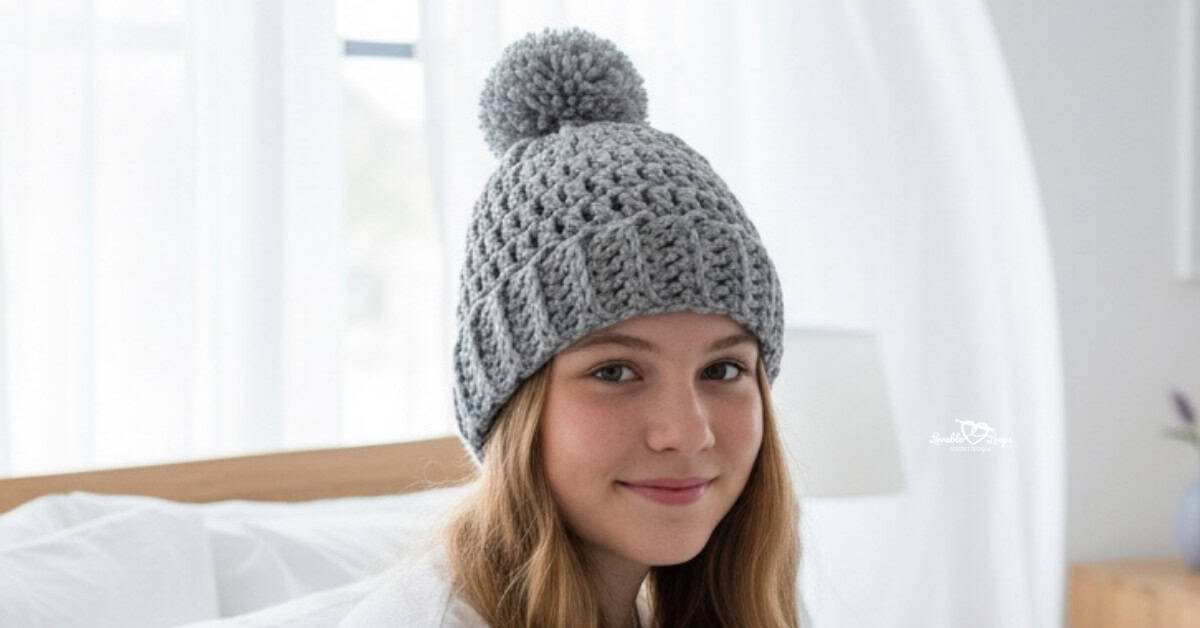
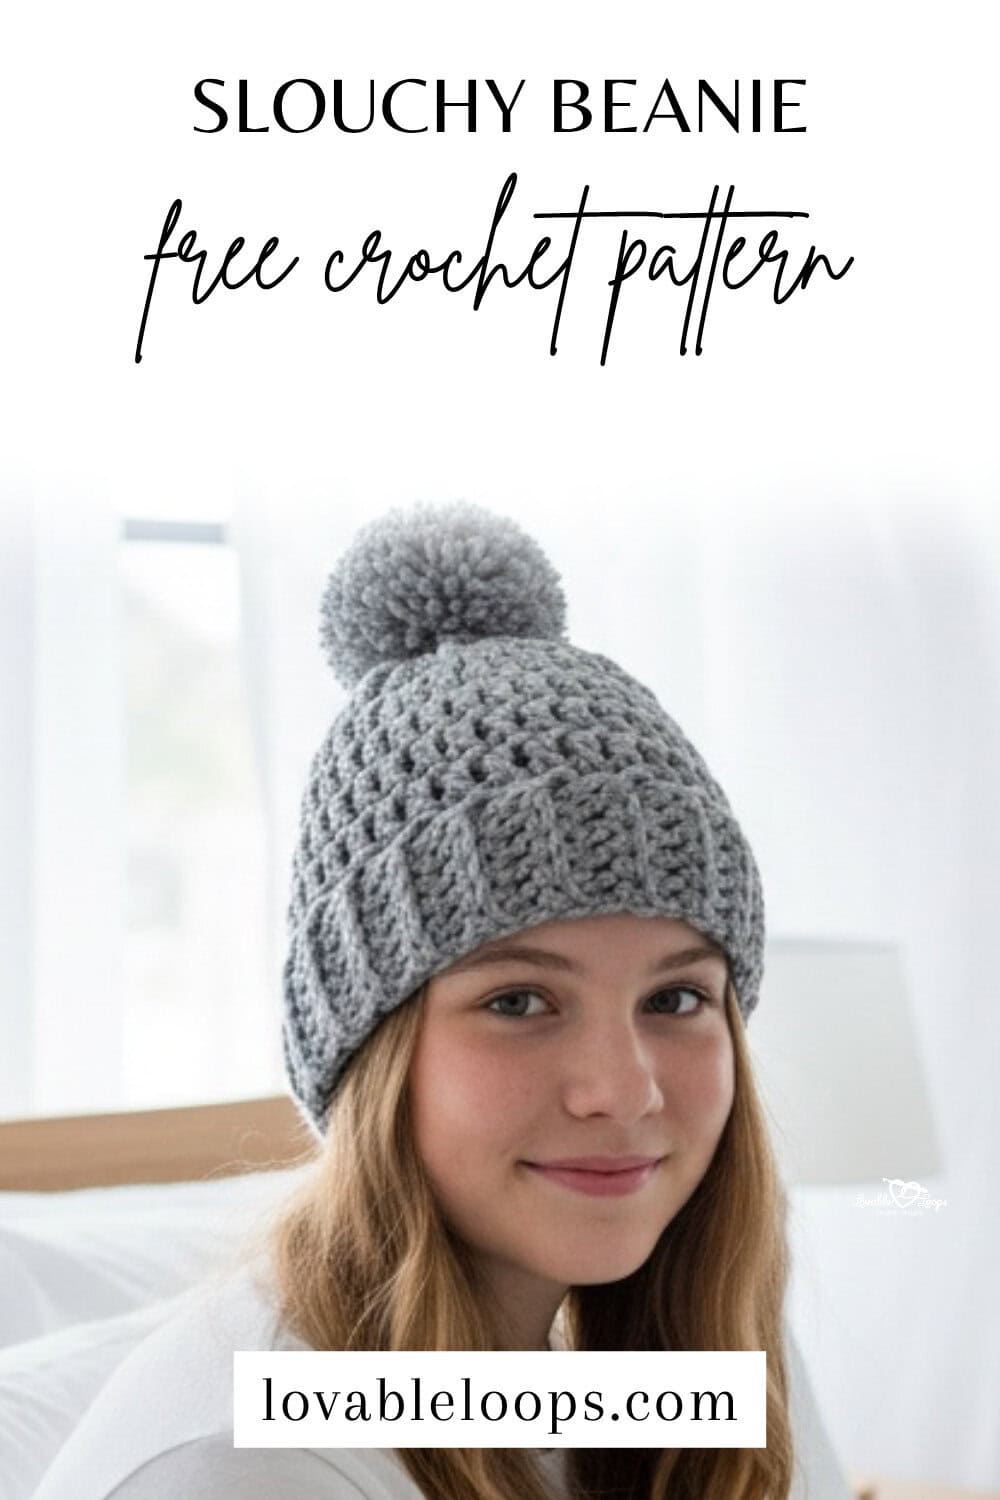
Need a fast and cozy winter hat you can make without a lot of fuss? This chunky crochet beanie pattern is a beginner-friendly project made with #6 super bulky yarn and a 12 mm hook, so it works up quickly and feels extra warm.
The hat is crocheted from the top down, then finished with a stretchy ribbed brim and a fun pom pom on top. It fits most teens and adults and makes a great everyday beanie for cold weather, gift-giving, or adding a quick handmade project to your winter crochet list.
Quick answer
This chunky crochet beanie pattern is a beginner-friendly top-down hat made with #6 super bulky yarn and a 12 mm hook. It fits most teens and adults, works up fast, and features a cozy ribbed brim with an optional pom pom.
Why you’ll love this pattern
You’ll love this pattern because it is quick, cozy, and easy to follow. The super bulky yarn helps the hat work up fast, while the top-down construction makes it simple to check the fit as you go. The ribbed brim adds stretch and texture, and the classic shape makes it a great hat for everyday winter wear.
Who this pattern is best for
This pattern is best for beginners who want an easy crochet hat that feels doable and looks polished. It is also a great choice for anyone who loves fast projects, warm winter accessories, and simple beanies that make thoughtful handmade gifts.
How the hat is constructed
This hat is worked top-down in the round, starting with a magic circle at the crown. After the increase rounds are complete, you’ll crochet even rounds for the body of the hat. The ribbed brim is added directly to the bottom edge, so you do not need to make a separate band first. Once the brim is finished, weave in the ends and add a pom pom if desired.
Chunky crochet beanie pattern details
Before you start, take a quick look at the pattern details below so you can check the size, yarn, hook, gauge, and construction at a glance..
Skill level
Beginner — This free crochet hat pattern uses basic stitches, simple repeats, and easy shaping. If you know how to make double crochet, single crochet, and back loop only stitches, you can make this hat.
Materials needed
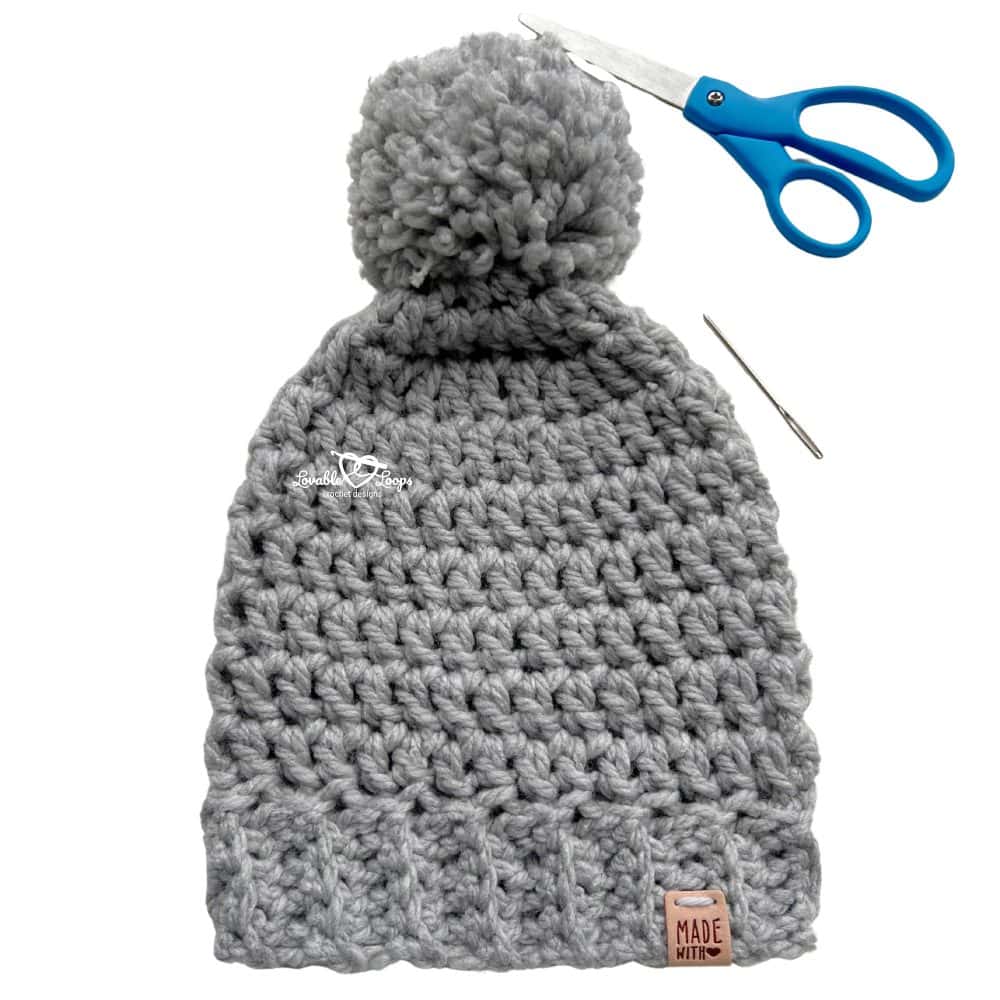
- 12 mm crochet hook — Used to crochet the hat.
- Super bulky yarn #6 — I used Bernat Softee Chunky yarn in Great Heather.
- Yarn needle — Use this to weave in your ends.
- Scissors — Use these to fasten off your yarn.
- Stitch markers — These help keep track of your stitches.
- Extra large pom pom maker — Use this to make a pom pom for your hat.
Finished size
Adult — One size fits most teens and adults with a head circumference of 20–23 inches (51–58 cm). The ribbed brim gives the hat a stretchy, comfortable fit.
How to adjust the fit of this crochet hat
To make the hat smaller, stop the crown increases earlier and begin the straight body rounds once the crown matches a smaller size. To make the hat larger, add another increase round before working even. You can also add or remove body rounds to make the hat shorter or taller before starting the brim.
If you need help choosing the right fit, visit my crochet hat sizing guide for head circumference tips and size charts.
Gauge
8 stitches and 5 rounds = 4 inches (10 cm)
Crochet abbreviations
- dc = double crochet stitch
- sc = single crochet stitch
- blo = back loop only
- ch/chs = chain/chains
- st/sts = stitch/stitches
- sl st = slip stitch
- rnd/rnds = round/rounds
- rem = remaining
Pattern notes
- This crochet beanie pattern starts with a magic circle.
- The chain at the beginning of each round does not count as your first stitch.
- Join each round with a slip stitch to the first stitch made in that round.
- Repeat instructions between the asterisks (*) for the rest of the round.
- You are crocheting in the round from the top of the hat down.
- The pattern is written in US crochet terms.
Chunky crochet beanie pattern instructions
Rnd 1: Magic circle, ch 2, 9 dc, join with sl st to the top of the first dc (9 stitches)
Rnd 2: Ch 2, 2 dc in each st, join (18 stitches)
Rnd 3: Ch 2, *2 dc, dc in next 2 sts*, join (24 stitches)
Rnd 4: Ch 2, *2 dc, dc in next 3 sts*, join (30 stitches)
Rnd 5: Ch 2, dc in each st, join (30 stitches)
Rnds 6-9: Repeat round 5
Do not fasten off.
Adding the ribbed brim
Begin where you left off for round 9.

1st Step: Ch 6, sc in 2nd ch from hook and in each rem ch, (5 stitches)
2nd Step: Slip Stitch in the next two stitches.
3rd Step: Turn your work clockwise
↑ 4th Step: Do not chain, sc blo in each st, (5 stitches)
↓ 5th Step: Ch 1, sc blo in each st, (5 stitches)
Repeat steps 2-5 all the way around.
Finally, use a yarn needle to sew the seam where the two ends of the brim meet.
Adding a Pom Pom
- Wind the yarn around both arches.
- Cut the yarn along the middle gap.
- Tie with a piece of scrap yarn.
- Open the arches and remove the pom pom.
- Trim any loose ends.
Attach the pom pom to the top of your hat.
Finishing
Weave in your ends.
Frequently asked questions
Is this a good crochet hat pattern for beginners?
Yes. The pattern uses basic stitches, simple repeats, and straightforward top-down construction, which makes it a great beginner-friendly project.
What yarn should I use for this hat?
This pattern uses #6 super bulky yarn. Bernat Softee Chunky is a good option if you want a similar look and feel.
What size does this beanie fit?
The hat fits most teens and adults with a head circumference of 20–23 inches (51–58 cm).
Can I make this hat without the pom pom?
Yes. The beanie looks great with or without a pom pom, so you can finish it either way.
How do I make the hat taller or shorter?
Add more body rounds for a taller hat, or work fewer body rounds for a shorter hat before starting the ribbed brim.
Do I have to start with a magic circle?
The written pattern starts with a magic circle, but you can use another closed-center start if that is easier for you.
More free crochet hat patterns
Looking for more crochet hat ideas? Browse my full collection of free crochet hat patterns for babies, kids, and adults. You’ll find everything from classic crochet beanies and cozy winter hats to playful animal hats and seasonal designs — all written with clear instructions and helpful sizing details.


Let’s connect!
I’d love to see what you’re making! Share your finished project and follow along for more free crochet patterns and tutorials.
📌 Don’t forget to pin this pattern for later!
Happy crocheting! 🧶
— Melissa