Crochet bunny hat pattern with floppy ears
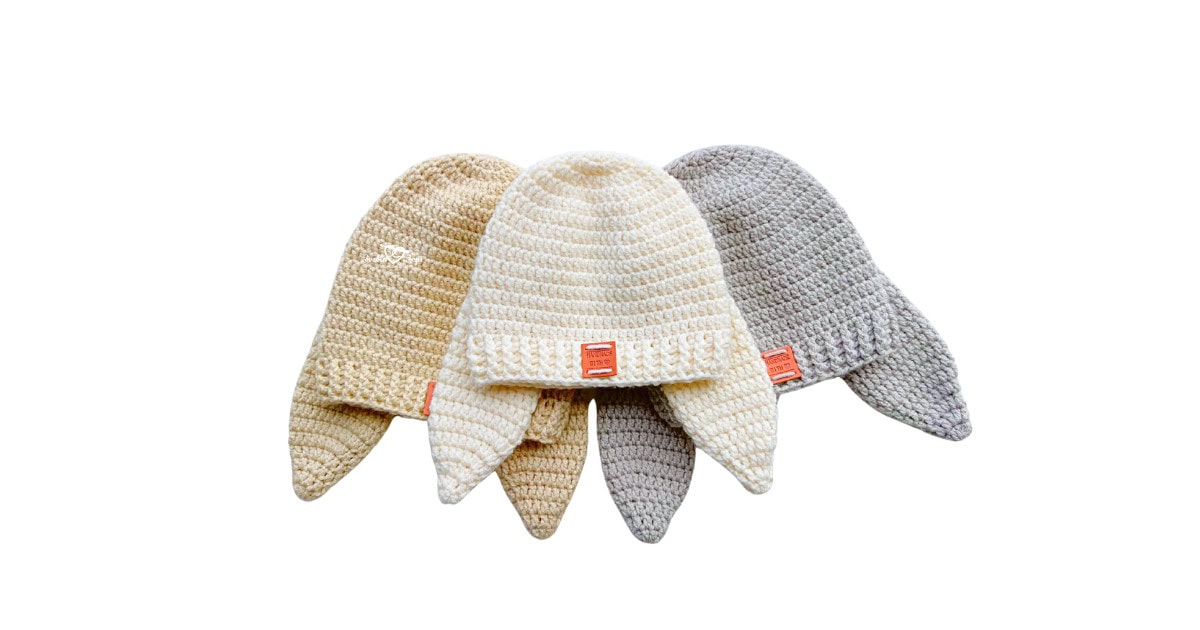
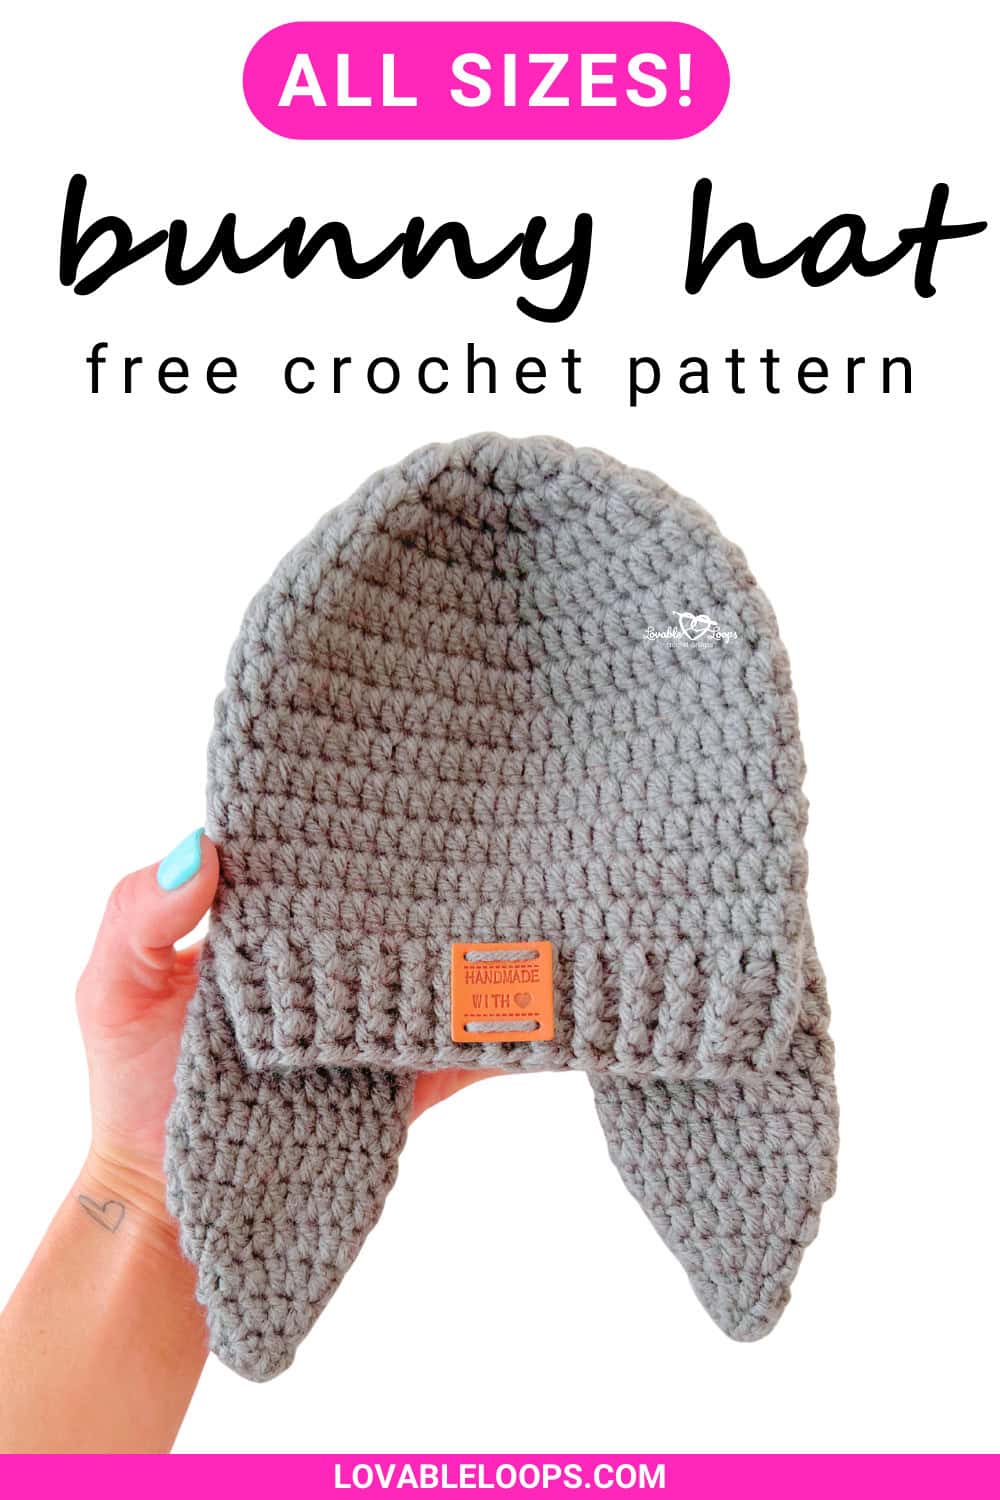
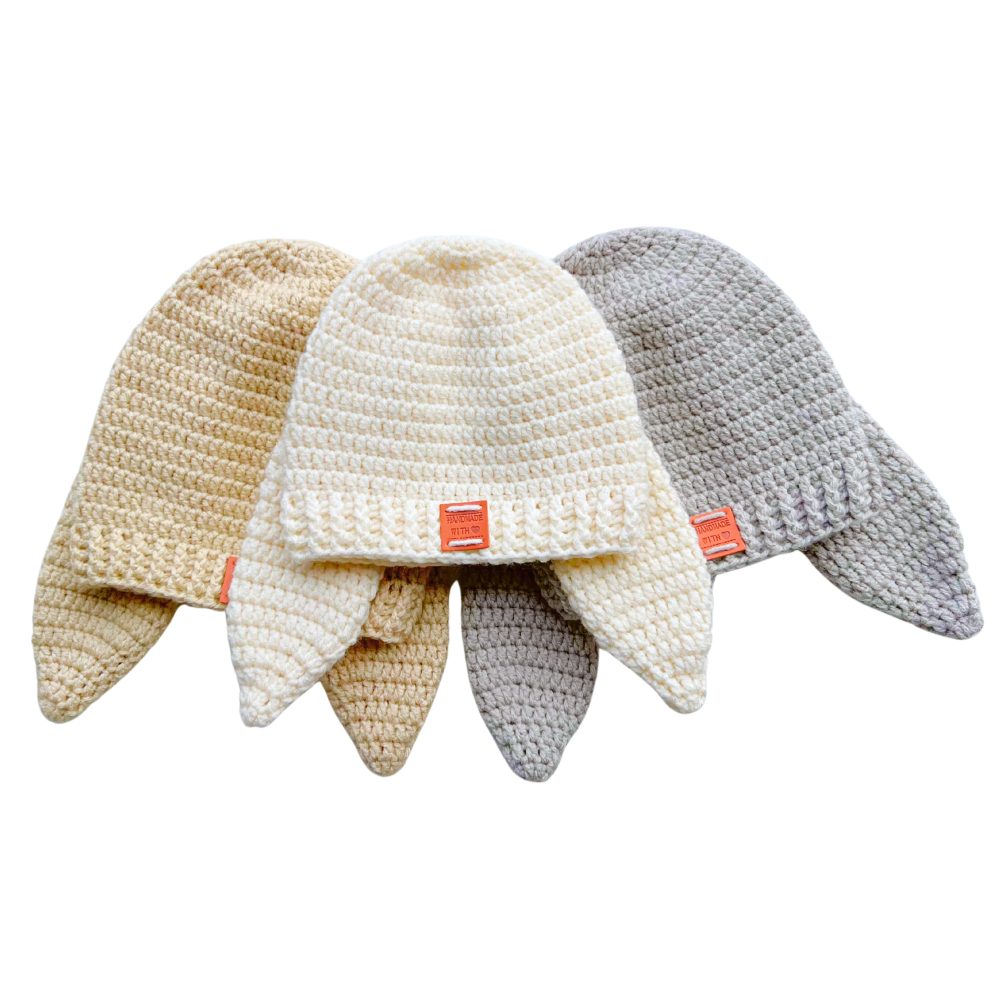
Looking for an adorable crochet bunny hat pattern that’s easy to make and fun to wear? This free crochet bunny hat pattern is beginner friendly and designed with long, floppy ears for a cute, playful look. It’s perfect for spring photos, Easter outfits, dress-up play, or everyday wear.
This pattern includes four sizes—baby, toddler, child, and adult—so you can make matching bunny hats for the whole family. The hat is worked from the top down using simple stitches, with the ears added separately for a soft, floppy finish. Keep reading for the full free crochet pattern, plus tips to help you get the best fit.
Looking for more cute designs? Explore my full collection of crochet animal hat patterns.
Quick answer
This free crochet bunny hat pattern is worked from the top down in the round using basic stitches and features long, floppy ears added separately. It’s beginner-friendly, includes baby, toddler, child, and adult sizes, and is perfect for Easter outfits, spring photos, dress-up play, or a fun handmade gift.
Why you’ll love this crochet bunny hat pattern
- Beginner-friendly: Uses only basic crochet stitches with clear instructions.
- Free pattern: The full crochet bunny hat pattern is available right here on the blog.
- Multiple sizes included: Instructions are written for baby, toddler, child, and adult sizes.
- Floppy bunny ears: Long, soft ears give this hat its classic bunny look.
- Great for gifts: A fun handmade option for Easter baskets, photo props, or dress-up play.
- Customizable: Easily change colors, ear length, or yarn type to match your style.
- More cute hats to make: This bunny hat pairs perfectly with my free crochet baby hat patterns (add your internal link on that phrase).
Crochet bunny hat pattern details
This section includes all the important details for this crochet bunny hat pattern, such as skill level, materials, sizing, gauge, and notes to help you get the best results before you start crocheting.
Skill level
Beginner — This bunny ear hat crochet pattern uses only basic crochet stitches.
Materials needed
- Crochet hook size H-8 (5 mm) — or the size needed to match the gauge.
- Worsted weight yarn (#4) — choose a gentle, non-itchy yarn for a cozy hat.
- Yarn needle — for weaving in ends neatly.
- Scissors — to cut your yarn.
- Stitch markers (optional) — helpful for keeping track of rounds and stitch counts.
Ad-free printable PDF
Prefer a print-friendly version? Grab the ad-free, printable PDF of this crochet bunny hat pattern and enjoy easy, distraction-free crocheting.
Finished size
This crochet hat pattern includes four sizes.
- Baby — 16–17 inches (41–43 cm) head circumference, 6.25 inches (16 cm) tall
- Toddler — 18–19 inches (46–48 cm) head circumference, 6.75 inches (17 cm) tall
- Child — 19–20 inches (48–51 cm) head circumference, 7 inches (18 cm) tall
- Adult — 20–23 inches (51–58 cm) head circumference, 7.75 inches (20 cm) tall
Need help with crochet hat sizing?
Getting the right fit is one of the most important parts of making a crochet hat.
If you’re unsure about head circumference, negative ease, crown diameter, or hat height, I’ve created a complete Crochet Hat Sizing Guide that walks you through everything step by step.
You’ll learn:
• How to measure head circumference correctly
• How much negative ease to use
• How to calculate crown diameter
• Standard baby, child, and adult size charts
• How to adjust any crochet hat pattern for a better fit
Gauge
16 stitches and 10 rows = 4 inches (10 cm)
✅ Too many stitches in 4 inches? Try a larger hook.
✅ Too few stitches in 4 inches? Try a smaller hook.
Crochet abbreviations
- dc = double crochet stitch
- FPdc = front post double crochet
- BPdc = back post double crochet
- sc = single crochet stitch
- ch/chs = chain/chains
- st/sts = stitch/stitches
- rnd/rnds = round/rounds
Pattern notes
- The starting chain does not count as a stitch
- Join each round with a slip stitch to the first stitch
- The hat is crocheted from the top down in the round
- Repeat instructions between the asterisks (*) for the rest of the round
- The pattern is written in US crochet terms
How to crochet post stitches
Post stitches are made by working around the post (vertical part) of the stitch instead of into the top loops.
- Front Post Double Crochet (FPdc): Make a double crochet by inserting your hook from front to back around the post of the stitch.
- Back Post Double Crochet (BPdc): Make a double crochet by inserting your hook from back to front around the post of the stitch.
Free crochet bunny hat pattern instructions (all sizes)
Follow the step-by-step instructions below to make this crochet bunny hat pattern in baby, toddler, child, or adult sizes.
Baby size hat
Rnd 1: Magic circle, ch 2, 11 dc, join (11 stitches)
Rnd 2: Ch 2, 2 dc in each st, join (22 stitches)
Rnd 3: Ch 2, *2 dc, dc in next st*, join (33 stitches)
Rnd 4: Ch 2, *2 dc, dc in next 2 sts*, join (44 stitches)
Rnd 5: Ch 2, *2 dc, dc in next 10 sts*, join (48 stitches)
Rnd 6: Ch 2, *2 dc, dc in next 11 sts*, join (52 stitches)
Rnds 7-13: Ch 2, dc in each st, join (52 stitches)
Rnd 14: Ch 2, *FPdc, BPdc*, join (52 stitches)
Rnd 15: Ch 2, *FPdc, BPdc*, join (52 stitches)
Rnd 16: Ch 2, *FPdc, BPdc*, join and fasten off (52 stitches)
Toddler size hat
Rnd 1: Magic circle, ch 2, 11 dc, join (11 stitches)
Rnd 2: Ch 2, 2 dc in each st, join (22 stitches)
Rnd 3: Ch 2, *2 dc, dc in next st*, join (33 stitches)
Rnd 4: Ch 2, *2 dc, dc in next 2 sts*, join (44 stitches)
Rnd 5: Ch 2, *2 dc, dc in next 10 sts*, join (48 stitches)
Rnd 6: Ch 2, *2 dc, dc in next 11 sts*, join (52 stitches)
Rnd 7: Ch 2, *2 dc, dc in next 12 sts*, join (56 stitches)
Rnd 8: Ch 2, *2 dc, dc in next 13 sts*, join (60 stitches)
Rnds 9-16: Ch 2, dc in each st, join (60 stitches)
Rnd 17: Ch 2, *FPdc, BPdc*, join (60 stitches)
Rnd 18: Ch 2, *FPdc, BPdc*, join (60 stitches)
Rnd 19: Ch 2, *FPdc, BPdc*, join and fasten off (60 stitches)
Child size hat
Rnd 1: Magic circle, ch 2, 11 dc, join (11 stitches)
Rnd 2: Ch 2, 2 dc in each st, join (22 stitches)
Rnd 3: Ch 2, *2 dc, dc in next st*, join (33 stitches)
Rnd 4: Ch 2, *2 dc, dc in next 2 sts*, join (44 stitches)
Rnd 5: Ch 2, *2 dc, dc in next 10 sts*, join (48 stitches)
Rnd 6: Ch 2, *2 dc, dc in next 11 sts*, join (52 stitches)
Rnd 7: Ch 2, *2 dc, dc in next 12 sts*, join (56 stitches)
Rnd 8: Ch 2, *2 dc, dc in next 13 sts*, join (60 stitches)
Rnd 9: Ch 2, *2 dc, dc in next 14 sts*, join (64 stitches)
Rnds 10-17: Ch 2, dc in each st, join (64 stitches)
Rnd 18: Ch 2, *FPdc, BPdc*, join (64 stitches)
Rnd 19: Ch 2, *FPdc, BPdc*, join (64 stitches)
Rnd 20: Ch 2, *FPdc, BPdc*, join and fasten off (64 stitches)
Adult size hat
Rnd 1: Magic circle, ch 2, 11 dc, join (11 stitches)
Rnd 2: Ch 2, 2 dc in each st, join (22 stitches)
Rnd 3: Ch 2, *2 dc, dc in next st*, join (33 stitches)
Rnd 4: Ch 2, *2 dc, dc in next 2 sts*, join (44 stitches)
Rnd 5: Ch 2, *2 dc, dc in next 10 sts*, join (48 stitches)
Rnd 6: Ch 2, *2 dc, dc in next 11 sts*, join (52 stitches)
Rnd 7: Ch 2, *2 dc, dc in next 12 sts*, join (56 stitches)
Rnd 8: Ch 2, *2 dc, dc in next 13 sts*, join (60 stitches)
Rnd 9: Ch 2, *2 dc, dc in next 14 sts*, join (64 stitches)
Rnd 10: Ch 2, *2 dc, dc in next 15 sts*, join (68 stitches)
Rnds 11-19: Ch 2, dc in each st, join (68 stitches)
Rnd 20: Ch 2, *FPdc, BPdc*, join (68 stitches)
Rnd 21: Ch 2, *FPdc, BPdc*, join (68 stitches)
Rnd 22: Ch 2, *FPdc, BPdc*, join and fasten off (68 stitches)
Adding the bunny ears
Rounds 1-5 are the same for all sizes.
Rnd 1: Magic circle, ch 2, 6 dc, join (6 stitches)
Rnd 2: Ch 2, *2 dc, dc in next 2 sts*, join (8 stitches)
Rnd 3: Ch 2, *2 dc, 2 dc, dc in next st 2 sts*, join (12 stitches)
Rnd 4: Ch 2, *2 dc, 2 dc, dc in next st 4 sts*, join (16 stitches)
Rnd 5: Ch 2, *2 dc, 2 dc, dc in next st 6 sts*, join (20 stitches)
Baby size continued:
Rnds 6-10: Ch 2, dc in each st, join (20 stitches)
Rnd 11: Ch 2, *dc2tog, dc in next st 8 sts*, join (18 stitches)
Rnd 12: Ch 2, *dc2tog, dc in next st 7 sts*, join (16 stitches)
Rnds 13-20: Ch 2, dc in each st, join (16 stitches)
Toddler size continued:
Rnd 6: Ch 2, *2 dc, 2 dc, dc in next st 8 sts*, join (24 stitches)
Rnds 7-13: Ch 2, dc in each st, join (24 stitches)
Rnd 14: Ch 2, *dc2tog, dc in next st 10 sts*, join (22 stitches)
Rnd 15: Ch 2, *dc2tog, dc in next st 9 sts*, join (20 stitches)
Rnd 16: Ch 2, *dc2tog, dc in next st 8 sts*, join (18 stitches)
Rnds 17-23: Ch 2, dc in each st, join (18 stitches)
Child size continued:
Rnd 6: Ch 2, *2 dc in next st, 2 dc in next st, dc in next 4 sts repeat 3 times*, dc in next 2 sts, join (26 sts)
Rnds 7-13: Ch 2, dc in each st, join (26 stitches)
Rnd 14: Ch 2, *dc2tog, dc in next st 11 sts*, join (24 stitches)
Rnd 15: Ch 2, *dc2tog, dc in next st 10 sts*, join (22 stitches)
Rnd 16: Ch 2, *dc2tog, dc in next st 9 sts*, join (20 stitches)
Rnds 17-24: Ch 2, dc in each st, join (20 stitches)
Adult size continued:
Rnd 6: Ch 2, *2 dc in next st, 2 dc in next st, dc in next 4 sts* repeat 3 times, dc in next 2 sts, join (26 sts)
Rnds 7-14: Ch 2, dc in each st, join (26 stitches)
Rnd 15: Ch 2, *dc2tog, dc in next st 11 sts*, join (24 stitches)
Rnd 16: Ch 2, *dc2tog, dc in next st 10 sts*, join (22 stitches)
Rnd 17: Ch 2, *dc2tog, dc in next st 9 sts*, join (20 stitches)
Rnds 18-25: Ch 2, dc in each st, join (20 stitches)
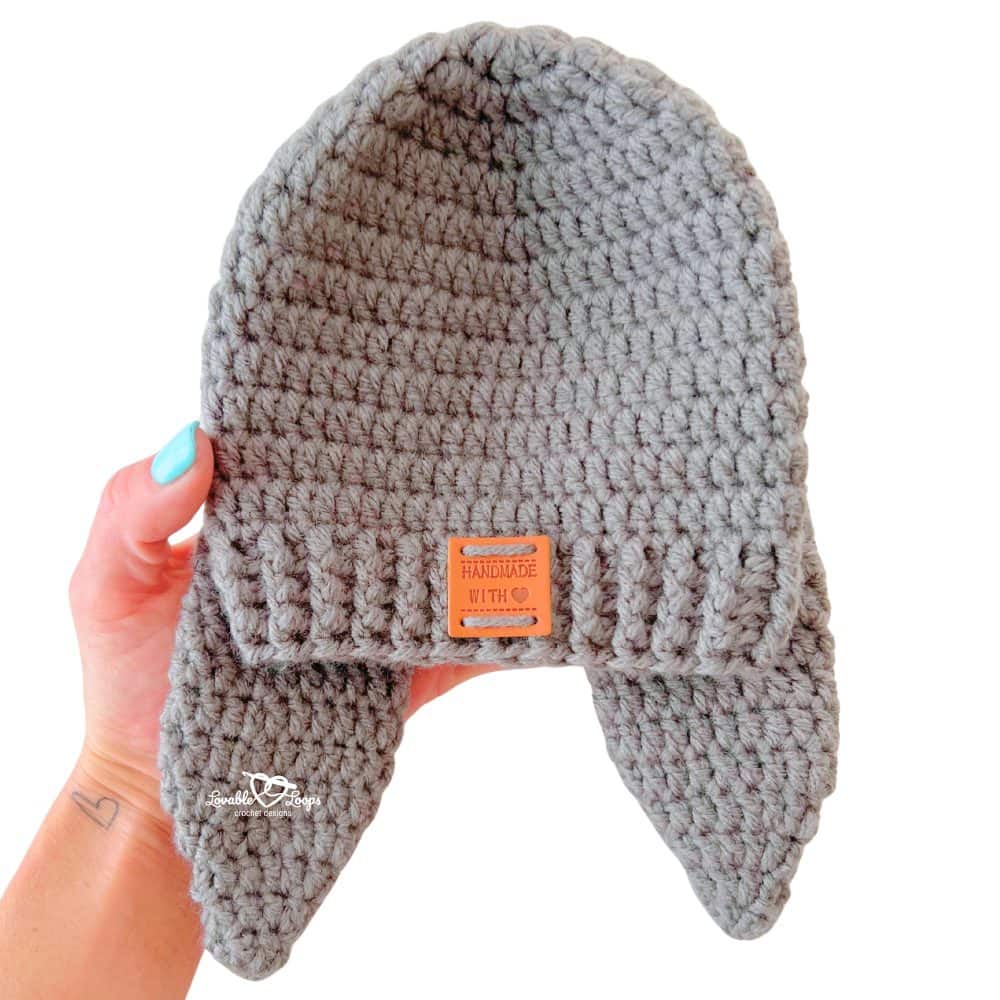
Finishing the hat
Place the ears on the top back area of the hat and sew them on securely with a yarn needle. Weave in all yarn tails, then trim any excess. Your crochet bunny hat with floppy ears is now ready to wear!
Frequently asked questions about the crochet bunny hat pattern
Is this crochet bunny hat pattern beginner friendly?
Yes! This is a beginner-friendly crochet pattern that uses basic stitches. The hat is crocheted from the top down in the round, and the bunny ears are made separately and sewn on.
What sizes does this bunny hat crochet pattern include?
This crochet bunny hat pattern includes four sizes: baby, toddler, child, and adult. Check the size chart to choose the best fit based on head circumference.
How long does it take to crochet a bunny hat?
Most crocheters can finish the hat in a few hours, depending on the size. The ears add a little extra time, but they’re simple and repetitive.
What yarn is best for a crochet bunny hat with floppy ears?
Worsted weight (#4) yarn works great for this bunny ear hat crochet pattern. For babies and kids, pick a soft, non-itchy yarn so the hat is comfy.
Do I have to use an H (5 mm) crochet hook?
Not necessarily. Use an H-8 (5 mm) hook or the hook size needed to match gauge. If your hat is coming out too small or too big, going up or down a hook size can help.
Are the bunny ears crocheted onto the hat or made separately?
The bunny ears are crocheted separately and then sewn onto the top/back area of the hat. This makes it easier to place them evenly and helps keep the ears floppy.
How do I keep the bunny ears from standing up?
To keep the ears floppy, avoid stiff yarn, don’t crochet too tightly, and don’t add stuffing. If your ears feel stiff, try a larger hook for the ears or a softer yarn.
Can I sell finished hats made from this pattern?
Yes, you can sell finished hats made from this free crochet bunny hat pattern on a small scale. Please don’t copy, resell, or redistribute the pattern instructions.
Free crochet hat patterns
Love making cozy hats? Explore even more free crochet hat and beanie patterns that are perfect for every season and style. From classic beanies and warm winter hats to playful designs for kids and trendy accessories for adults, you’ll find inspiration for your next project here.


Let’s connect!
I’d love to see what you’re making! Share your finished project and follow along for more free crochet patterns and tutorials.
📌 Don’t forget to pin this pattern for later!
Happy crocheting! 🧶
— Melissa