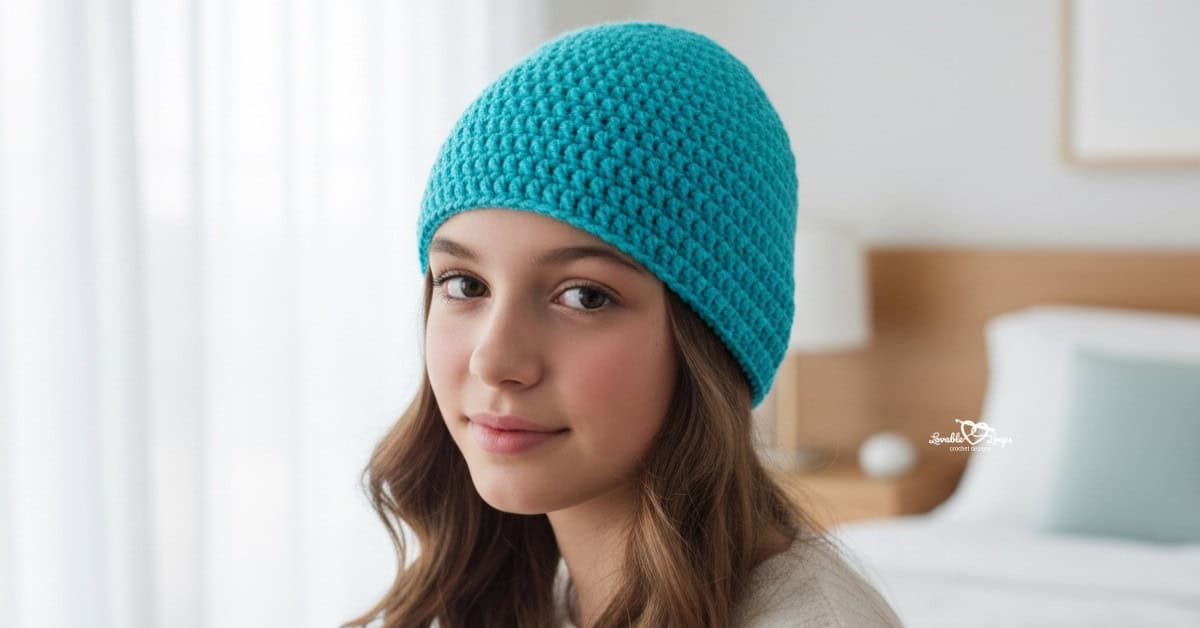
How to Crochet a Beanie for Adults

Are you a beginner crocheter looking for an easy crochet hat pattern with step-by-step instructions (and pictures)? If so, you have come to the right place! So, let me show you step-by-step exactly how to crochet a beanie for adults.
This post contains affiliate links. See my Privacy Policy for more information.
Undoubtedly, crochet hats are one of my favorite things to design? In fact, the very first free crochet pattern that I designed and shared here on my blog was a Dinosaur Hat.
Since then, I have designed many different beanie hats. From very simple hats to cute, animal hats to colorful, holiday hats, I have many different patterns to choose from. In fact, the majority of them are written for different sizes (the whole family!) and use basic stitches like single crochet, half double crochet, or double crochet stitches. So be sure to check out my free crochet hat patterns (and bookmark them!) before you go.
Pin this adult sizes Simple Beanie pattern to save for later!

Double Crochet Stitch Tutorial
How to Measure Your Head
One of the most important things when it comes to making crocheted beanies is to get the sizing right. You might have a really pretty and easy hat pattern, but if it doesn’t fit properly, it won’t be comfortable or keep you warm in the cold weather.
Alright, let’s get started and learn how to crochet a beanie for adults! First, we are going to need two pieces of information: head circumference and head height (in inches).
Head Circumference
To begin, grab a sewing measuring tape and measure around your head. To be sure that you have a proper fit, the measuring tape should be placed above your ears and across your forehead just above your eyebrows. Remember to keep the tape snug enough to fit one finger under it.

Head Height
Next, measure your head/hat height by placing the beginning of the measuring tape at the very top of your head and measure down to just above your eyebrows.

Pro Tip: If you are in-between sizes, always size up.
Crochet Gauge
If you’re going to learn how to crochet a beanie for adults, you’re going to want your hat to fit properly? It is important that you always check your gauge and adjust your hook size accordingly.
How to Make a Gauge Swatch
Step 1. Chain 30. Double crochet in the 3rd chain from your hook and in each remaining chain. Turn your work.
Step 2. Chain 2. Double crochet once in each stitch.
Repeat step 2, working back and forth in rows, until your swatch is large enough to accurately measure the number of rows in 4 inches.
My Gauge
14 double crochet stitches= 4 inches
9 rounds= 4 inches


Do you have the same gauge as me? YAY! You can breathe a sigh of relief.
More than 14 stitches/9 rounds in 4 inches means your gauge is tighter than mine. No worries. Try going up a hook size.
Less than 14 stitches/9 rounds in 4 inches means your gauge is looser than mine. No worries. Try going down a hook size.
Beanie Sizes
Small/Medium
Circumference: fits up to 22 inches
Height: 8.25 inches. You can make your hat longer or shorter by adding another row or eliminating the last row.
Medium/Large
Circumference: fits up to 23.5 inches
Height: 8.5 inches. You can make your hat longer or shorter by adding another row or eliminating the last row.
Project Materials
- Hook size: I 5.5 mm hook OR hook needed to obtain gauge (see “gauge” section for more information)
- Yarn weight: medium worsted #4 in a color of your choice. One of my favorite yarns is Red Heart.
- Yarn needle (also known as a tapestry needle) for weaving in your ends
- Locking stitch markers (these are optional but I highly recommended that you use them)
- Sewing measuring tape for measuring your head.
Skill Level
Beginner. Basic stitches in basic form, simple repeats in rows or rounds.
Important Notes
- This pattern starts with a magic ring (also known as a magic circle). If you don’t know how to make a magic ring, check out my magic ring tutorial.
- The beginning of each round starts with chain 2 (ch 2). This ch 2 does NOT count as your first stitch.
- At the end of each round, you’ll join your yarn with a slip stitch (sl st) to the first dc (double crochet) stitch made in that round.
- This pattern is worked in the round from the top of the hat down to the brim.
- The outside of the hat is the right side and the inside of the hat is the wrong side.
- Leave a long yarn tail for weaving in when you make your magic ring.
- Head to my HOW TO section where I answer more of your questions
Crochet Abbreviations
- dc= double crochet
- st= stitch
- sts= stitches
- ch= chain
- chs= chains
- sl st= slip stitch
- rnd= round
- rnd(s)= rounds
- rem= remaining
Double Crochet Stitch Tutorial

- Chain 2
- Yarn over
- *Insert hook in next st & draw up a loop (there are now 3 loops on your hook)
- Yarn over & draw through two of the loops on your hook (there are now two loops on your hook)
- Yarn over again and draw through the two remaining loops on your hook (1 loop left on hook)
- Repeat for the next stitch.
*To start your hat, your first double crochet stitch will be made into the magic ring, not an existing stitch. Insert your hook into the center of the ring and draw up a loop through the center (and around the ring), towards you.

How to Crochet a Beanie for Adults
Rounds 1-8 are the same for both sizes.
Round 1
Step 1 of round 1: Make a magic ring

Step 2 of round 1: Chain 2

Step 3 of round 1: Make 11 double crochet. You are working into and around the magic ring. Use a locking stitch marker to mark the first stitch that you make.


Step 4 of round 1: Gently pull on the yarn tail to close the ring.


Step 5 of round 1: Join in the round with slip stitch in the top of the first double crochet.
To make a slip stitch, insert your hook into the first double crochet. Pull your working yarn through that stitch and through the most recent stitch that you made.


Steps 1-5 were also round 1. Count your stitches. You should have 11.
Round 2
Chain 2. Make 2 double crochet in the first stitch (the same stitch you joined to) and in each remaining stitch all the way around.
Join with a slip stitch. You should have 22 stitches.
Note: I recommend you always mark the first stitch of each round with a locking stitch marker. In these photos, my first stitch is marked with a green stitch marker.


Round 3
Chain 2. Make 2 double crochet in the first stitch, followed by 1 double crochet in the next stitch. You are going to repeat this pattern all the way around: 2 dc, 1 dc.
Join in the round. You should have 33 stitches.


Round 4
Chain 2. Make 2 double crochet in the first stitch, followed by 1 double crochet in the next two stitches. You are going to repeat this pattern all the way around: 2 dc, 1 dc, 1 dc.
Join in the round. You should have 44 stitches.


Pro Tip: Use locking stitch markers to keep track of increases.
Round 5
Chain 2. Make 2 double crochet in the first stitch, followed by 1 double crochet in the next ten stitches. You are going to repeat this pattern all the way around.
Join in the round. You should have 48 stitches.


Round 6
Chain 2. Make 2 double crochet in the first stitch, followed by 1 double crochet in the next eleven stitches. You are going to repeat this pattern all the way around.
Join in the round. You should have 52 stitches.


Round 7
Chain 2. Make 2 double crochet in the first stitch, followed by 1 double crochet in the next twelve stitches. You are going to repeat this pattern all the way around.
Join in the round. You should have 56 stitches.


Round 8
Chain 2. Make 2 double crochet in the first stitch, followed by 1 double crochet in the next thirteen stitches. You are going to repeat this pattern all the way around.
Join in the round. You should have 60 stitches.


Stop here for the small/medium size. Your crown (diameter) will measure approximately 7 inches across.
Click here (or scroll down) to continue the pattern for the small/medium size.
Continue to round 9 for the medium/large size.
Round 9: Medium/Large Size
Chain 2. Make 2 double crochet in the first stitch, followed by 1 double crochet in the next fourteen stitches. You are going to repeat this pattern all the way around.
Join in the round. You should have 64 stitches.


Stop here for the medium/large size. Your crown (diameter) will measure approximately 7.5 inches across.
Click here (or scroll down) to continue the pattern for the medium/large size.
Rounds 9-19: Adult Small/Medium Continued
Rounds 9- 19: Chain 2. Make 1 double crochet in each stitch.
Join in the round. You should have 60 stitches.


You are done! Fasten off and weave in your yarn ends using a yarn needle.
Rounds 10-20: Adult Medium/Large Continued
Chain 2. Make 1 double crochet in each stitch.
Join in the round. You should have 64 stitches.


You are done! Fasten off and weave in your yarn ends using a yarn needle.
How To Section
How to Change Yarn Colors
It is very easy to change yarn colors for one or more rounds of your crochet hat. When you get to the end of a round and are ready to join with a slip stitch, rather than pulling the working yarn through, pull the new yarn color through.
You can practice color changes with my Fall Fling Beanie!

How to Crochet a Beanie with a Ribbed Brim
If you prefer to have a beanie with a ribbed brim, eliminate the last two rounds of your hat and follow the instructions below.
Using the same hook size (I 5.5 mm) and yarn weight (worsted) that you used for your hat, chain 7. Single crochet in the 2nd chain from your hook and in each remaining chain. You will have 6 single crochet.
Turn your work, chain 1 and single crochet in each stitch in the back loops only. Repeat this for 60 rows for your small/medium size hat and for 64 rows for your medium/large hat.
Using a yarn needle, sew the brim to your hat. Make sure each each stitch from that hat lines up with a row from the brim. Sew the seam where the two ends of the brim meet. Pictures are from my Color Pop Beanie.


How to Crochet a Hat with a Pom Pom
I love a crochet hat with a pom pom! It’s such a quick and easy way to dress up a simple beanie pattern. Using a pom pom maker, yarn needle & hot melt adhesive, follow the instructions below (pictures are from my Love Beanie).

How to Crochet a Slouchy Beanie
If you prefer the look of a slouchy beanie over a fitted style, you can achieve this by crocheting a beanie that is worked flat. Check out my Easy Peasy Beanie which is worked flat in rows of double crochet. As the name suggests, it’s super easy!

How to Crochet a Beanie with Cat Ears
Adding cat ears to your beanie is super easy! Using the same hook size (I 5.5 mm) and yarn weight (worsted) that you used for your hat, follow these instructions from my Cat & Fox Hat Pattern.
Row 1: Chain 9, single crochet (sc) in the 2nd chain from your hook and in each remaining chain. You will have 8 sc. Turn your work.
Row 2: Chain 1 and sc in each stitch, turn. (8 sc)
Row 3: Chain 1 and single crochet your first two stitches together (sc2tog), sc in the next 4 stitches, sc2tog, turn. (6 sc)
Row 4: Chain 1 and sc in each stitch, turn. (6 sc)
Row 5: Chain 1, sc2tog, sc in the next 2 stitches, sc2tog, turn. (4 sc)
Row 6: Chain 1 and sc in each stitch, turn. (4 sc)
Row 7: Chain 1, sc2tog, sc2tog, turn. (2 sc)
Row 8: Chain 1, sc2tog and continue to sc around the entire ear. Join and fasten off. Leave a long tail for sewing.
Using a yarn needle, sew your ears to the third round of your hat.

How to Fasten Off
To “fasten off” simply means to cut your working yarn. You do this when you are either done with your crochet project or done using a that yarn color.

How to Crochet a Beer Can Hat
Beer can hats are a fun way to share your love of your favorite beer while showing off your amazing crochet skills! They can also be a fun gag gift! I don’t have a pattern here on my blog but I do have a Beer Can Hat tutorial on my YouTube channel.

How to Join a Crochet Hat
Typically, when you are making a crochet hat, you are working in the round. Joining your rounds is very straight forward. When you get to the end of a round and make your last stitch, join to the first stitch from that round with a slip stitch.
Simply insert your hook into the first stitch and pull your working yarn through that stitch and through the most recent stitch that you made.

How to Crochet a Hat with a Ponytail Hole
A hat with a ponytail hole, also known as a Messy Bun Beanie, is actually super easy to make. Rather than starting with a magic ring, you start your hat with a chain.
The size/length of the chain will determine the size of the hole for your ponytail. And guess what? I have a written pattern for a Messy Bun Beanie AND a tutorial for all sizes (toddler, child & adult) on my YouTube channel!

I’d Love to Hear from You!
Did you enjoy this pattern? Are you ready for another easy project & free pattern? If so, be sure to check out my 40 Minute Baby Beanie and my Half Double Crochet (hdc) Beanie patterns.
Also, I’d love to hear from you and see pictures of your crochet projects. Let’s connect on Instagram or Facebook.
Crochet Creatively! 🧶
Melissa