

Read Across America crochet hat pattern
Looking for a fun and playful hat for Read Across America week? This beginner-friendly Read Across America crochet hat pattern is bright, bold, and perfect for school spirit days and storybook celebrations.
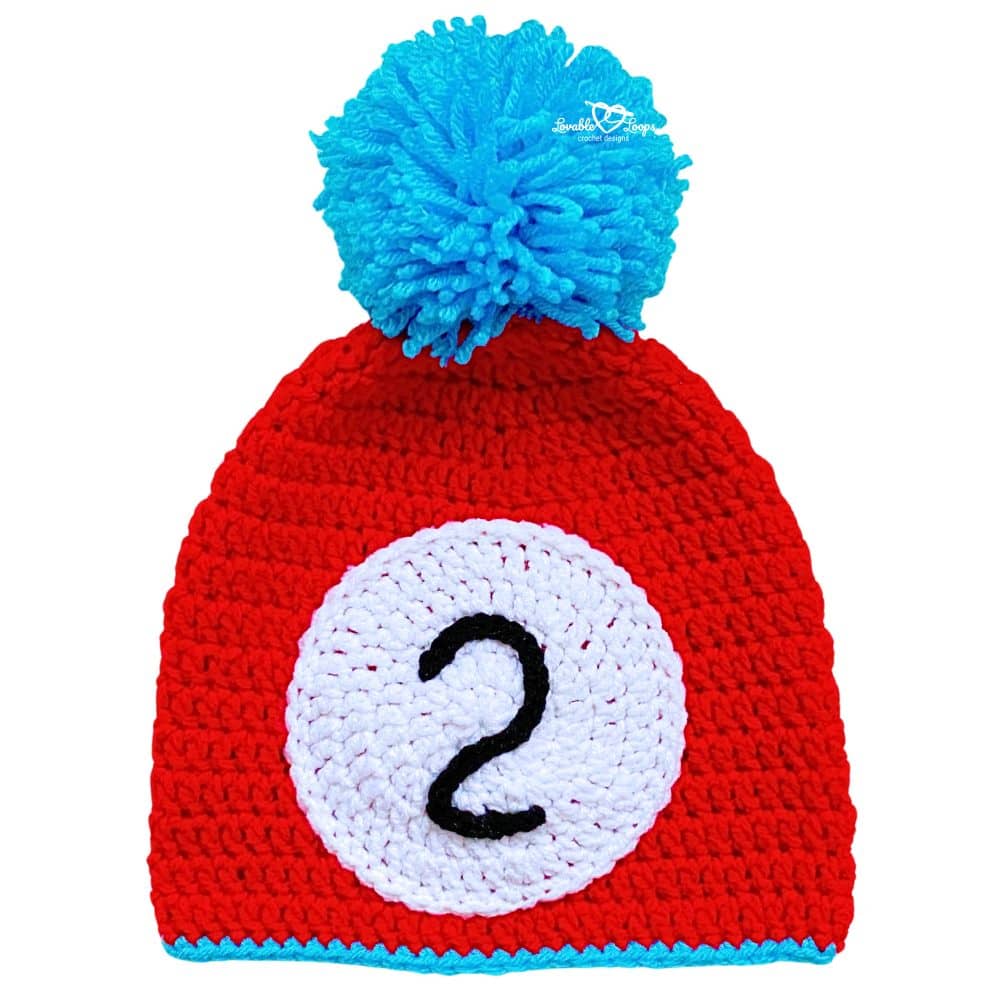
Designed with earflaps, braids, and a pom pom on top, this hat is worked in the round from the top down. The front circle and customizable number panel give it that classic red and blue storybook vibe without complicated colorwork.
Sizes range from 0–3 months through adult, so everyone can join the fun.
Quick answer
This Read Across America crochet hat pattern is worked in the round from the top down using double crochet stitches and worsted weight yarn. It features earflaps, braided ties, a pom pom, and a customizable number circle on the front. Sizes range from 0–3 months through adult, making it perfect for classroom celebrations and themed school events.
What is Read Across America?
Read Across America is a nationwide reading celebration that takes place each year in early March. Schools, teachers, and families participate by encouraging children to read, dress up as storybook characters, and celebrate literacy in fun and creative ways.
This crochet hat fits perfectly with that theme. The bold red design, contrasting number panel, and playful pom pom make it ideal for:
- School spirit days
- Classroom reading events
- Storybook character dress-up days
- Literacy week celebrations
- Themed classroom photos
Because the hat comes in sizes from baby through adult, you can make matching sets for students, teachers, siblings, or even the whole family.
Why you’ll love this pattern
- Customizable number panel — create matching hats for twins, classrooms, or themed events
- Earflap design — keeps little ears warm during outdoor activities
- Beginner-friendly stitches — uses basic double crochet and single crochet
- Full size range — includes 0–3 months through adult
- Top-down construction — easy to adjust for fit
- Bold red and blue design — perfect for Read Across America celebrations
Construction overview
This Read Across America crochet hat pattern is worked in the round from the top down.
- Begin with a magic circle
- Increase to form the crown
- Work even rounds to create the body
- Add earflaps
- Attach braids and pom pom
- Sew on the customizable number circle
Top-down construction allows you to measure as you go and adjust the height if needed.

Read Across America crochet hat pattern details
This Read Across America crochet hat pattern includes everything you need to know before you begin. Below you’ll find sizing details, skill level, construction notes, and helpful information to guide you through the project from start to finish.
Skill level
Beginner — This pattern uses basic double crochet and single crochet stitches and is worked in the round from the top down. If you are comfortable joining rounds and sewing pieces in place, you can make this hat with confidence.
Materials needed
- I-9 (5.5 mm) crochet hook — for the hat
- H-8 (5 mm) crochet hook — for the circle appliqué
- Worsted weight yarn (#4) — soft yarn works best
- Yarn needle — for weaving in ends neatly
- Scissors — to cut your yarn
- Stitch markers — optional, to help mark stitches or keep track of rows.
- Pom pom maker — optional, to make a yarn pom pom.
Finished size
This pattern includes multiple sizes with a complete size chart to help you choose the best fit. Use the chart below to match head circumference, crown size, and hat height, and always check your gauge for the most accurate results.
Sizes are based on average head circumference. When between sizes, size up for a more relaxed fit.
| Hat Size | Crown | Head Circumference | Hat Height |
| 0–3 months | 4.5 inches (11 cm) | 13–14 inches (33–36 cm) | 5 inches (13 cm) |
| 3–6 months | 5 inches (13 cm) | 14–15 inches (36–38 cm) | 5.5 inches (14 cm) |
| 6–12 months | 5.5 inches (14 cm) | 16–17 inches (41–43 cm) | 6.25 inches (16 cm) |
| Toddler | 6 inches (15 cm) | 18–19 inches (46–48 cm) | 6.75 inches (17 cm) |
| Child | 6.5 inches (17 cm) | 19–20 inches (48–51 cm) | 7 inches (18 cm) |
| Adult | 7 inches (18 cm) | 20–23 inches (51–58 cm) | 7.75 inches (20 cm) |
Need help with crochet hat sizing?
Getting the right fit is one of the most important parts of making a crochet hat.
If you’re unsure about head circumference, negative ease, crown diameter, or hat height, I’ve created a complete Crochet Hat Sizing Guide that walks you through everything step by step.
You’ll learn:
• How to measure head circumference correctly
• How much negative ease to use
• How to calculate crown diameter
• Standard baby, child, and adult size charts
• How to adjust any crochet hat pattern for a better fit
Gauge
14 stitches and 9 rounds = 4 inches (10 cm)
Crochet abbreviations
- dc = double crochet
- sc = single crochet
- sc2tog = single crochet decrease
- ch/chs = chain/chains
- st/sts = stitch/stitches
- sl st = slip stitch
- rnd/rnds = round/rounds
- rem = remaining
Pattern notes
Read through the entire pattern before beginning to ensure the best fit and smooth construction.
- The chain at the beginning of each round does not count as your first stitch.
- Join each round with a slip stitch to the first stitch made in that round.
- Repeat instructions between the asterisks (*) for the rest of the round.
- You are crocheting in the round from the top of the hat down.
- The pattern is written in US crochet terms.

Step-by-step video tutorial (child size)
Prefer to follow along visually? In this step-by-step video tutorial, I walk you through making the child size of this Read Across America crochet hat pattern from start to finish. You’ll see how to shape the crown, work the body, add the earflaps, and finish with the number panel and pom pom, so you can crochet with confidence every step of the way.


Quick links
0–3 months size
3–6 months size
6–12 months size
Toddler size
Child size
Adult size
Earflaps (0–3 months)
Earflaps (3–6 and 6–12 months)
Earflaps (toddler to adult)
Circle appliqué
Adding braids
Adding a pom pom
Finishing
FAQs
Free Read Across America crochet hat pattern instructions
Use the sections below to crochet the hat, earflaps, circle appliqué, and finishing details. The pattern is written by size and broken into clear steps so you can follow along with confidence.
Hat instructions
Start here to crochet the main body of the hat. Choose your size below and follow the rounds exactly as written. The final round number varies by size, so follow the instructions listed within your chosen size.
If you plan to add earflaps, stop after completing the last body round for your size and scroll down to the earflap section. If you prefer a simple beanie style, continue with the final edging round as instructed for your size.
0–3 months size
Round 1: Magic circle, ch 2, 11 dc, join (11 stitches)
Round 2: Ch 2, 2 dc in each st, join (22 stitches)
Round 3: Ch 2, *2 dc, dc in next st*, join (33 stitches)
Round 4: Ch 2, *2 dc, dc in next 2 sts*, join (44 stitches)
Rounds 5– 12: Ch 2, dc in each st, join (44 stitches)
To add earflaps, continue to the Earflaps (0–3 months) section below.
For a simple beanie, continue to the edging round as written.
Use blue yarn.
Round 13: Ch 1, sc in each st, join, fasten off (44 stitches)
3–6 months size
Round 1: Magic circle, ch 2, 11 dc, join (11 stitches)
Round 2: Ch 2, 2 dc in each st, join (22 stitches)
Round 3: Ch 2, *2 dc, dc in next st*, join (33 stitches)
Round 4: Ch 2, *2 dc, dc in next 2 sts*, join (44 stitches)
Round 5: Ch 2, *2 dc, dc in next 10 sts*, join (48 stitches)
Rounds 6– 13: Ch 2, dc in each st, join (48 stitches)
To add earflaps, continue to the Earflaps (3–6 and 6–12 months) section below.
For a simple beanie, continue to the edging round as written.
Use blue yarn.
Round 16: Ch 1, sc in each st, join, fasten off (48 stitches)
6–12 months size
Round 1: Magic circle, ch 2, 11 dc, join (11 stitches)
Round 2: Ch 2, 2 dc in each st, join (22 stitches)
Round 3: Ch 2, *2 dc, dc in next st*, join (33 stitches)
Round 4: Ch 2, *2 dc, dc in next 2 sts*, join (44 stitches)
Round 5: Ch 2, *2 dc, dc in next 10 sts*, join (48 stitches)
Round 6: Ch 2, *2 dc, dc in next 11 sts*, join (52 stitches)
Rounds 7– 15: Ch 2, dc in each st, join (52 stitches)
To add earflaps, continue to the Earflaps (3–6 and 6–12 months) section below.
For a simple beanie, continue to the edging round as written.
Use blue yarn.
Round 16: Ch 1, sc in each st, join, fasten off (52 stitches)
Toddler size
Round 1: Magic circle, ch 2, 11 dc, join (11 stitches)
Round 2: Ch 2, 2 dc in each st, join (22 stitches)
Round 3: Ch 2, *2 dc, dc in next st*, join (33 stitches)
Round 4: Ch 2, *2 dc, dc in next 2 sts*, join (44 stitches)
Round 5: Ch 2, *2 dc, dc in next 10 sts*, join (48 stitches)
Round 6: Ch 2, *2 dc, dc in next 11 sts*, join (52 stitches)
Round 7: Ch 2, *2 dc, dc in next 12 sts*, join (56 stitches)
Rounds 8– 16: Ch 2, dc in each st, join (56 stitches)
To add earflaps, continue to the Earflaps (toddler to adult) section below.
For a simple beanie, continue to the edging round as written.
Use blue yarn.
Round 17: Ch 1, sc in each st, join, fasten off (56 stitches)
Child size
Round 1: Magic circle, ch 2, 11 dc, join (11 stitches)
Round 2: Ch 2, 2 dc in each st, join (22 stitches)
Round 3: Ch 2, *2 dc, dc in next st*, join (33 stitches)
Round 4: Ch 2, *2 dc, dc in next 2 sts*, join (44 stitches)
Round 5: Ch 2, *2 dc, dc in next 10 sts*, join (48 stitches)
Round 6: Ch 2, *2 dc, dc in next 11 sts*, join (52 stitches)
Round 7: Ch 2, *2 dc, dc in next 12 sts*, join (56 stitches)
Round 8: Ch 2, *2 dc, dc in next 13 sts*, join (60 stitches)
Rounds 9– 17: Ch 2, dc in each st, join (60 stitches)
To add earflaps, continue to the Earflaps (toddler to adult) section below.
For a simple beanie, continue to the edging round as written.
Use blue yarn.
Round 18: Ch 1, sc in each st, join, fasten off (60 stitches)
Adult size
Round 1: Magic circle, ch 2, 11 dc, join (11 stitches)
Round 2: Ch 2, 2 dc in each st, join (22 stitches)
Round 3: Ch 2, *2 dc, dc in next st*, join (33 stitches)
Round 4: Ch 2, *2 dc, dc in next 2 sts*, join (44 stitches)
Round 5: Ch 2, *2 dc, dc in next 10 sts*, join (48 stitches)
Round 6: Ch 2, *2 dc, dc in next 11 sts*, join (52 stitches)
Round 7: Ch 2, *2 dc, dc in next 12 sts*, join (56 stitches)
Round 8: Ch 2, *2 dc, dc in next 13 sts*, join (60 stitches)
Round 9: Ch 2, *2 dc, dc in next 14 sts*, join (64 stitches)
Rounds 10– 19: Ch 2, dc in each st, join (64 stitches)
To add earflaps, continue to the Earflaps (toddler to adult) section below.
For a simple beanie, continue to the edging round as written.
Use blue yarn.
Round 20: Ch 1, sc in each st, join, fasten off (64 stitches)
Adding the earflaps
Begin the first earflap where you ended the last round of your hat. Then, refer to the chart below for placement of the second earflap.
Repeat the instructions for the second earflap. Then single crochet around the entire hat and both earflaps.
Earflaps (0–3 months)
Space to leave between earflaps
14 stitches in front, 10 stitches in back
Row 1: Ch 1, sc in 10 sts, turn (10 stitches)
Row 2: Ch 1, sc2tog, sc in 6 sts, sc2tog, turn (8 stitches)
Row 3: Ch 1, sc in each st, turn (8 stitches)
Row 4: Ch 1, sc2tog, sc in 4 sts, sc2tog, turn (6 stitches)
Row 5: Ch 1, sc in each st, turn (6 stitches)
Row 6: Ch 1, sc2tog, sc in 2 sts, sc2tog, turn (4 stitches)
Row 7: Ch 1, sc in each st, turn (4 stitches)
Row 8: Ch 1, sc2tog, sc2tog, turn (2 stitches)
Row 9: Ch 1, sc2tog (1 stitch)
Earflaps (3–6 and 6–12 months)
Space to leave between earflaps
3–6 months: 14 stitches in front, 10 stitches in back
6–12 months: 16 stitches in front, 12 stitches in back
Row 1: Ch 1, sc in 12 sts, turn (12 stitches)
Row 2: Ch 1, sc2tog, sc in 8 sts, sc2tog, turn (10 stitches)
Row 3: Ch 1, sc in each st, turn (10 stitches)
Row 4: Ch 1, sc2tog, sc in 6 sts, sc2tog, turn (8 stitches)
Row 5: Ch 1, sc in each st, turn (8 stitches)
Row 6: Ch 1, sc2tog, sc in 4 sts, sc2tog, turn (6 stitches)
Row 7: Ch 1, sc in each st, turn (6 stitches)
Row 8: Ch 1, sc2tog, sc in 2 sts, sc2tog, turn (4 stitches)
Row 9: Ch 1, sc in each st, turn (4 stitches)
Row 10: Ch 1, sc2tog, sc2tog, turn (2 stitches)
Row 11: Ch 1, sc2tog (1 stitch)
Earflaps (toddler to adult)
Space to leave between earflaps
Toddler size: 16 stitches in front, 12 stitches in back
Child size: 18 stitches in front, 14 stitches in back
Adult size: 20 stitches in front, 16 stitches in back
Row 1: Ch 1, sc in 14, turn (14 stitches)
Row 2: Ch 1, sc2tog, sc in 10 sts, sc2tog, turn (12 stitches)
Row 3: Ch 1, sc in each st, turn (12 stitches)
Row 4: Ch 1, sc2tog, sc in 8 sts, sc2tog, turn (10 stitches)
Row 5: Ch 1, sc in each st, turn (10 stitches)
Row 6: Ch 1, sc2tog, sc in 6 sts, sc2tog, turn (8 stitches)
Row 7: Ch 1, sc in each st, turn (8 stitches)
Row 8: Ch 1, sc2tog, sc in 4 sts, sc2tog, turn (6 stitches)
Row 9: Ch 1, sc in each st, turn (6 stitches)
Row 10: Ch 1, sc2tog, sc in 2 sts, sc2tog, turn (4 stitches)
Row 11: Ch 1, sc in each st, turn (4 stitches)
Row 12: Ch 1, sc2tog, sc2tog, turn (2 stitches)
Row 13: Ch 1, sc2tog (1 stitch)
Adding the circle appliqué
Use an H-8 (5 mm) crochet hook and white yarn. Do not sew circle onto the hat until you have added the number.
Circle instructions (0–3 to 6–12 months)
Round 1: Magic circle, 9 dc, join (9 stitches)
Round 2: Ch 2, 2 dc in each st, join (18 stitches)
Round 3: Ch 2, *2 dc, dc in next st*, join (27 stitches)
Round 4: Ch 2, *2 dc, dc in next 2 sts*, join (36 stitches)
Switch to black yarn.
Round 5: Ch 1, sc in each st, join, fasten off (36 stitches)
Circle instructions (toddler to adult)
Round 1: Magic circle, 9 dc, join (9 stitches)
Round 2: Ch 2, 2 dc in each st, join (18 stitches)
Round 3: Ch 2, *2 dc, dc in next st*, join (27 stitches)
Round 4: Ch 2, *2 dc, dc in next 2 sts*, join (36 stitches)
Round 5: Ch 2, *2 dc, dc in next 3 sts*, join (45 stitches)
Switch to black yarn.
Round 6: Ch 1, sc in each st, join, fasten off (45 stitches)
Adding the number
Use an H-8 (5 mm) crochet hook and black yarn.
Chain 30. Sew the chain to the circle the shape of the number 1 or 2. Sew the circle to the hat.
Adding braids
Cut fifteen 30” strands of yarn for each braid.
- Fold the strands in half and pass the folded loop through the bottom of the ear flap.
- Pass the strand ends through the loop and pull tight to form a knot.
- Divide into three sections and braid.
Adding a pom pom
- Wind the yarn around both arches.
- Cut the yarn along the middle gap.
- Tie with a piece of scrap yarn.
- Open the arches and remove the pom pom.
- Trim any loose ends.
Attach the pom pom to the top of your hat.
Finishing
Weave in the ends.
Frequently asked questions
Can I adjust the height of the hat?
Yes. Because it is worked from the top down, you can add or remove rounds before finishing the edge to adjust the length.
Do I have to add earflaps?
No. You can stop after completing the main hat body and finish with the single crochet edging for a simple beanie style.
Can I use a different yarn weight?
This pattern is written for worsted weight yarn (#4). Changing yarn weight will affect sizing and gauge.
Is this hat worked in rows or rounds?
The hat is worked in the round from the top down. Earflaps are worked in rows.
Can I make matching sets?
Absolutely. The full size range makes it easy to create coordinating hats for babies, kids, and adults.
More free crochet hat patterns
Looking for more easy and beginner-friendly crochet hat patterns? Explore these free designs for babies, kids, and adults, perfect for everyday wear, seasonal events, and handmade gifts.


Let’s connect!
I’d love to see what you’re making! Share your finished project and follow along for more free crochet patterns and tutorials.
📌 Don’t forget to pin this pattern for later!
Happy crocheting! 🧶
— Melissa