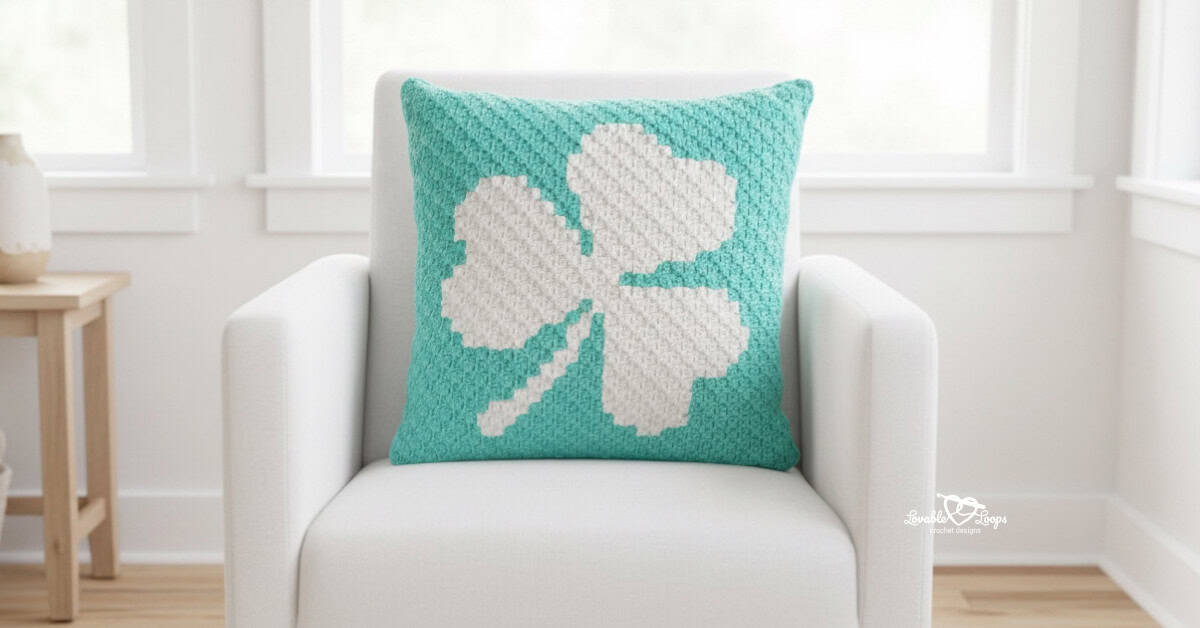
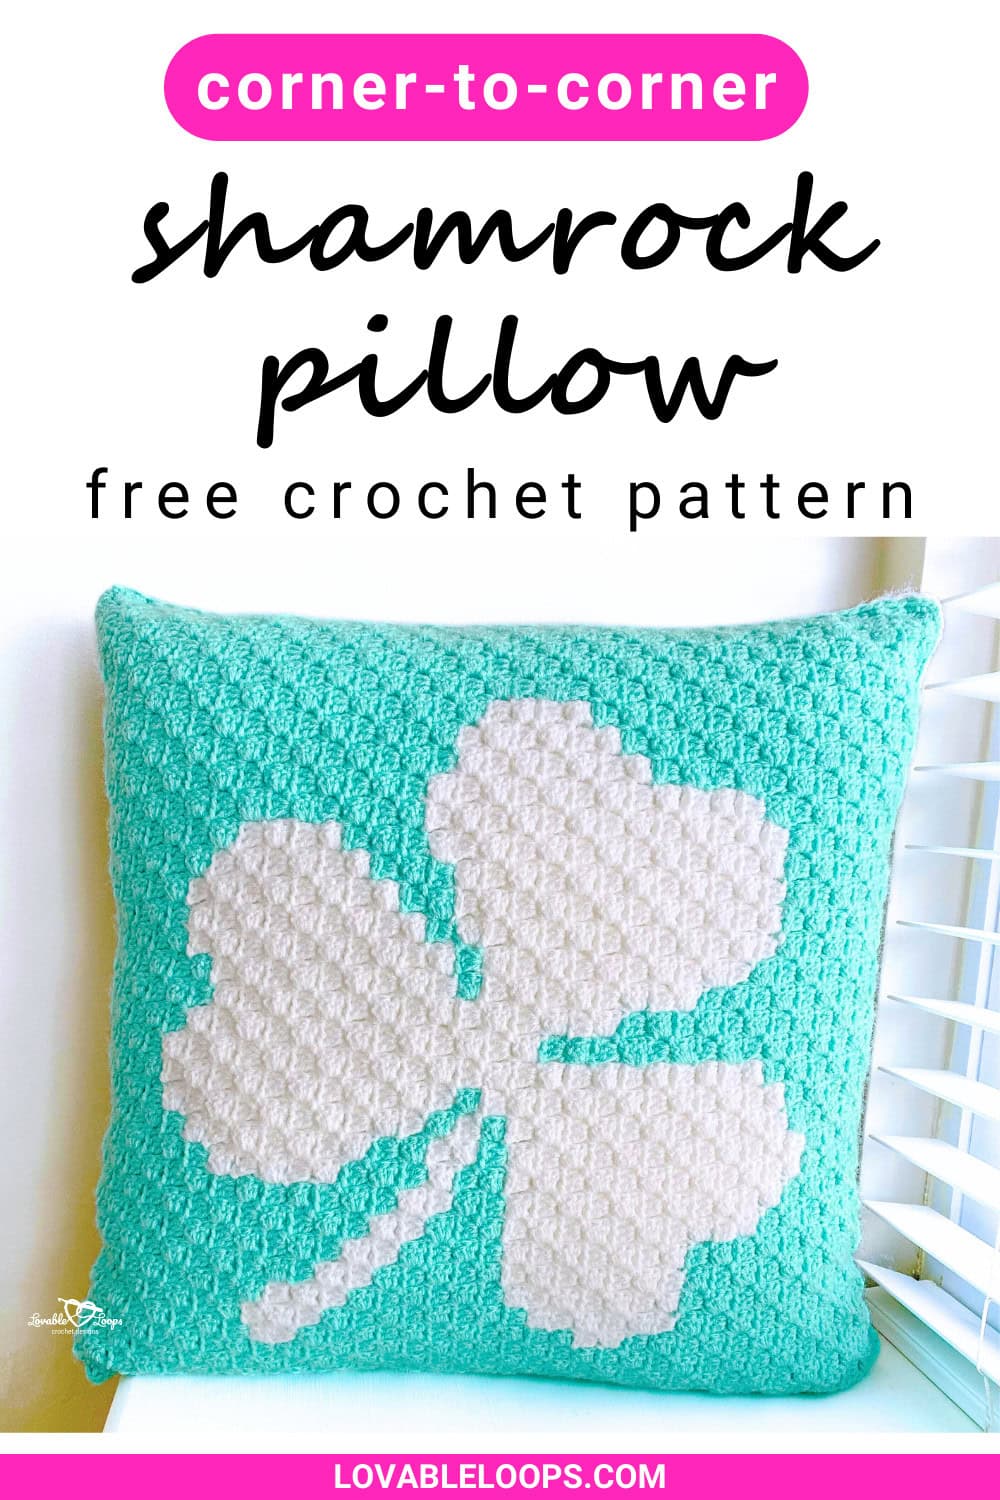
C2C crochet shamrock pillow pattern
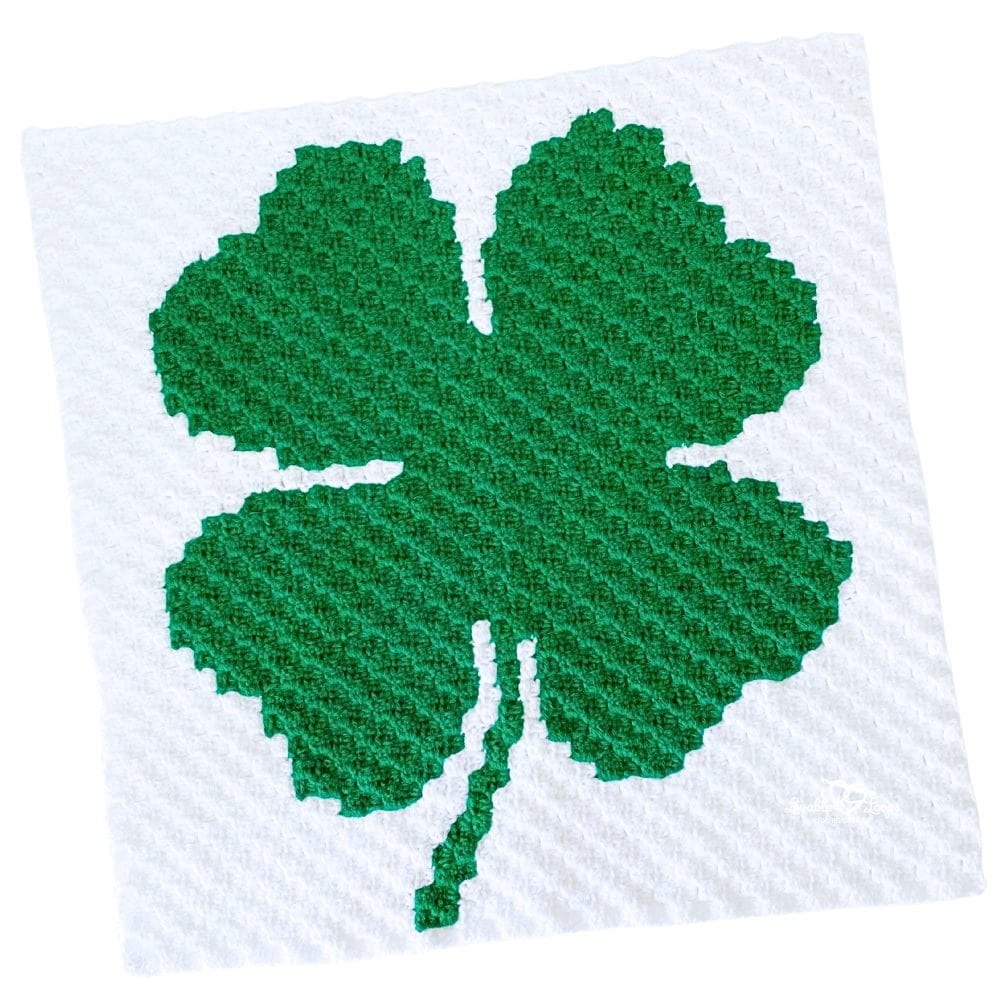
Looking for a festive way to decorate for St. Patrick’s Day? This C2C crochet shamrock pillow pattern creates a bold shamrock design using the classic corner-to-corner technique.
The pillow is made from two C2C panels sewn together for a clean, structured finish, creating a festive crochet pillow cover you can display all season long. This corner-to-corner pillow pattern includes both a graph and written instructions, making it beginner-friendly for crocheters ready to explore color changes in C2C.
Perfect for St. Patrick’s Day crochet decor, Irish-themed home accents, or festive spring decorating.
Quick answer
This C2C crochet shamrock pillow pattern is worked diagonally using the corner-to-corner technique to form a shamrock design. The finished pillow cover measures 19″ x 19″ (48 x 48 cm) and is made with worsted weight yarn and a G-6 (4 mm) crochet hook. Two panels are crocheted and sewn together to create a festive St. Patrick’s Day pillow.
What is corner-to-corner crochet (C2C)?
Corner-to-corner crochet (also called C2C) is a technique where you crochet diagonally instead of working traditional straight rows. The design is built using small C2C blocks made from ch 3 + 3 double crochet stitches. You begin in one corner, increase row by row until you reach the widest point, and then decrease to finish the opposite corner.
C2C is especially popular for graphic designs because it makes color changes simple and easy to track. In this shamrock pillow pattern, the C2C blocks create a bold shamrock image that looks like pixel art, making it perfect for festive St. Patrick’s Day decor.
Why you’ll love this pattern
- Festive seasonal decor — perfect for St. Patrick’s Day styling
- Beginner-friendly C2C project — great for practicing color changes
- Graph + written instructions included — easy to follow your preferred method
- Customizable colors — choose classic green and white or make it your own
- Versatile design — use the shamrock panel for pillows, wall art, or blankets
How this C2C crochet shamrock pillow is constructed
This pillow is made using the C2C (corner-to-corner) crochet technique. Each block is created using ch 3 + 3 dc and worked diagonally from the bottom right corner to the top left corner.
You will:
– Crochet the front panel following the shamrock graph
– Crochet a second panel in a solid coordinating color for the back
– Add a single crochet border around each panel
– Sew the panels together with a yarn needle
– Insert a 20″ pillow form before closing
Because the design is built block by block, it’s easy to follow the graph and keep your color changes clean and organized.

C2C crochet shamrock pillow pattern details
Before you begin, here are the key details for this C2C crochet shamrock pillow pattern, including skill level, materials, finished size, and gauge. Reviewing this information first will help you gather your supplies and ensure your pillow turns out the correct size.
Skill level
Advanced beginner — This pattern is ideal for crocheters who know basic stitches and are ready to practice color changes in C2C. If you’ve completed a small C2C project before, you’ll feel confident making this pillow.
Materials needed
- Crochet hook G-6 (4 mm) — used to create tight, even C2C blocks
- Worsted weight yarn (#4 medium) — in white and green
- 20″ square pillow insert or fiber fill stuffing — to shape and fill the finished pillow cover
- Yarn needle — for weaving in ends and sewing the panels together.
- Locking stitch markers — optional, helpful for keeping track of rows and corners.
- Scissors — for trimming yarn.
Finished size
19″ wide by 19″ tall (48 cm by 48 cm)
Designed to fit a 20″ square pillow insert for a full, plush look.
Gauge
8 C2C blocks = 4″ (10 cm)
Each block = ch 3 + 3 dc
Getting the best results with C2C
For pillow covers, tighter stitches create a cleaner, more structured finish. Using a G-6 (4 mm) hook with worsted weight yarn helps the C2C blocks stay firm so the pillow insert doesn’t show through.
If your stitches feel loose, consider sizing down your hook slightly to keep the fabric dense and even.
Crochet abbreviations
- dc = double crochet
- sc = single crochet
- hdc = half double crochet
- ch/chs = chain/chains
- st/sts = stitch/stitches
- sl st = slip stitch
Pattern notes
- This pillow is made using the corner-to-corner (C2C) crochet technique.
- You can follow either the graph or the written instructions for color changes.
- Crochet both C2C shamrock panels first, then add the borders and sew them together to assemble the pillow cover.
- Each C2C block is made with ch 3 + 3 dc.
- Ch 6 to start each new row and ch 3 to start each new block.
- Rows worked in the ↙ direction are right-side rows.
- Rows worked in the ↗ direction are wrong-side rows.
- This pattern is written in US crochet terms.
New to C2C? Start with my video tutorial
If you’re new to corner-to-corner crochet, I recommend starting with my beginner-friendly C2C video tutorial. It walks you through the basic C2C block, plus increases and decreases, using a small practice panel before jumping into larger projects.

Printable PDF pattern
Prefer a print-friendly version? A printable PDF of this C2C crochet shamrock pillow pattern is available in my Etsy shop.

Quick links
Graph
Written instructions
Border for the pillow panels
Make the back panel
Assembling the pillow
Finishing
FAQs
Free C2C crochet shamrock pillow pattern instructions
Follow the shamrock graph or the written instructions below to complete the front panel using the C2C technique. Each row tells you how many C2C blocks to make in each color and in what order.
Once the front panel is finished, you will crochet a solid back panel, add borders to both pieces, and sew them together to create the finished pillow cover.
Graph
Download the C2C crochet shamrock pillow pattern graph.
Written instructions
↙ Row 1: green x 1 (1 block)
↗ Row 2: green x 2 (2 blocks)
↙ Row 3: green x 3 (3 blocks)
↗ Row 4: green x 4 (4 blocks)
↙ Row 5: green x 5 (5 blocks)
↗ Row 6: green x 6 (6 blocks)
↙ Row 7: green x 7 (7 blocks)
↗ Row 8: green x 8 (8 blocks)
↙ Row 9: green x 9 (9 blocks)
↗ Row 10: green x 10 (10 blocks)
↙ Row 11: green x 11 (11 blocks)
↗ Row 12: green x 12 (12 blocks)
↙ Row 13: green x 13 (13 blocks)
↗ Row 14: green x 14 (14 blocks)
↙ Row 15: green x 15 (15 blocks)
↗ Row 16: green x 16 (16 blocks)
↙ Row 17: green x 10, white x 1, green x 6 (17 blocks)
↗ Row 18: green x 5, white x 3, green x 2, white x 3, green x 5 (18 blocks)
↙ Row 19: green x 5, white x 4, green x 1, white x 4, green x 5 (19 blocks)
↗ Row 20: green x 6, white x 8, green x 6 (20 blocks)
↙ Row 21: green x 6, white x 9, green x 6 (21 blocks)
↗ Row 22: green x 6, white x 10, green x 6 (22 blocks)
↙ Row 23: green x 7, white x 9, green x 7 (23 blocks)
↗ Row 24: green x 7, white x 10, green x 7 (24 blocks)
↙ Row 25: green x 8, white x 9, green x 8 (25 blocks)
↗ Row 26: green x 9, white x 8, green x 9 (26 blocks)
↙ Row 27: green x 10, white x 7, green x 10 (27 blocks)
↗ Row 28: green x 11, white x 6, green x 11 (28 blocks)
↙ Row 29: green x 7, white x 2, green x 3, white x 5, green x 12 (29 blocks)
↗ Row 30: green x 13, white x 4, green x 2, white x 4, green x 7 (30 blocks)
↙ Row 31: green x 7, white x 5, green x 2, white x 3, green x 2, white x 7, green x 5 (31 blocks)
↗ Row 32: green x 5, white x 9, green x 1, white x 2, green x 1, white x 7, green x 7 (32 blocks)
↙ Row 33: green x 7, white x 8, green x 1, white x 4, green x 5, white x 2, green x 6 (33 blocks)
↗ Row 34: green x 16, white x 10, green x 8 (34 blocks)
↙ Row 35: green x 8, white x 13, green x 14 (35 blocks)
Corner: Start decreasing on both ends
↗ Row 36: green x 11, white x 15, green x 8 (34 blocks)
↙ Row 37: green x 8, white x 15, green x 10 (33 blocks)
↗ Row 38: green x 9, white x 7, green x 1, white x 7, green x 8 (32 blocks)
↙ Row 39: green x 8, white x 6, green x 1, white x 8, green x 8 (31 blocks)
↗ Row 40: green x 7, white x 16, green x 7 (30 blocks)
↙ Row 41: green x 7, white x 6, green x 1, white x 8, green x 7 (29 blocks)
↗ Row 42: green x 6, white x 9, green x 1, white x 6, green x 6 (28 blocks)
↙ Row 43: green x 6, white x 5, green x 2, white x 8, green x 6 (27 blocks)
↗ Row 44: green x 5, white x 9, green x 1, white x 6, green x 5 (26 blocks)
↙ Row 45: green x 5, white x 5, green x 2, white x 8, green x 5 (25 blocks)
↗ Row 46: green x 5, white x 8, green x 2, white x 4, green x 5 (24 blocks)
↙ Row 47: green x 5, white x 2, green x 4, white x 5, green x 7 (23 blocks)
↗ Row 48: green x 7, white x 5, green x 10 (22 blocks)
↙ Row 49: green x 10, white x 5, green x 6 (21 blocks)
↗ Row 50: green x 6, white x 4, green x 10 (20 blocks)
↙ Row 51: green x 10, white x 3, green x 6 (19 blocks)
↗ Row 52: green x 18 (18 blocks)
↙ Row 53: green x 17 (17 blocks)
↗ Row 54: green x 16 (16 blocks)
↙ Row 55: green x 15 (15 blocks)
↗ Row 56: green x 14 (14 blocks)
↙ Row 57: green x 13 (13 blocks)
↗ Row 58: green x 12 (12 blocks)
↙ Row 59: green x 11 (11 blocks)
↗ Row 60: green x 10 (10 blocks)
↙ Row 61: green x 9 (9 blocks)
↗ Row 62: green x 8 (8 blocks)
↙ Row 63: green x 7 (7 blocks)
↗ Row 64: green x 6 (6 blocks)
↙ Row 65: green x 5 (5 blocks)
↗ Row 66: green x 4 (4 blocks)
↙ Row 67: green x 3 (3 blocks)
↗ Row 68: green x 2 (2 blocks)
↙ Row 69: green x 1 (1 block)
Border for the pillow panels
After completing the last C2C block, do not fasten off. Continue working around the outer edge to create a border.
Ch 1. Work 2 sc in the side of each C2C block along the edges. In each corner, work (sc, ch 2, sc) to keep the corners square.
Fasten off and weave in ends.
Repeat for the second panel.
Make the back panel
Crochet a second panel using the same C2C construction as the front, but without any color changes. Work it in a solid coordinating color.
Add the same single crochet border to match the front panel.
Assembling the pillow
Place both panels together with the right sides facing out and the wrong sides touching.
Using a yarn needle and matching yarn, sew through the border stitches around the edges to join the panels.
Sew three sides closed, insert a 20″ pillow form or fiber fill stuffing, then sew the final side closed.
Finishing
Weave in any remaining ends and gently shape the pillow. Your C2C crochet shamrock pillow is ready to display for St. Patrick’s Day.
Frequently asked questions
Do I need prior C2C experience to make this pillow?
Basic knowledge of C2C is helpful, but advanced skills are not required. The graph and written instructions guide you through each row.
Can I use a different yarn weight?
You can, but it will change the finished size. Worsted weight yarn (#4) gives the pillow its intended 19″ size and structure.
Is this pattern worked in rows or in the round?
The panels are worked diagonally in rows using the C2C technique, not in the round.
Can I make this larger for a blanket?
Yes. The shamrock panel can be repeated or incorporated into a larger C2C blanket design.
Do I crochet the back panel with color changes?
No. The back panel is made in a solid color using the same C2C construction for a clean, simple finish.
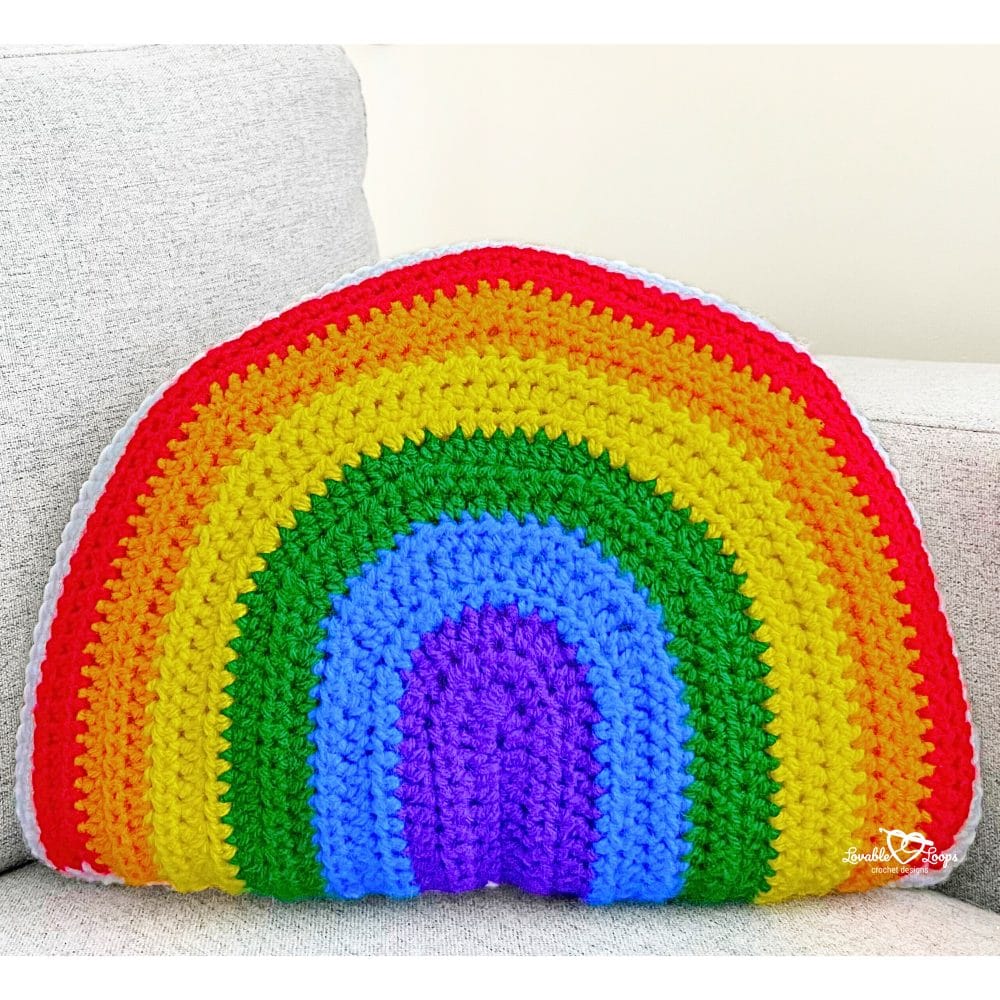
More St. Patrick’s Day crochet patterns
If you love decorating with rainbows and lucky greens, you’ll also enjoy these festive St. Patrick’s Day crochet patterns. From shamrocks to seasonal home décor, these projects are perfect for adding a handmade touch to your spring decorating.
Scroll through the gallery below to find your next lucky crochet project.


Let’s connect!
I’d love to see what you’re making! Share your finished project and follow along for more free crochet patterns and tutorials.
📌 Don’t forget to pin this pattern for later!
Happy crocheting! 🧶
— Melissa