
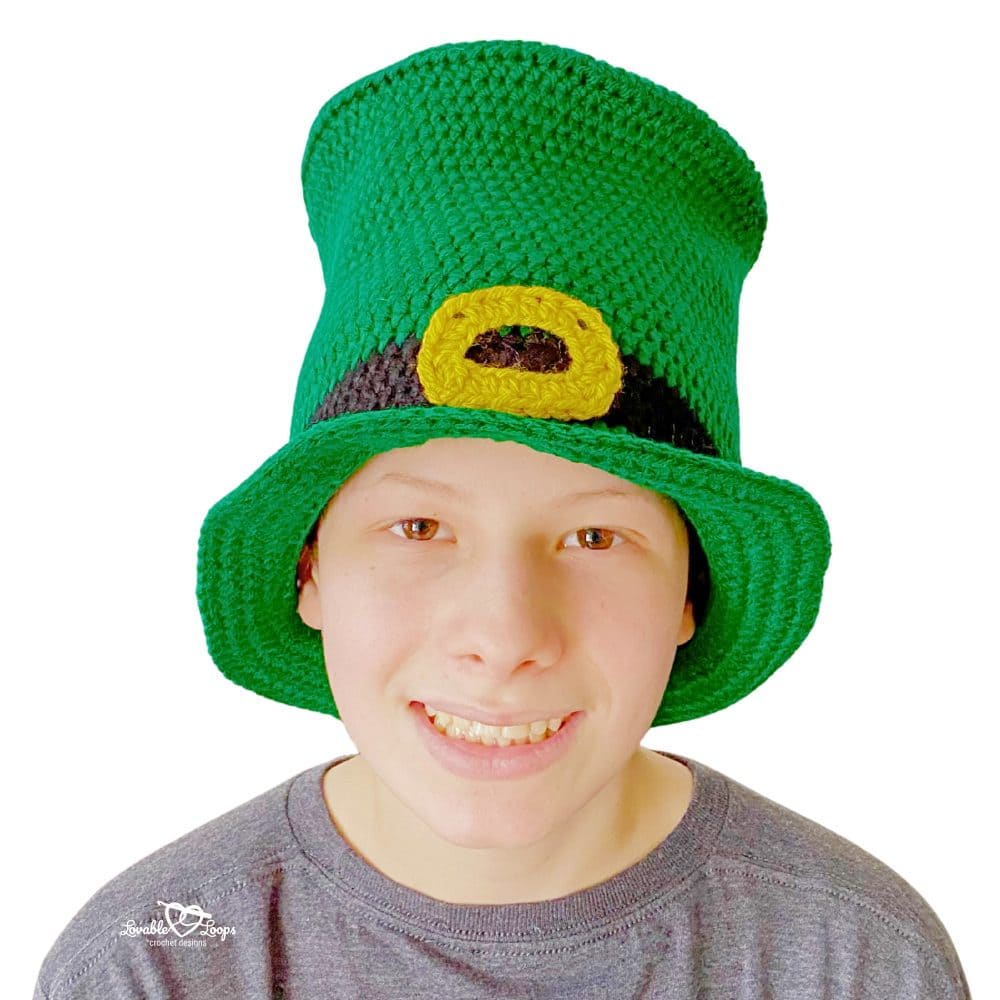
Crochet shamrock hat pattern
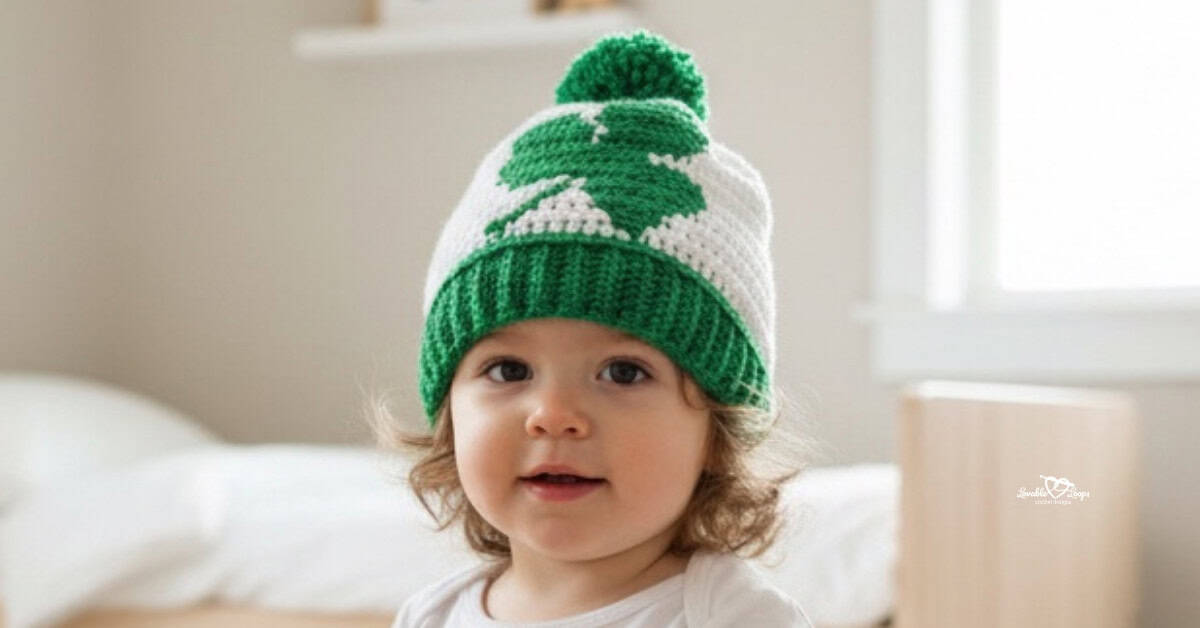
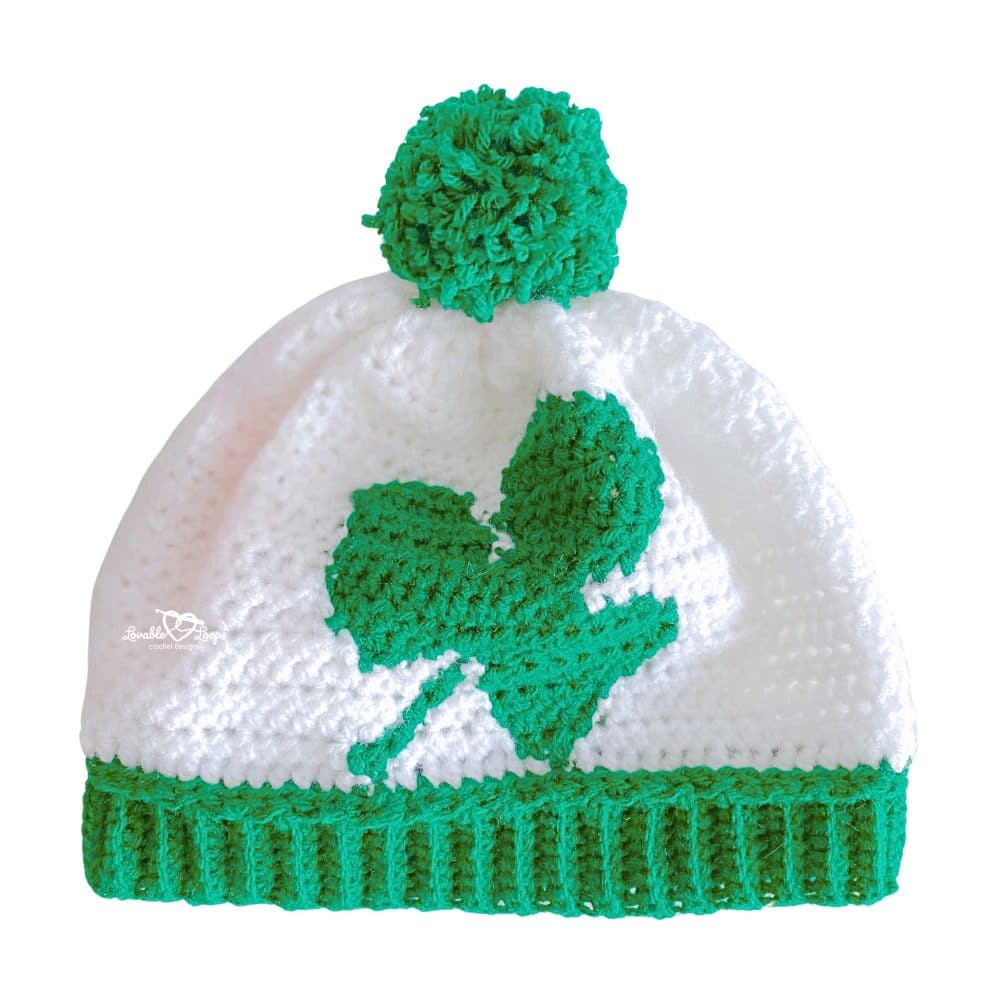
Looking for a festive hat to celebrate St. Patrick’s Day? This free crochet shamrock hat pattern features a bold green shamrock centered on the front with a classic ribbed brim for a cozy beanie finish.
The hat is worked flat in rows of half double crochet, then seamed and topped with an optional pom pom. Sizes include toddler, child, and adult, so you can make matching hats for the whole family.
It’s a fun St. Patrick’s Day crochet project that makes a festive beanie for kids and adults. Scroll down for materials, sizing, and the full free pattern.
Quick answer
This crochet shamrock hat pattern is worked flat in rows of half double crochet using worsted weight yarn #4 and an H-8 (5 mm) hook. The shamrock design is created with simple color changes, then the hat is seamed and finished with a separately crocheted ribbed brim. Sizes include toddler, child, and adult, making it perfect for St. Patrick’s Day.

Why you’ll love this pattern
- Festive and bold — The large shamrock makes a statement for St. Patrick’s Day.
- Family sizing — Toddler, child, and adult sizes are included.
- Advanced beginner-friendly — Simple stitches with approachable color changes.
- Worked flat — Great if you prefer rows over crocheting the entire hat in the round.
- Customizable — Add a pom pom for a playful finish or keep it classic.
How this crochet shamrock hat is constructed
The hat body is worked flat from the bottom up in rows of half double crochet. The shamrock image is formed using color changes, following either the graph or the written stitch counts.
After completing the panel:
- The side seam is sewn closed.
- The top is shaped with decrease rounds worked in the round.
- The ribbed brim is crocheted separately using back loop only single crochet.
- The brim is sewn to the hat for a snug, stretchy fit.
This construction keeps the colorwork clean while giving the hat a polished, professional finish.
Pattern details
Before you start your St. Patrick’s Day crochet hat pattern, take a quick look at the materials, sizing, gauge, and pattern notes below. This section will help you choose the right size, match gauge, and understand how the hat is worked flat before seaming and adding the ribbed brim.
Getting familiar with these details first will make the color changes and assembly process smooth and stress-free.
Skill level
Advanced beginner — This pattern uses half double crochet, single crochet, color changes, and basic seaming. If you are comfortable following written stitch counts or a graph, you’ll do well with this design.
Materials needed
- Crochet hook size H-8 (5 mm) — for the hat
- Crochet hook size G-6 (4 mm) — for the brim
- Yarn — worsted weight yarn (#4) in green and white
- Yarn needle — for weaving in ends
- Scissors — for finishing
- Stitch markers — optional, for tracking rows
- Tape measure — to check fit
- Large pom pom maker — to make a yarn pom pom
Finished size
- Toddler — 18–19 inches (46–48 cm) head circumference, 7 inches (18 cm) tall
- Child — 19–20 inches (48–51 cm), 7.5 inches (19 cm) tall
- Adult — 20–23 inches (51–58 cm), 8 inches (20 cm) tall
For best results, choose a size based on head circumference rather than age.
Need help with crochet hat sizing?
Getting the right fit is one of the most important parts of making a crochet hat.
If you’re unsure about head circumference, negative ease, crown diameter, or hat height, I’ve created a complete Crochet Hat Sizing Guide that walks you through everything step by step.
You’ll learn:
• How to measure head circumference correctly
• How much negative ease to use
• How to calculate crown diameter
• Standard baby, child, and adult size charts
• How to adjust any crochet hat pattern for a better fit
Gauge
16 stitches and 14 rows = 4 inches (10 cm)
Crochet abbreviations
- hdc = half double crochet
- hdc2tog = half double crochet decrease
- ch/chs = chain/chains
- st/sts = stitch/stitches
- sc = single crochet
- rem = remaining
Pattern notes
- The hat is worked flat from the bottom up in rows of half double crochet stitches.
- You can follow the picture graph or the written pattern.
- The written pattern tells you how many stitches to make in each color and in what order.
- The brim is made separately and then sewn onto the hat.
- Repeat the instructions between the asterisks (*) as indicated.
- Join each round (top of the hat) with a slip stitch to the first stitch made in that round.
- The beginning chain does not count as a stitch.
- ← You are working on the “right side”
- → You are working on the “wrong side”
- The pattern is written in US crochet terms.
Quick links
Toddler size
Child size
Adult size
Assembling the hat
Closing the top of the hat
Adding the brim
Adding a pom pom
Finishing
FAQs
Free crochet shamrock hat pattern instructions
Below you’ll find the full written instructions for the shamrock hat in toddler, child, and adult sizes. You can follow either the color graph or the written stitch counts to create the shamrock design.
Work each row carefully, paying attention to the color changes that form the shamrock image. After completing the flat panel, you’ll seam the hat, close the top, and attach the separately crocheted ribbed brim for a finished beanie look.
Toddler size
Graph
Download the toddler size hat pattern graph.
Following the example in row 1, chain 2 at the beginning of each row. Then, make the half double crochet stitches according to the written pattern, which tells you how many stitches to make in each color and in what order.
Written instructions
← Row 1: Ch 2, in white hdc 32, in green hdc 1, in white hdc 8, in green hdc 1, in white hdc 30, turn
→ Row 2: white x 29, green x 3, white x 5, green x 4, white x 31
← Row 3: white x 30, green x 5, white x 4, green x 2, white x 31
→ Row 4: white x 32, green x 2, white x 2, green x 6, white x 30
← Row 5: white x 28, green x 8, white x 1, green x 2, white x 33
→ Row 6: white x 29, green x 3, white x 2, green x 1, white x 1, green x 9, white x 27
← Row 7: white x 27, green x 10, white x 1, green x 6, white x 28
→ Row 8: white x 28, green x 16, white x 28
← Row 9: white x 29, green x 15, white x 28
→ Row 10: white x 28, green x 11, white x 33
← Row 11: white x 30, green x 6, white x 1, green x 6, white x 29
→ Row 12: white x 28, green x 7, white x 1, green x 7, white x 29
← Row 13: white x 28, green x 9, white x 1, green x 6, white x 28
→ Row 14: white x 29, green x 4, white x 2, green x 9, white x 28
← Row 15: white x 29, green x 8, white x 35
→ Row 16: white x 35, green x 7, white x 30
← Row 17: white x 32, green x 5, white x 35
→ Row 18: white x 36, green x 2, white x 34
Child size
Download the child size hat pattern graph.
Graph
Following the example in row 1, chain 2 at the beginning of each row. Then, make the half double crochet stitches according to the written pattern, which tells you how many stitches to make in each color and in what order.
Written instructions
← Row 1: Ch 2, in white hdc 34, in green hdc 1, in white hdc 8, in green hdc 1, in white hdc 32, turn
→ Row 2: white x 31, green x 3, white x 5, green x 4, white x 33
← Row 3: white x 32, green x 5, white x 4, green x 2, white x 33
→ Row 4: white x 34, green x 2, white x 2, green x 6, white x 32
← Row 5: white x 30, green x 8, white x 1, green x 2, white x 35
→ Row 6: white x 31, green x 3, white x 2, green x 1, white x 1, green x 9, white x 29
← Row 7: white x 29, green x 10, white x 1, green x 6, white x 30
→ Row 8: white x 30, green x 16, white x 30
← Row 9: white x 31, green x 15, white x 30
→ Row 10: white x 30, green x 11, white x 35
← Row 11: white x 32, green x 6, white x 1, green x 6, white x 31
→ Row 12: white x 30, green x 7, white x 1, green x 7, white x 31
← Row 13: white x 30, green x 9, white x 1, green x 6, white x 30
→ Row 14: white x 31, green x 4, white x 2, green x 9, white x 30
← Row 15: white x 31, green x 8, white x 37
→ Row 16: white x 37, green x 7, white x 32
← Row 17: white x 34, green x 5, white x 37
→ Row 18: white x 38, green x 2, white x 36
← Row 19: white x 76
Adult size
Graph
Download the adult size hat pattern graph.
Following the example in row 1, chain 2 at the beginning of each row. Then, make the half double crochet stitches according to the written pattern, which tells you how many stitches to make in each color and in what order.
Written instructions
← Row 1: Ch 2, in white hdc 38, in green hdc 1, in white hdc 8, in green hdc 1, in white hdc 36, turn
→ Row 2: white x 35, green x 3, white x 5, green x 4, white x 37
← Row 3: white x 36, green x 5, white x 4, green x 2, white x 37
→ Row 4: white x 38, green x 2, white x 2, green x 6, white x 36
← Row 5: white x 34, green x 8, white x 1, green x 2, white x 39
→ Row 6: white x 35, green x 3, white x 2, green x 1, white x 1, green x 9, white x 33
← Row 7: white x 33, green x 10, white x 1, green x 6, white x 34
→ Row 8: white x 34, green x 16, white x 34
← Row 9: white x 35, green x 15, white x 34
→ Row 10: white x 34, green x 11, white x 39
← Row 11: white x 36, green x 6, white x 1, green x 6, white x 35
→ Row 12: white x 34, green x 7, white x 1, green x 7, white x 35
← Row 13: white x 34, green x 9, white x 1, green x 6, white x 34
→ Row 14: white x 35, green x 4, white x 2, green x 9, white x 34
← Row 15: white x 35, green x 8, white x 41
→ Row 16: white x 41, green x 7, white x 36
← Row 17: white x 38, green x 5, white x 41
→ Row 18: white x 42, green x 2, white x 40
← Row 19: white x 84
→ Row 20: white x 84

Assembling the hat
Lay your hat with the wrong side facing out. Use your yarn needle to sew up the seam. Turn your hat inside out so that the right side is now facing out and the seam is on the inside.
Closing the top of the hat
Join yarn to the top of the hat. You are going to work in the round.
Toddler Size
Rnd 1: Ch 2, *hdc2tog*, join (36 stitches)
Rnd 2: Ch 2, *hdc2tog*, join (18 stitches)
Child Size
Rnd 1: Ch 2, *hdc2tog*, join (38 stitches)
Rnd 2: Ch 2, *hdc2tog*, join (19 stitches)
Adult Size
Rnd 1: Ch 2, *hdc2tog*, join (42 stitches)
Rnd 2: Ch 2, *hdc2tog*, join (21 stitches)
Fasten off, leaving a long tail for sewing. Use your yarn needle to sew the top closed.
Adding the brim
The brim is made separately and then sewn onto the hat. I used a G-6 (4 mm) crochet hook size.
Row 1: Ch 9, sc in 2nd ch from hook and each rem ch, turn (8 stitches)
Row 2: Ch 1, sc in each st in the back loops only, turn (8 stitches)
- Toddler Size: Repeat row 2 for a total of 72 rows.
- Child Size: Repeat row 2 for a total of 76 rows.
- Adult Size: Repeat row 2 for a total of 84 rows.
Use your yarn needle to sew the brim to the hat. Sew each stitch from the hat to a row of the brim. The brim will stretch as you go.
Adding a pom pom
- Wind the yarn around both arches.
- Cut the yarn along the middle gap.
- Tie with a piece of scrap yarn.
- Open the arches and remove the pom pom.
- Trim any loose ends.
Attach the pom pom to the top of your hat.
Finishing
Weave in your ends.
Frequently asked questions
Is this hat worked in the round?
The main body is worked flat in rows. The top shaping is done in the round after seaming.
Do I have to follow the graph?
No. You can use either the picture graph or the written color stitch counts.
Can I use a different weight yarn?
This pattern is written for worsted weight yarn #4. Using a different weight yarn will change the finished size and fit.
Is the pom pom required?
No. The pom pom is optional and decorative.
Is this beginner-friendly?
It is best for advanced beginners who are comfortable with color changes and sewing seams.
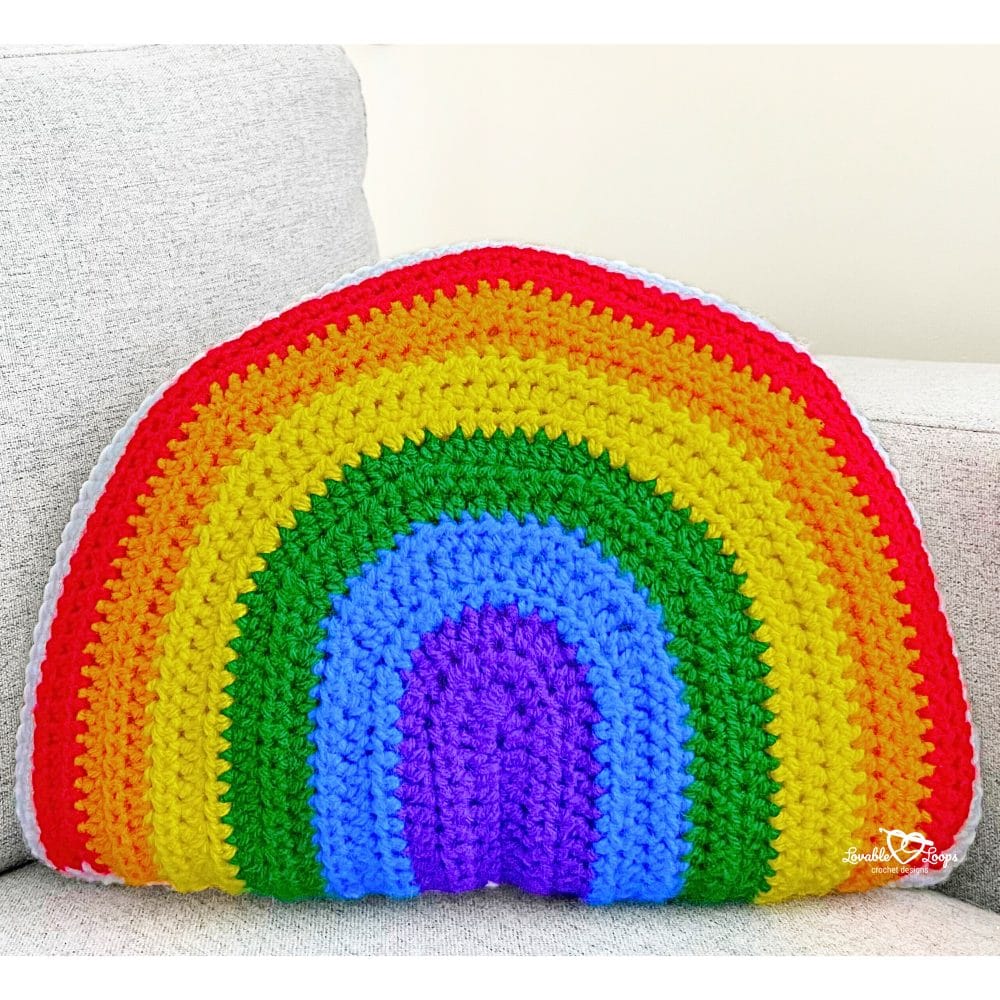
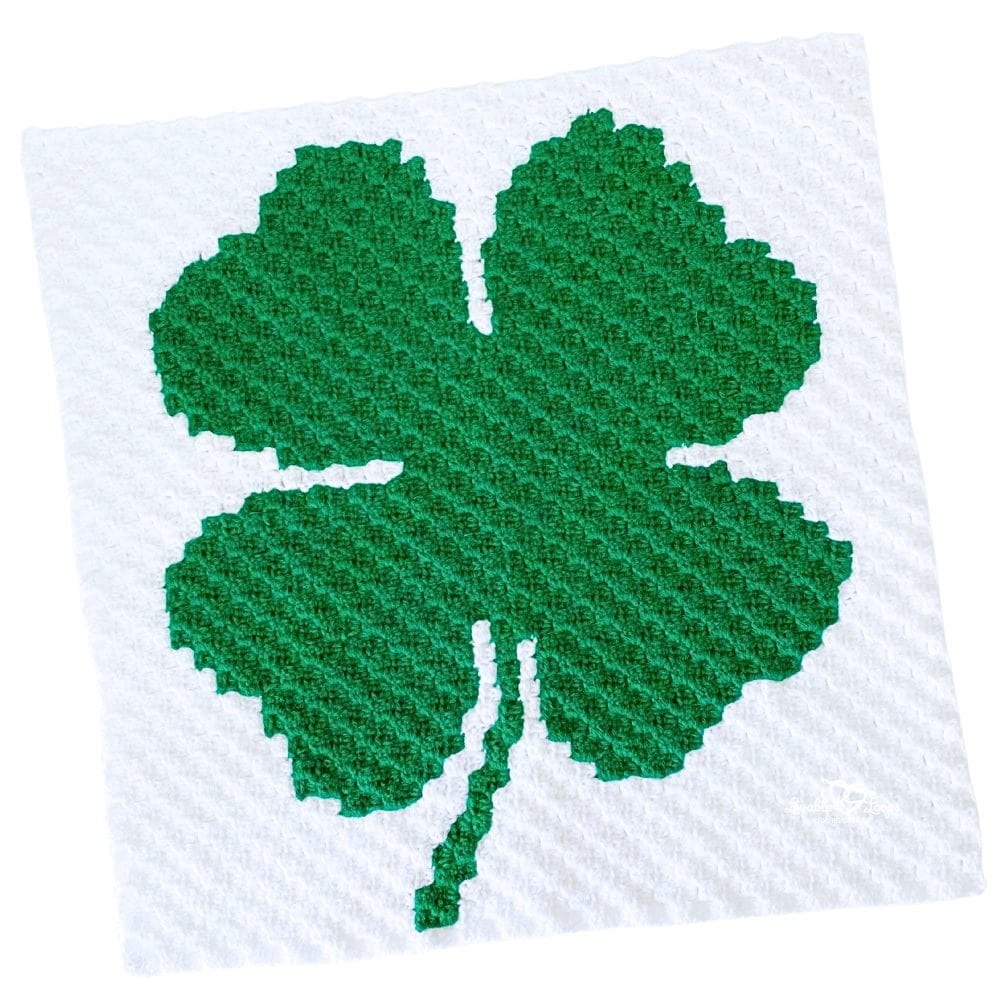
More St. Patrick’s Day crochet patterns
If you love decorating with rainbows and lucky greens, you’ll also enjoy these festive St. Patrick’s Day crochet patterns. From shamrocks to seasonal home décor, these projects are perfect for adding a handmade touch to your spring decorating.
Scroll through the gallery below to find your next lucky crochet project.

Free crochet hat patterns
Love making cozy hats? Explore even more free crochet hat and beanie patterns that are perfect for every season and style. From classic beanies and warm winter hats to playful designs for kids and trendy accessories for adults, you’ll find inspiration for your next project here.


Let’s connect!
I’d love to see what you’re making! Share your finished project and follow along for more free crochet patterns and tutorials.
📌 Don’t forget to pin this pattern for later!
Happy crocheting! 🧶
— Melissa