
Turtle bucket hat crochet pattern
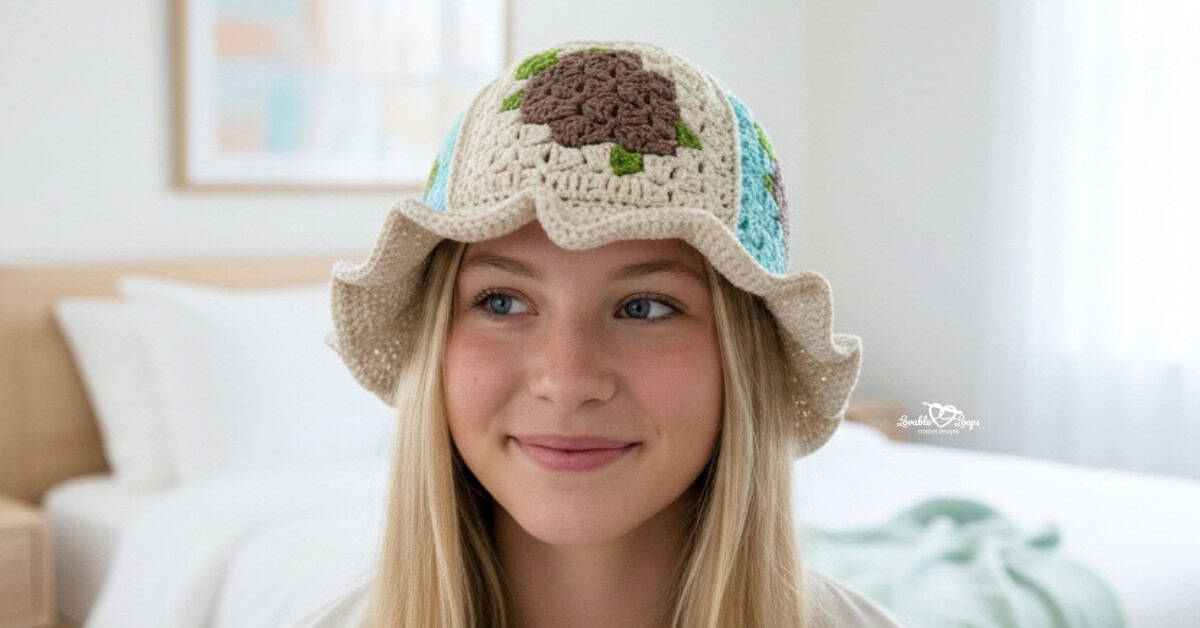
I’m so excited to share my Land & Sea Turtle Crochet Bucket Hat pattern with you. This hat is perfect for summer and super fun to make! You crochet four c2c turtle squares, sew them together, and then add the crown and brim. It’s a great project for any turtle lover. One size fits most teens and adults. Let’s get started and make a cool hat for those sunny days! The free crochet pattern is below.

Free Crochet Bucket Hat Pattern
A bucket hat is a versatile and stylish hat with a wide brim that slopes down all around it. The name comes from its shape, which looks a bit like an upside-down bucket. This hat is great for keeping the sun out of your eyes and off your face.
It’s perfect for outdoor activities like fishing, gardening, or just enjoying a sunny day. Bucket hats are very trendy and come in lots of different colors and patterns. They’re also quite easy to crochet, making them a fun project for beginners!
Complete your look with my matching Land & Sea Turtle Bag pattern for an extra stylish and fun ensemble. Dive into this exciting project and show off your crochet skills!
Crochet Project Materials Needed
- Crochet Hook Size:
G-6 4 mm (turtle squares)
H-8 5 mm (hat crown & brim) - Yarn: Worsted weight yarn in green, brown, blue, and tan. I used Lion Brand Yarns 24/7 Cotton in grass, cafe au lait, aqua, and ecru.
- Yarn needle: Use this to weave in your ends.
- Scissors: Use scissors to fasten off your yarn.
- Stitch marker(s): Optional. Use these to help keep track of your stitches.
The Best Yarn for Bucket Hats
When making a bucket hat, the best yarn to use is medium-weight cotton yarn. Cotton yarn is perfect because it’s breathable, which helps keep you cool in the sun. It’s also lightweight and very comfortable to wear.
Another advantage is that cotton yarn holds its shape well, ensuring your hat looks neat and stays durable. Plus, cotton yarn comes in many vibrant colors, allowing you to create a hat that perfectly matches your style. Overall, cotton yarn is ideal for making a comfy, stylish, and durable bucket hat!
Yardage
My hat weighs 140 grams/4.9 ounces.
PDF Version
View this pattern in my Etsy shop: Turtle Crochet Bucket Hat Pattern
Crochet Bucket Hat Pattern
Skill Level
Advanced beginners. This crochet hat is made using the corner to corner C2C crochet method. It involves color changes.
Finished Size
One size fits most teens/adults with a head circumference of 20-23 inches.
Need help with crochet hat sizing?
Getting the right fit is one of the most important parts of making a crochet hat.
If you’re unsure about head circumference, negative ease, crown diameter, or hat height, I’ve created a complete Crochet hat sizing guide that walks you through everything step by step.
You’ll learn:
• How to measure head circumference correctly
• How much negative ease to use
• How to calculate crown diameter
• Standard baby, child, and adult size charts
• How to adjust any crochet hat pattern for a better fit
Gauge
C2C Turtle: 8 squares (ch 3 + 3 dc) = 4 inches
Hat Crown: 5 stitches = 1 inch & 2 rounds = 3/4 inch
Hat Brim: 5 stitches = 1 inch & 6 rounds = 1 inch
Crochet Terms
- dc = double crochet
- sc = single crochet
- blo = back loop only
- flo = front loop only
- ch/chs = chain/chains
- st/sts = stitch/stitches
- sl st = slip stitch
- rnd/rnds = round/rounds
- rem = remaining
C2C Crochet Technique
- The pattern is made using the c2c technique of making “squares” back and forth in diagonal rows starting in the bottom right corner and ending in the top left corner.
- Each square is made of a chain 3 + 3 double crochet.
- Chain 6 to start a new row and chain 3 to start a new square.
- You can follow the picture graph or the written pattern.
- The written pattern tells you how many squares to make of each color and in what order.
C2C Video Tutorial
Need C2C help? I have a step by step C2C tutorial for my mini heart square on my YouTube channel.
Pattern Notes
- The pattern is written in US terms.
- You will make 4 turtle squares and then sew them together.
- I made 2 turtles of each background: tan & blue
- The crown is made separately and then attached to the turtle squares.
- Join each round (crown & brim) with a slip stitch to the first stitch made in that round.
- The beginning chain (crown & brim) does not count as a stitch.
- Repeat instructions between the asterisks (*) for the rest of the round.
Crochet Bucket Hat Pattern Instructions
Turtle Squares for the Crochet Bucket Hat Pattern
Crochet 4 turtle squares following the picture graph or the written pattern.
- G-6 4 mm crochet hook
- ↙ You are working on the “right side”.
- ↗ You are working on the “wrong side”.
↙ Row 1: background x 1 (1 square)
↗ Row 2: background x 2 (2 squares)
↙ Row 3: background x 3 (3 squares)
↗ Row 4: background x 4 (4 squares)
↙ Row 5: background x 1, green x 1, brown, green x 1, background x 1 (5 squares)
↗ Row 6: background x 2, brown x 2, background x 2 (6 squares)
↙ Row 7: background x 2, brown x 3, background x 2 (7 squares)
↗ Row 8: background x 2, brown x 4, background x 2 (8 squares)
↙ Row 9: background x 3, brown x 3, background x 3 (9 squares)
Corner: Start decreasing on both ends
↗ Row 10: background x 2, brown x 4, background x 2 (8 squares)
↙ Row 11: background x 2, brown x 3, background x 2 (7 squares)
↗ Row 12: background x 1, green x 1, brown x 2, green x 1, background x 1 (6 squares)
↙ Row 13: background x 2, green x 1, background x 2 (5 squares)
↗ Row 14: background x 1, green x 2, background x 1 (4 squares)
↙ Row 15: background x 1, green x 1, background x 1 (3 squares)
↗ Row 16: background x 2 (2 squares)
↙ Row 17: background x 1 (1 square)
Border: Make 2 sc in each square along the sides and in each corner square make (2 sc, ch 2, 2 sc).

Join the Turtle Squares for the Crochet Bucket Hat Pattern
Join the turtle pieces together by single crocheting through the borders along the sides.
Crown for the Crochet Bucket Hat Pattern
Make the crown of the hat. You will make the crown separately and then sew it to the turtle section.
Rnd 1: Magic circle, ch 2, 12 dc, join (12 stitches)
Rnd 2: Ch 2, 2 dc in each st, join (24 stitches)
Rnd 3: Ch 2, *2 dc, dc in next st*, join (36 stitches)
Rnd 4: Ch 2, *2 dc, dc in next 2 sts*, join (48 stitches)
Rnd 5: Ch 2, *2 dc, dc in next 3 sts*, join (60 stitches)
Rnd 6: Ch 2, *2 dc, dc in next 4 sts*, join (72 stitches)
Now it’s time to join the crown to the top of the turtle squares. Both the crown and the turtle squares have 72 stitches (4 sides x 18 stitches = 72).
Single crochet through the back loops of the crown stitches and the front loops of the turtle border stitches to join them together.
Brim for the Crochet Bucket Hat Pattern
This turtle bucket hat has a wavy style brim. If you prefer a traditional flat, downward sloping brim, follow the instructions from my mushroom bucket hat.
Make the brim of the hat. Join your yarn to the bottom of the turtle section.
Rnd 1: Ch 1, *2 sc flo, sc flo in next 5 sts*, join (84 stitches)
Rnd 2: Ch 1, *2 sc, sc in next 6 sts*, join (96 stitches)
Rnd 3: Ch 1, *2 sc, sc in next 7 sts*, join (108 stitches)
Rnd 4: Ch 1, *2 sc, sc in next 8 sts*, join (120 stitches)
Rnd 5: Ch 1, *2 sc, sc in next 9 sts*, join (132 stitches)
Rnd 6: Ch 1, *2 sc, sc in next 10 sts*, join (144 stitches)
Rnd 7: Ch 1, *2 sc, sc in next 11 sts*, join (156 stitches)
Rnd 8: Ch 1, *2 sc, sc in next 12 sts*, join (168 stitches)
Rnd 9: Ch 1, *2 sc, sc in next 13 sts*, join (180 stitches)
Rnd 10: Ch 1, *2 sc, sc in next 14 sts*, join (192 stitches)
Rnd 11: Ch 1, *2 sc, sc in next 15 sts*, join (204 stitches)
Rnd 12: Ch 1, *2 sc, sc in next 16 sts*, join (276 stitches)
Rnd 13: Ch 1, *2 sc, sc in next 17 sts*, join (348 stitches)
Finishing the Crochet Bucket Hat Pattern
Fasten off and then weave in your ends.

More free crochet hat patterns
Looking for more crochet hat ideas? Browse my full collection of free crochet hat patterns for babies, kids, and adults. You’ll find everything from classic crochet beanies and cozy winter hats to playful animal hats and seasonal designs — all written with clear instructions and helpful sizing details.


Let’s connect!
I’d love to see what you’re making! Share your finished project and follow along for more free crochet patterns and tutorials.
📌 Don’t forget to pin this pattern for later!
Happy crocheting! 🧶
— Melissa