
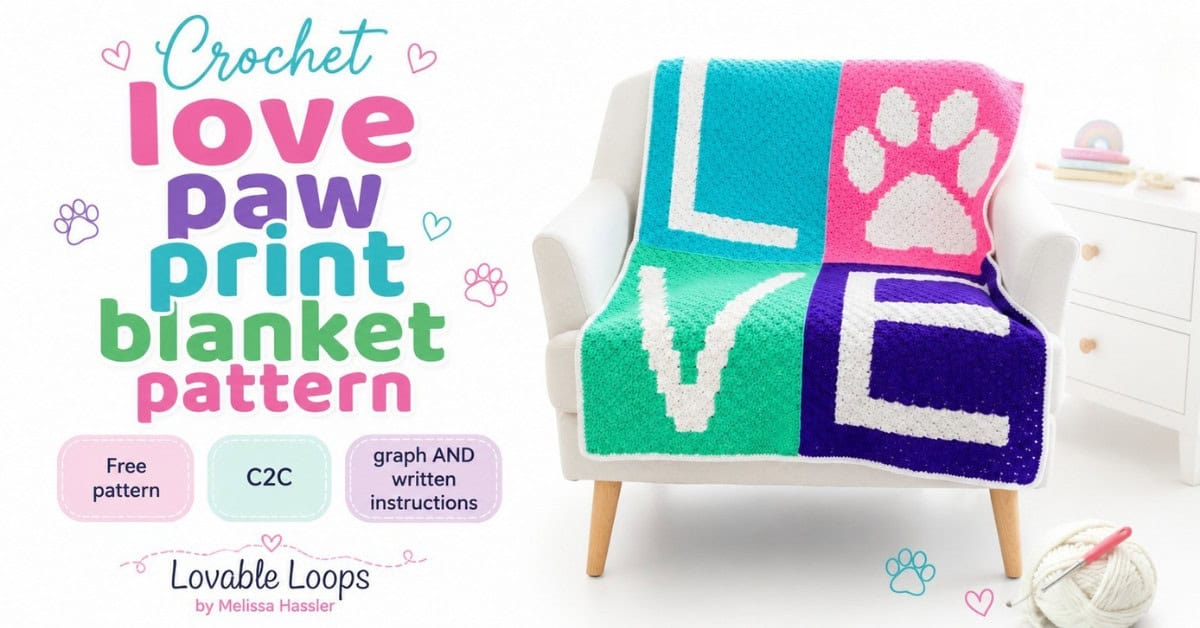
Crochet love paw print blanket pattern
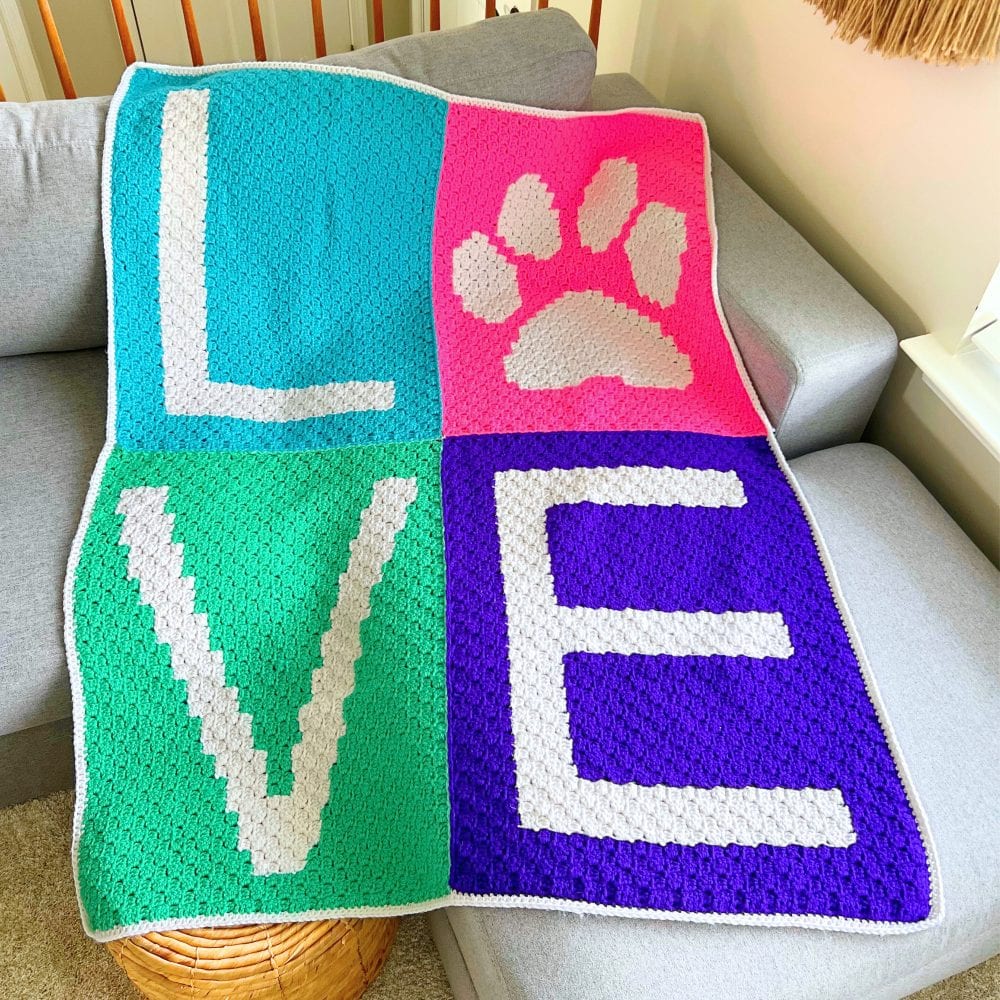
Want a crochet blanket that celebrates the love we have for our pets? This crochet love paw print blanket pattern is a corner-to-corner (C2C) design made from 4 rectangular panels that are sewn together to create one cozy blanket. It’s an advanced beginner-friendly project with simple color changes and a meaningful pet-inspired design.
Quick answer
This crochet love paw print blanket pattern is a corner-to-corner (C2C) design made from 4 rectangular panels that are sewn together. Each panel measures about 20 x 27.5 inches (51 x 70 cm), and the finished blanket measures about 44 x 55 inches (112 x 140 cm).
Best for: Advanced beginners
Style: C2C blanket made from paw print panels
Includes: Blanket details, written instructions, and FAQs
What is corner-to-corner crochet (C2C)?
Corner-to-corner crochet, also called C2C, is a method worked diagonally in small blocks made with chains and double crochet stitches. In this blanket, each paw print panel is crocheted separately, then joined together to create the finished design.
Why you’ll love this pattern
- Pet-lover friendly design — A sweet paw print motif for dog lovers, cat lovers, and animal lovers alike.
- Manageable construction — Crochet 4 separate panels, then join them together.
- Advanced beginner-friendly — Uses standard C2C blocks with simple color changes.
- Great gift idea — Perfect for pet owners, memorial blankets, or heartfelt handmade gifts.
- Easy to customize — Swap colors to match your home, a favorite pet, or a special theme.
Pattern details
Here’s a quick overview of the materials, finished size, gauge, and pattern notes before you begin.
Skill level
Advanced beginner — This pattern uses standard corner-to-corner (C2C) blocks with simple color changes. You should already feel comfortable with the basic C2C stitch before you begin.
Materials needed
- Crochet hook size: J-10 6 mm crochet hook
- Yarn: Worsted weight yarn in white, blue, pink, green, and purple
- Yarn needle: Use this to weave in your ends.
- Scissors: Use scissors to fasten off your yarn.
- Stitch marker(s): Use these to help keep track of your stitches.
Finished size
Each rectangle panel measures 20 x 27.5 inches (51 x 70 cm).
Once all four panels are sewn together and the blanket is finished, the completed blanket measures approximately 44 x 55 inches (112 x 140 cm).
Gauge
Gauge isn’t super critical for a blanket, but it will affect your finished size. If your gauge is looser or tighter than mine, your blanket may turn out bigger or smaller.
8 C2C blocks (ch 3 + 3 dc) = 5 inches (12.7 cm)
Too many blocks in 5 inches? Try a larger hook.
Too few blocks in 5 inches? Try a smaller hook.
Crochet abbreviations
- dc = double crochet
- sc = single crochet
- hdc = half double crochet
- ch/chs = chain/chains
- st/sts = stitch/stitches
- sl st = slip stitch
Terminology note: In this post, a panel is one finished rectangular section of the blanket (Letter L, Paw print (O), Letter V, or Letter E). A C2C block is the small stitch unit (ch 3 + 3 dc) that makes up the panel.
Pattern notes
- This blanket uses the corner-to-corner (C2C) technique.
- You will crochet all 4 panels first, then sew them together to make the blanket.
- You can follow the graph or the written instructions for each panel.
- Each C2C block is made of ch 3 + 3 dc.
- ↙ Right-side rows: You are looking at the front of the panel.
- ↗ Wrong-side rows: You are looking at the back of the panel.
- Tip: In C2C, you turn your work at the end of each row, so the front and back alternate.
- The pattern is written in US crochet terms.
Crochet love paw print blanket pattern instructions
Each panel includes a C2C graph (printable PDF) and written instructions—use whichever is easier for you. Once all 4 panels are finished, sew them together to assemble the blanket.
Border for each panel: Join yarn, ch 1, then work 2 sc in the side of each C2C block. In each corner, work (2 sc, ch 2, 2 sc). Sl st to join and fasten off.
Letter L panel
Graph: crochet letter L graph
Written instructions:
↙ Row 1: blue x 1 (1 block)
↗ Row 2: blue x 2 (2 blocks)
↙ Row 3: blue x 3 (3 blocks)
↗ Row 4: blue x 4 (4 blocks)
↙ Row 5: blue x 5 (5 blocks)
↗ Row 6: blue x 6 (6 blocks)
↙ Row 7: blue x 7 (7 blocks)
↗ Row 8: blue x 8 (8 blocks)
↙ Row 9: blue x 4, white x 1, blue x 4 (9 blocks)
↗ Row 10: blue x 4, white x 2, blue x 4 (10 blocks)
↙ Row 11: blue x 4, white x 3, blue x 4 (11 blocks)
↗ Row 12: blue x 4, white x 4, blue x 4 (12 blocks)
↙ Row 13: blue x 5, white x 4, blue x 4 (13 blocks)
↗ Row 14: blue x 4, white x 4, blue x 6 (14 blocks)
↙ Row 15: blue x 7, white x 4, blue x 4 (15 blocks)
↗ Row 16: blue x 4, white x 4, blue x 8 (16 blocks)
↙ Row 17: blue x 9, white x 4, blue x 4 (17 blocks)
↗ Row 18: blue x 4, white x 4, blue x 10 (18 blocks)
↙ Row 19: blue x 11, white x 4, blue x 4 (19 blocks)
↗ Row 20: blue x 4, white x 4, blue x 12 (20 blocks)
↙ Row 21: blue x 13, white x 4, blue x 4 (21 blocks)
↗ Row 22: blue x 4, white x 4, blue x 14 (22 blocks)
↙ Row 23: blue x 15, white x 4, blue x 4 (23 blocks)
↗ Row 24: blue x 4, white x 4, blue x 16 (24 blocks)
↙ Row 25: blue x 17, white x 4, blue x 4 (25 blocks)
↗ Row 26: blue x 4, white x 4, blue x 18 (26 blocks)
↙ Row 27: blue x 19, white x 4, blue x 4 (27 blocks)
↗ Row 28: blue x 4, white x 4, blue x 20 (28 blocks)
↙ Row 29: blue x 21, white x 4, blue x 4 (29 blocks)
↗ Row 30: blue x 4, white x 4, blue x 22 (30 blocks)
Corner: Start decreasing on RS
↙ Row 31: blue x 22, white x 4, blue x 4 (30 blocks)
↗ Row 32: blue x 4, white x 4, blue x 22 (30 blocks)
↙ Row 33: blue x 22, white x 4, blue x 4 (30 blocks)
↗ Row 34: blue x 4, white x 4, blue x 22 (30 blocks)
↙ Row 35: blue x 22, white x 4, blue x 4 (30 blocks)
↗ Row 36: blue x 4, white x 4, blue x 22 (30 blocks)
↙ Row 37: blue x 22, white x 4, blue x 4 (30 blocks)
↗ Row 38: blue x 4, white x 4, blue x 22 (30 blocks)
↙ Row 39: blue x 22, white x 4, blue x 4 (30 blocks)
↗ Row 40: blue x 4, white x 4, blue x 22 (30 blocks)
Corner: Start decreasing on RS
↙ Row 41: blue x 21, white x 4, blue x 4 (29 blocks)
↗ Row 42: blue x 4, white x 4, blue x 20 (28 blocks)
↙ Row 43: blue x 19, white x 4, blue x 4 (27 blocks)
↗ Row 44: blue x 4, white x 4, blue x 18 (26 blocks)
↙ Row 45: blue x 17, white x 4, blue x 4 (25 blocks)
↗ Row 46: blue x 4, white x 4, blue x 16 (24 blocks)
↙ Row 47: blue x 15, white x 4, blue x 4 (23 blocks)
↗ Row 48: blue x 4, white x 4, blue x 14 (22 blocks)
↙ Row 49: blue x 13, white x 4, blue x 4 (21 blocks)
↗ Row 50: blue x 4, white x 4, blue x 12 (20 blocks)
↙ Row 51: blue x 11, white x 4, blue x 4 (19 blocks)
↗ Row 52: blue x 4, white x 4, blue x 10 (18 blocks)
↙ Row 53: blue x 9, white x 4, blue x 4 (17 blocks)
↗ Row 54: blue x 4, white x 4, blue x 8 (16 blocks)
↙ Row 55: blue x 7, white x 4, blue x 4 (15 blocks)
↗ Row 56: blue x 4, white x 4, blue x 6 (14 blocks)
↙ Row 57: blue x 5, white x 4, blue x 4 (13 blocks)
↗ Row 58: blue x 4, white x 4, blue x 4 (12 blocks)
↙ Row 59: blue x 4, white x 3, blue x 4 (11 blocks)
↗ Row 60: blue x 4, white x 2, blue x 4 (10 blocks)
↙ Row 61: blue x 4, white x 1, blue x 4 (9 blocks)
↗ Row 62: blue x 8 (8 blocks)
↙ Row 63: blue x 7 (7 blocks)
↗ Row 64: blue x 6 (6 blocks)
↙ Row 65: blue x 5 (5 blocks)
↗ Row 66: blue x 4 (4 blocks)
↙ Row 67: blue x 3 (3 blocks)
↗ Row 68: blue x 2 (2 blocks)
↙ Row 69: blue x 1 (1 block)
Paw print (O) panel
Graph: crochet paw print graph
Written instructions:
↙ Row 1: pink x 1 (1 block)
↗ Row 2: pink x 2 (2 blocks)
↙ Row 3: pink x 3 (3 blocks)
↗ Row 4: pink x 4 (4 blocks)
↙ Row 5: pink x 5 (5 blocks)
↗ Row 6: pink x 6 (6 blocks)
↙ Row 7: pink x 7 (7 blocks)
↗ Row 8: pink x 8 (8 blocks)
↙ Row 9: pink x 9 (9 blocks)
↗ Row 10: pink x 10 (10 blocks)
↙ Row 11: pink x 11 (11 blocks)
↗ Row 12: pink x 12 (12 blocks)
↙ Row 13: pink x 13 (13 blocks)
↗ Row 14: pink x 6, white x 2, pink x 6 (14 blocks)
↙ Row 15: pink x 6, white x 3, pink x 6 (15 blocks)
↗ Row 16: pink x 6, white x 4, pink x 6 (16 blocks)
↙ Row 17: pink x 6, white x 5, pink x 6 (17 blocks)
↗ Row 18: pink x 6, white x 5, pink x 7 (18 blocks)
↙ Row 19: pink x 7, white x 6, pink x 6 (19 blocks)
↗ Row 20: pink x 7, white x 6, pink x 7 (20 blocks)
↙ Row 21: pink x 8, white x 6, pink x 7 (21 blocks)
↗ Row 22: pink x 7, white x 7, pink x 2, white x 3, pink x 3 (22 blocks)
↙ Row 23: pink x 2, white x 5, pink x 1, white x 8, pink x 7 (23 blocks)
↗ Row 24: pink x 6, white x 9, pink x 2, white x 5, pink x 2 (24 blocks)
↙ Row 25: pink x 2, white x 6, pink x 1, white x 10, pink x 6 (25 blocks)
↗ Row 26: pink x 6, white x 10, pink x 2, white x 6, pink x 2 (26 blocks)
↙ Row 27: pink x 2, white x 7, pink x 1, white x 11, pink x 6 (27 blocks)
↗ Row 28: pink x 6, white x 11, pink x 2, white x 6, pink x 3 (28 blocks)
↙ Row 29: pink x 3, white x 6, pink x 2, white x 12, pink x 6 (29 blocks)
↗ Row 30: pink x 7, white x 11, pink x 3, white x 5, pink x 4 (30 blocks)
Corner: Start decreasing on RS
↙ Row 31: pink x 4, white x 5, pink x 3, white x 12, pink x 6 (30 blocks)
↗ Row 32: pink x 6, white x 11, pink x 4, white x 4, pink x 5 (30 blocks)
↙ Row 33: pink x 13, white x 11, pink x 6 (30 blocks)
↗ Row 34: pink x 6, white x 10, pink x 14 (30 blocks)
↙ Row 35: pink x 7, white x 3, pink x 5, white x 8, pink x 7 (30 blocks)
↗ Row 36: pink x 8, white x 6, pink x 4, white x 5, pink x 7 (30 blocks)
↙ Row 37: pink x 7, white x 6, pink x 17 (30 blocks)
↗ Row 38: pink x 17, white x 6, pink x 7 (30 blocks)
↙ Row 39: pink x 7, white x 7, pink x 16 (30 blocks)
↗ Row 40: pink x 6, white x 3, pink x 7, white x 7, pink x 7 (30 blocks)
Corner: Start decreasing on RS
↙ Row 41: pink x 7, white x 6, pink x 7, white x 4, pink x 5 (29 blocks)
↗ Row 42: pink x 5, white x 4, pink x 3, white x 2, pink x 2, white x 6, pink x 6 (28 blocks)
↙ Row 43: pink x 6, white x 5, pink x 2, white x 3, pink x 2, white x 5, pink x 4 (27 blocks)
↗ Row 44: pink x 4, white x 5, pink x 2, white x 3, pink x 3, white x 3, pink x 6 (26 blocks)
↙ Row 45: pink x 11, white x 4, pink x 1, white x 6, pink x 3 (25 blocks)
↗ Row 46: pink x 3, white x 5, pink x 1, white x 5, pink x 10 (24 blocks)
↙ Row 47: pink x 10, white x 4, pink x 1, white x 5, pink x 3 (23 blocks)
↗ Row 48: pink x 2, white x 5, pink x 1, white x 5, pink x 9 (22 blocks)
↙ Row 49: pink x 8, white x 5, pink x 1, white x 5, pink x 2 (21 blocks)
↗ Row 50: pink x 2, white x 4, pink x 1, white x 5, pink x 8 (20 blocks)
↙ Row 51: pink x 7, white x 5, pink x 1, white x 4, pink x 2 (19 blocks)
↗ Row 52: pink x 2, white x 3, pink x 2, white x 4, pink x 7 (18 blocks)
↙ Row 53: pink x 6, white x 4, pink x 7 (17 blocks)
↗ Row 54: pink x 7, white x 3, pink x 6 (16 blocks)
↙ Row 55: pink x 6, white x 2, pink x 7 (15 blocks)
↗ Row 56: pink x 14 (14 blocks)
↙ Row 57: pink x 13 (13 blocks)
↗ Row 58: pink x 12 (12 blocks)
↙ Row 59: pink x 11 (11 blocks)
↗ Row 60: pink x 10 (10 blocks)
↙ Row 61: pink x 9 (9 blocks)
↗ Row 62: pink x 8 (8 blocks)
↙ Row 63: pink x 7 (7 blocks)
↗ Row 64: pink x 6 (6 blocks)
↙ Row 65: pink x 5 (5 blocks)
↗ Row 66: pink x 4 (4 blocks)
↙ Row 67: pink x 3 (3 blocks)
↗ Row 68: pink x 2 (2 blocks)
↙ Row 69: pink x 1 (1 block)
Letter V panel
Graph: crochet letter V graph
Written instructions:
↙ Row 1: green x 1 (1 block)
↗ Row 2: green x 2 (2 blocks)
↙ Row 3: green x 3 (3 blocks)
↗ Row 4: green x 4 (4 blocks)
↙ Row 5: green x 5 (5 blocks)
↗ Row 6: green x 6 (6 blocks)
↙ Row 7: green x 7 (7 blocks)
↗ Row 8: green x 8 (8 blocks)
↙ Row 9: green x 9 (9 blocks)
↗ Row 10: green x 10 (10 blocks)
↙ Row 11: green x 11 (11 blocks)
↗ Row 12: green x 12 (12 blocks)
↙ Row 13: green x 13 (13 blocks)
↗ Row 14: green x 14 (14 blocks)
↙ Row 15: green x 15 (15 blocks)
↗ Row 16: green x 16 (16 blocks)
↙ Row 17: green x 13, white x 1, green x 3 (17 blocks)
↗ Row 18: green x 3, white x 3, green x 12 (18 blocks)
↙ Row 19: green x 12, white x 4, green x 3 (19 blocks)
↗ Row 20: green x 3, white x 6, green x 11 (20 blocks)
↙ Row 21: green x 11, white x 6, green x 4 (21 blocks)
↗ Row 22: green x 5, white x 7, green x 10 (22 blocks)
↙ Row 23: green x 9, white x 9, green x 5 (23 blocks)
↗ Row 24: green x 6, white x 3, green x 1, white x 5, green x 9 (24 blocks)
↙ Row 25: green x 8, white x 6, green x 2, white x 2, green x 7 (25 blocks)
↗ Row 26: green x 8, white x 2, green x 2, white x 6, green x 8 (26 blocks)
↙ Row 27: green x 7, white x 6, green x 3, white x 3, green x 8 (27 blocks)
↗ Row 28: green x 9, white x 3, green x 3, white x 6, green x 7 (28 blocks)
↙ Row 29: green x 6, white x 6, green x 4, white x 3, green x 10 (29 blocks)
↗ Row 30: green x 11, white x 2, green x 5, white x 6, green x 6 (30 blocks)
Corner: Start decreasing on RS
↙ Row 31: green x 5, white x 6, green x 6, white x 3, green x 10 (30 blocks)
↗ Row 32: green x 10, white x 3, green x 6, white x 7, green x 4 (30 blocks)
↙ Row 33: green x 4, white x 6, green x 7, white x 3, green x 10 (30 blocks)
↗ Row 34: green x 9, white x 3, green x 9, white x 6, green x 3 (30 blocks)
↙ Row 35: green x 3, white x 6, green x 9, white x 3, green x 9 (30 blocks)
↗ Row 36: green x 9, white x 3, green x 10, white x 6, green x 2 (30 blocks)
↙ Row 37: green x 2, white x 6, green x 11, white x 2, green x 9 (30 blocks)
↗ Row 38: green x 8, white x 3, green x 12, white x 5, green x 2 (30 blocks)
↙ Row 39: green x 3, white x 4, green x 12, white x 3, green x 8 (30 blocks)
↗ Row 40: green x 8, white x 3, green x 13, white x 2, green x 4 (30 blocks)
Corner: Start decreasing on RS
↙ Row 41: green x 4, white x 1, green x 14, white x 2, green x 8 (29 blocks)
↗ Row 42: green x 7, white x 3, green x 18 (28 blocks)
↙ Row 43: green x 17, white x 3, green x 7 (27 blocks)
↗ Row 44: green x 7, white x 3, green x 16 (26 blocks)
↙ Row 45: green x 16, white x 2, green x 7 (25 blocks)
↗ Row 46: green x 6, white x 3, green x 15 (24 blocks)
↙ Row 47: green x 14, white x 3, green x 6 (23 blocks)
↗ Row 48: green x 6, white x 3, green x 13 (22 blocks)
↙ Row 49: green x 13, white x 2, green x 6 (21 blocks)
↗ Row 50: green x 5, white x 3, green x 12 (20 blocks)
↙ Row 51: green x 11, white x 3, green x 5 (19 blocks)
↗ Row 52: green x 5, white x 3, green x 10 (18 blocks)
↙ Row 53: green x 10, white x 3, green x 4 (17 blocks)
↗ Row 54: green x 4, white x 3, green x 9 (16 blocks)
↙ Row 55: green x 8, white x 3, green x 4 (15 blocks)
↗ Row 56: green x 4, white x 3, green x 7 (14 blocks)
↙ Row 57: green x 7, white x 3, green x 3 (13 blocks)
↗ Row 58: green x 3, white x 3, green x 6 (12 blocks)
↙ Row 59: green x 5, white x 3, green x 3 (11 blocks)
↗ Row 60: green x 3, white x 3, green x 4 (10 blocks)
↙ Row 61: green x 4, white x 3, green x 2 (9 blocks)
↗ Row 62: green x 2, white x 2, green x 4 (8 blocks)
↙ Row 63: green x 4, white x 1, green x 2 (7 blocks)
↗ Row 64: green x 6 (6 blocks)
↙ Row 65: green x 5 (5 blocks)
↗ Row 66: green x 4 (4 blocks)
↙ Row 67: green x 3 (3 blocks)
↗ Row 68: green x 2 (2 blocks)
↙ Row 69: green x 1 (1 block)
Letter E panel
Graph: crochet letter E graph
Written instructions:
↙ Row 1: purple x 1 (1 block)
↗ Row 2: purple x 2 (2 blocks)
↙ Row 3: purple x 3 (3 blocks)
↗ Row 4: purple x 4 (4 blocks)
↙ Row 5: purple x 5 (5 blocks)
↗ Row 6: purple x 6 (6 blocks)
↙ Row 7: purple x 7 (7 blocks)
↗ Row 8: purple x 8 (8 blocks)
↙ Row 9: purple x 4, white x 1, purple x 4 (9 blocks)
↗ Row 10: purple x 4, white x 2, purple x 4 (10 blocks)
↙ Row 11: purple x 4, white x 3, purple x 4 (11 blocks)
↗ Row 12: purple x 4, white x 4, purple x 4 (12 blocks)
↙ Row 13: purple x 5, white x 4, purple x 4 (13 blocks)
↗ Row 14: purple x 4, white x 4, purple x 6 (14 blocks)
↙ Row 15: purple x 7, white x 4, purple x 4 (15 blocks)
↗ Row 16: purple x 4, white x 4, purple x 8 (16 blocks)
↙ Row 17: purple x 9, white x 4, purple x 4 (17 blocks)
↗ Row 18: purple x 4, white x 4, purple x 10 (18 blocks)
↙ Row 19: purple x 11, white x 4, purple x 4 (19 blocks)
↗ Row 20: purple x 4, white x 4, purple x 12 (20 blocks)
↙ Row 21: purple x 13, white x 4, purple x 4 (21 blocks)
↗ Row 22: purple x 4, white x 4, purple x 14 (22 blocks)
↙ Row 23: purple x 4, white x 1, purple x 10, white x 4, purple x 4 (23 blocks)
↗ Row 24: purple x 4, white x 4, purple x 10, white x 2, purple x 4 (24 blocks)
↙ Row 25: purple x 4, white x 3, purple x 10, white x 4, purple x 4 (25 blocks)
↗ Row 26: purple x 4, white x 4, purple x 10, white x 4, purple x 4 (26 blocks)
↙ Row 27: purple x 5, white x 4, purple x 10, white x 4, purple x 4 (27 blocks)
↗ Row 28: purple x 4, white x 4, purple x 10, white x 4, purple x 6 (28 blocks)
↙ Row 29: purple x 7, white x 4, purple x 10, white x 4, purple x 4 (29 blocks)
↗ Row 30: purple x 4, white x 4, purple x 10, white x 4, purple x 8 (30 blocks)
Corner: Start decreasing on RS
↙ Row 31: purple x 9, white x 4, purple x 9, white x 4, purple x 4 (30 blocks)
↗ Row 32: purple x 4, white x 4, purple x 8, white x 4, purple x 10 (30 blocks)
↙ Row 33: purple x 11, white x 4, purple x 7, white x 4, purple x 4 (30 blocks)
↗ Row 34: purple x 4, white x 4, purple x 6, white x 4, purple x 12 (30 blocks)
↙ Row 35: purple x 13, white x 4, purple x 5, white x 4, purple x 4 (30 blocks)
↗ Row 36: purple x 4, white x 4, purple x 4, white x 4, purple x 14 (30 blocks)
↙ Row 37: purple x 4, white x 1, purple x 10, white x 4, purple x 3, white x 4, purple x 4 (30 blocks)
↗ Row 38: purple x 4, white x 4, purple x 2, white x 4, purple x 10, white x 2, purple x 4 (30 blocks)
↙ Row 39: purple x 4, white x 3, purple x 10, white x 4, purple x 1, white x 4, purple x 4 (30 blocks)
↗ Row 40: purple x 4, white x 8, purple x 10, white x 4, purple x 4 (30 blocks)
Corner: Start decreasing on RS
↙ Row 41: purple x 4, white x 4, purple x 10, white x 7, purple x 4 (29 blocks)
↗ Row 42: purple x 4, white x 6, purple x 10, white x 4, purple x 4 (28 blocks)
↙ Row 43: purple x 4, white x 4, purple x 10, white x 5, purple x 4 (27 blocks)
↗ Row 44: purple x 4, white x 4, purple x 10, white x 4, purple x 4 (26 blocks)
↙ Row 45: purple x 4, white x 4, purple x 9, white x 4, purple x 4 (25 blocks)
↗ Row 46: purple x 4, white x 4, purple x 8, white x 4, purple x 4 (24 blocks)
↙ Row 47: purple x 4, white x 4, purple x 7, white x 4, purple x 4 (23 blocks)
↗ Row 48: purple x 4, white x 4, purple x 6, white x 4, purple x 4 (22 blocks)
↙ Row 49: purple x 4, white x 4, purple x 5, white x 4, purple x 4 (21 blocks)
↗ Row 50: purple x 4, white x 4, purple x 4, white x 4, purple x 4 (20 blocks)
↙ Row 51: purple x 4, white x 4, purple x 3, white x 4, purple x 4 (19 blocks)
↗ Row 52: purple x 4, white x 4, purple x 2, white x 4, purple x 4 (18 blocks)
↙ Row 53: purple x 4, white x 4, purple x 1, white x 4, purple x 4 (17 blocks)
↗ Row 54: purple x 4, white x 8, purple x 4 (16 blocks)
↙ Row 55: purple x 4, white x 7, purple x 4 (15 blocks)
↗ Row 56: purple x 4, white x 6, purple x 4 (14 blocks)
↙ Row 57: purple x 4, white x 5, purple x 4 (13 blocks)
↗ Row 58: purple x 4, white x 4, purple x 4 (12 blocks)
↙ Row 59: purple x 4, white x 3, purple x 4 (11 blocks)
↗ Row 60: purple x 4, white x 2, purple x 4 (10 blocks)
↙ Row 61: purple x 4, white x 1, purple x 4 (9 blocks)
↗ Row 62: purple x 8 (8 blocks)
↙ Row 63: purple x 7 (7 blocks)
↗ Row 64: purple x 6 (6 blocks)
↙ Row 65: purple x 5 (5 blocks)
↗ Row 66: purple x 4 (4 blocks)
↙ Row 67: purple x 3 (3 blocks)
↗ Row 68: purple x 2 (2 blocks)
↙ Row 69: purple x 1 (1 block)
Assembling the blanket
Sew your crochet panels together. Make sure they are facing the correct way. You can use locking stitch markers to hold the panels together.
Add the blanket border
Join white yarn in any corner and ch 2. Work hdc evenly in each stitch around the blanket.
In each corner, crochet (hdc, ch 2, hdc).
Finishing
Fasten off and weave in all ends. Block the blanket if desired to help the panels lie flat and the edges look neat. Your love paw print blanket is now ready to gift or use.
Frequently asked questions
Is this a beginner-friendly C2C blanket pattern?
This pattern is best for advanced beginners. You should already be comfortable with basic C2C stitches and simple color changes before starting.
How big is the finished crochet blanket?
The completed blanket measures approximately 44 x 55 inches (112 x 140 cm). Each individual panel measures 20 x 27.5 inches (51 x 70 cm).
What yarn and hook are used for this pattern?
This pattern uses worsted weight yarn in white, blue, pink, green, and purple, along with a J-10 (6 mm) crochet hook.
Can I make this C2C blanket bigger or smaller?
Yes. You can adjust the overall size by using a larger or smaller hook and yarn, or by adding additional rounds to the border. This pattern does not recommend adding more C2C blocks to the panels, as that would change the design proportions.
Can I change the colors or customize the design?
Absolutely. You can swap colors to match your décor or personalize the blanket for a specific pet while keeping the same panel layout.
Printable PDF pattern
If you prefer an easy, print-friendly version of this crochet love paw print blanket pattern, a printable PDF is available in my Etsy shop. The PDF includes the full pattern instructions in a clean, ad-free format, making it perfect for printing or saving on your device.
New to C2C? Start with my video tutorial
If you’re new to corner-to-corner crochet, start with my beginner-friendly C2C video tutorial. It walks you through the basic C2C block, plus increases and decreases, using a small practice panel before you begin the panels for this blanket.

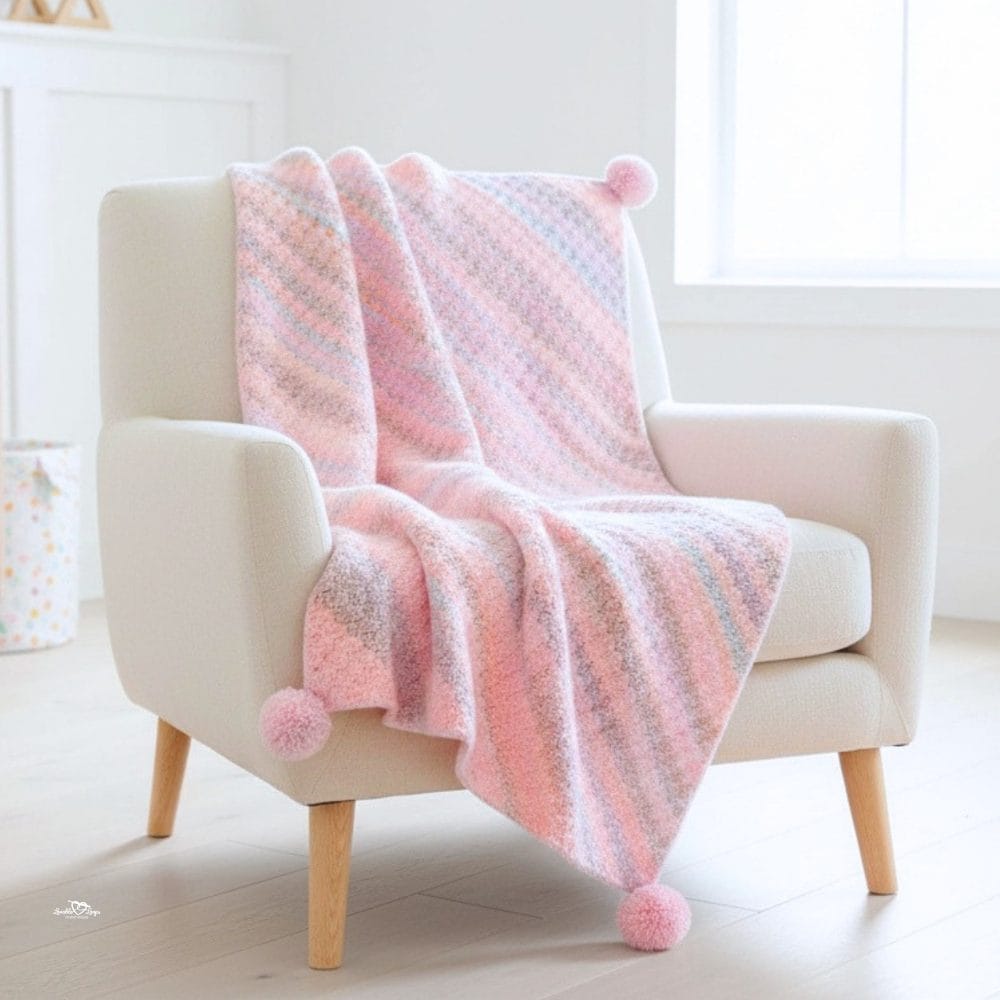
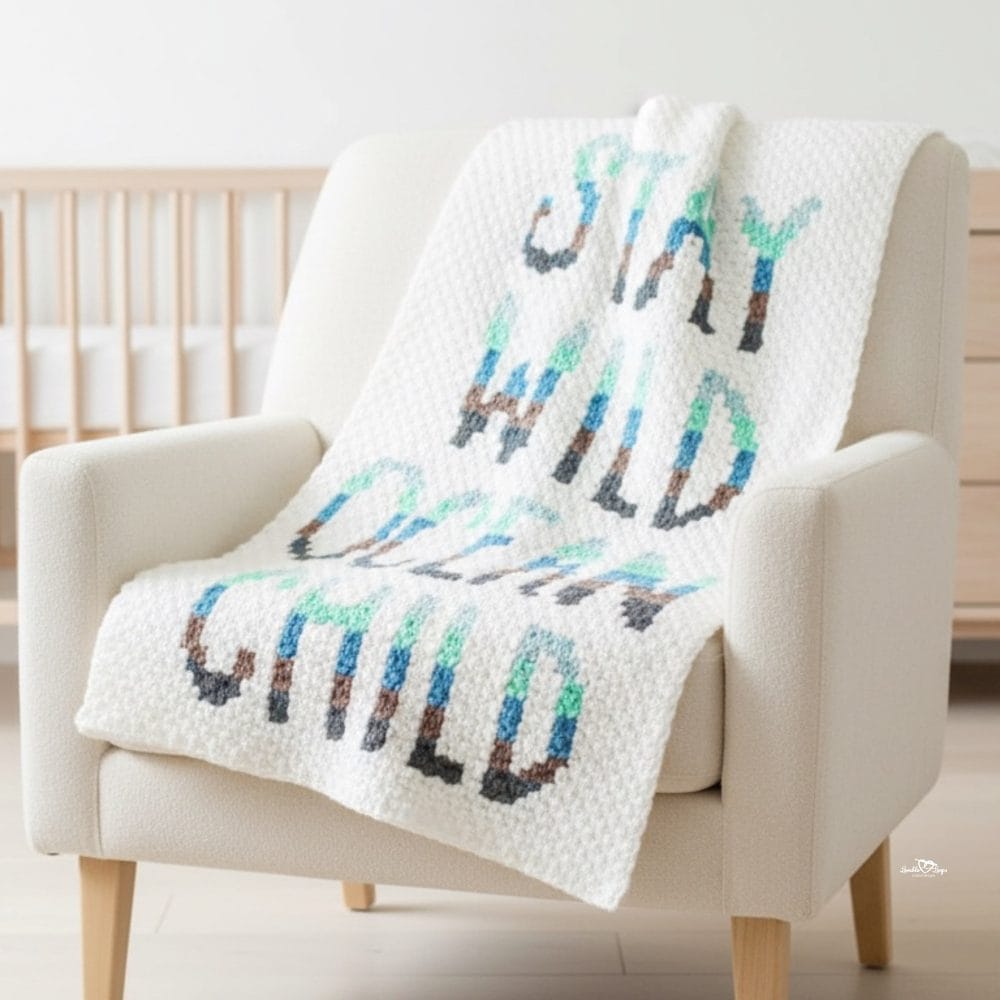
More free crochet blanket patterns
For more cozy ideas, browse my main collection of free crochet blanket patterns, my free crochet baby blanket patterns, and my C2C crochet blanket patterns for more corner-to-corner graph designs.
Let’s connect!
I’d love to see what you’re making! Share your finished project and follow along for more free crochet patterns and tutorials.
📌 Don’t forget to pin this pattern for later!
Happy crocheting! 🧶
— Melissa