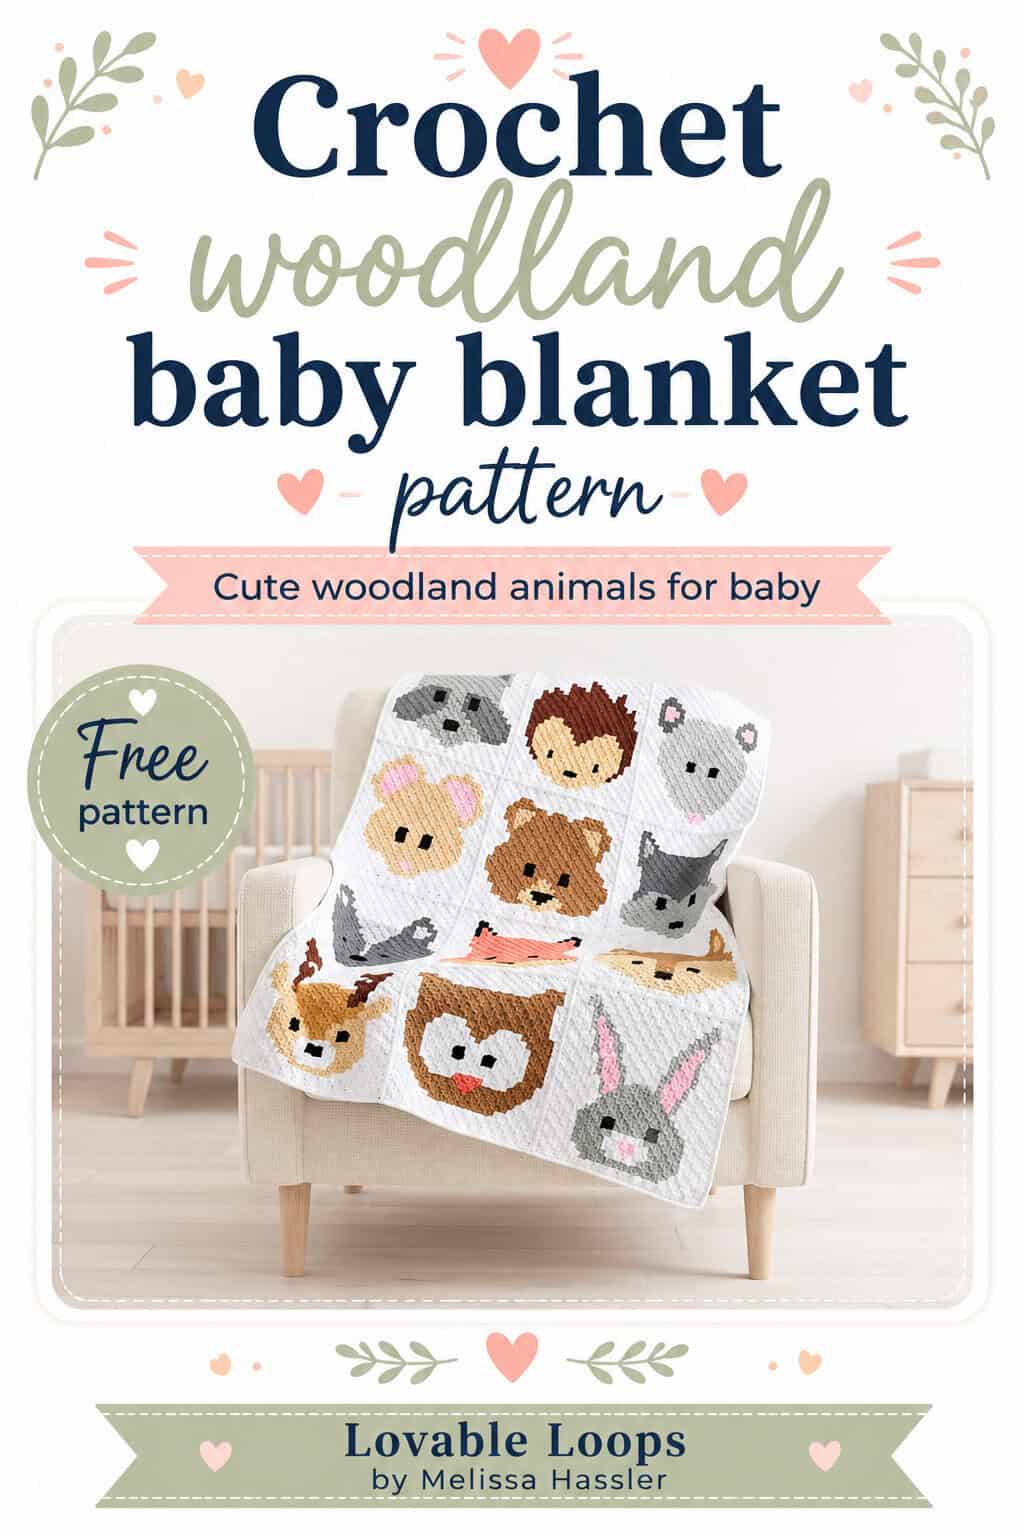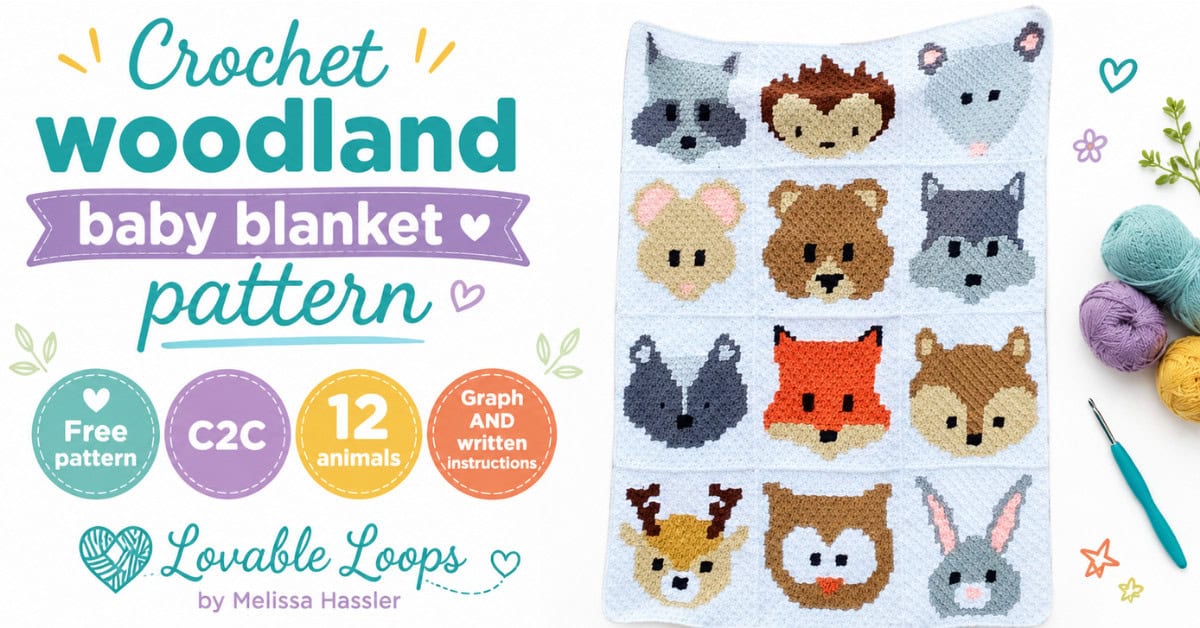
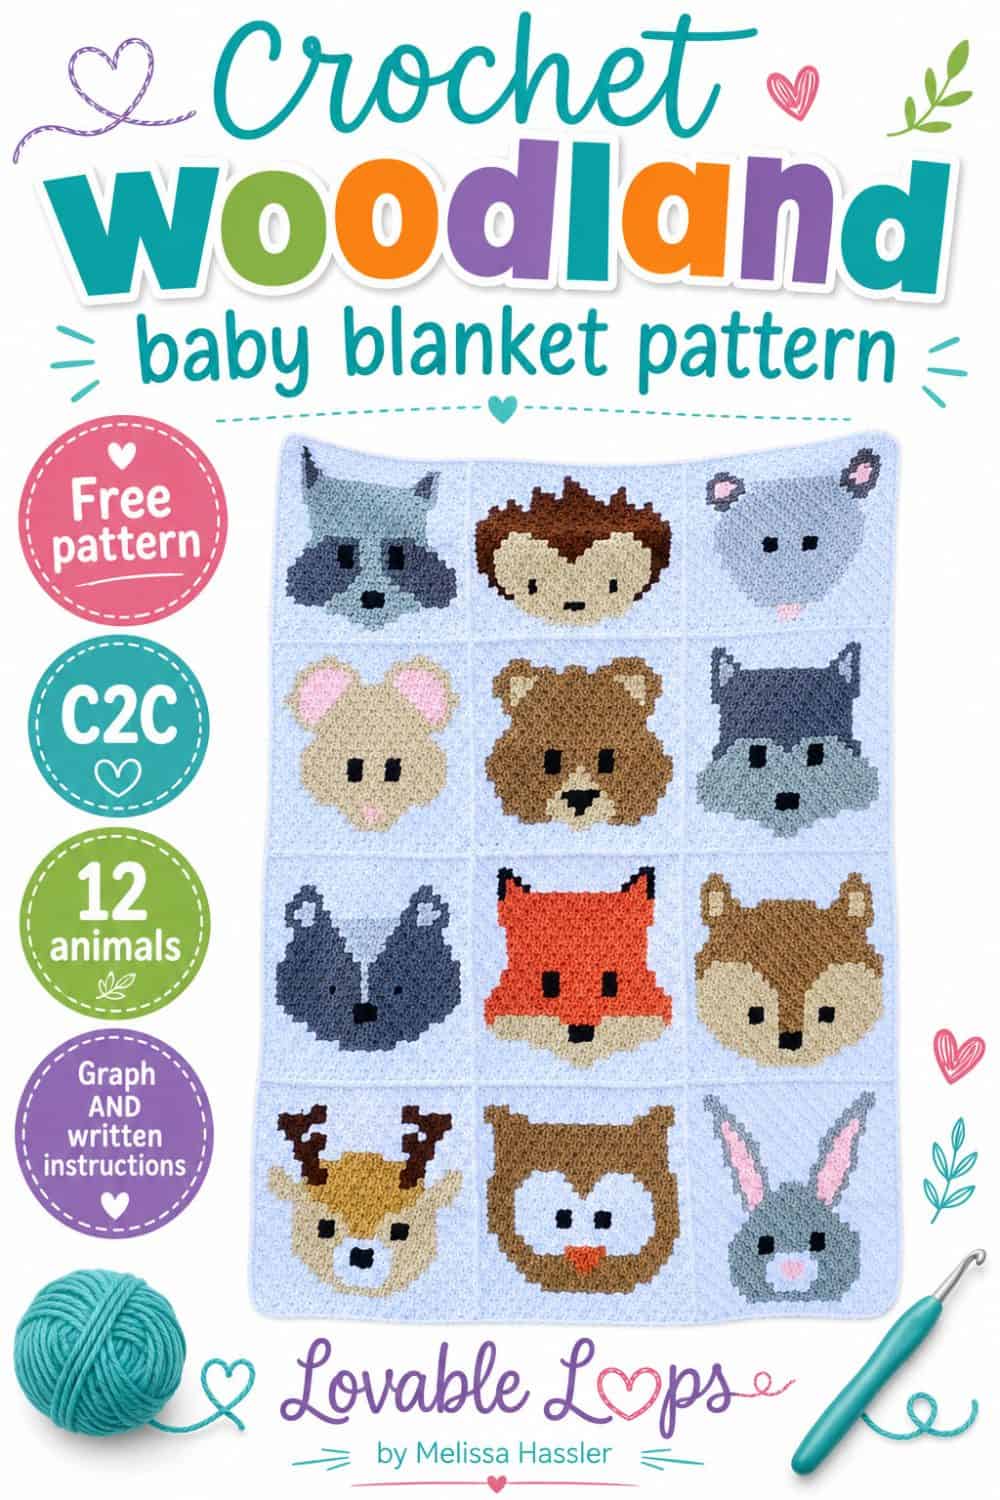
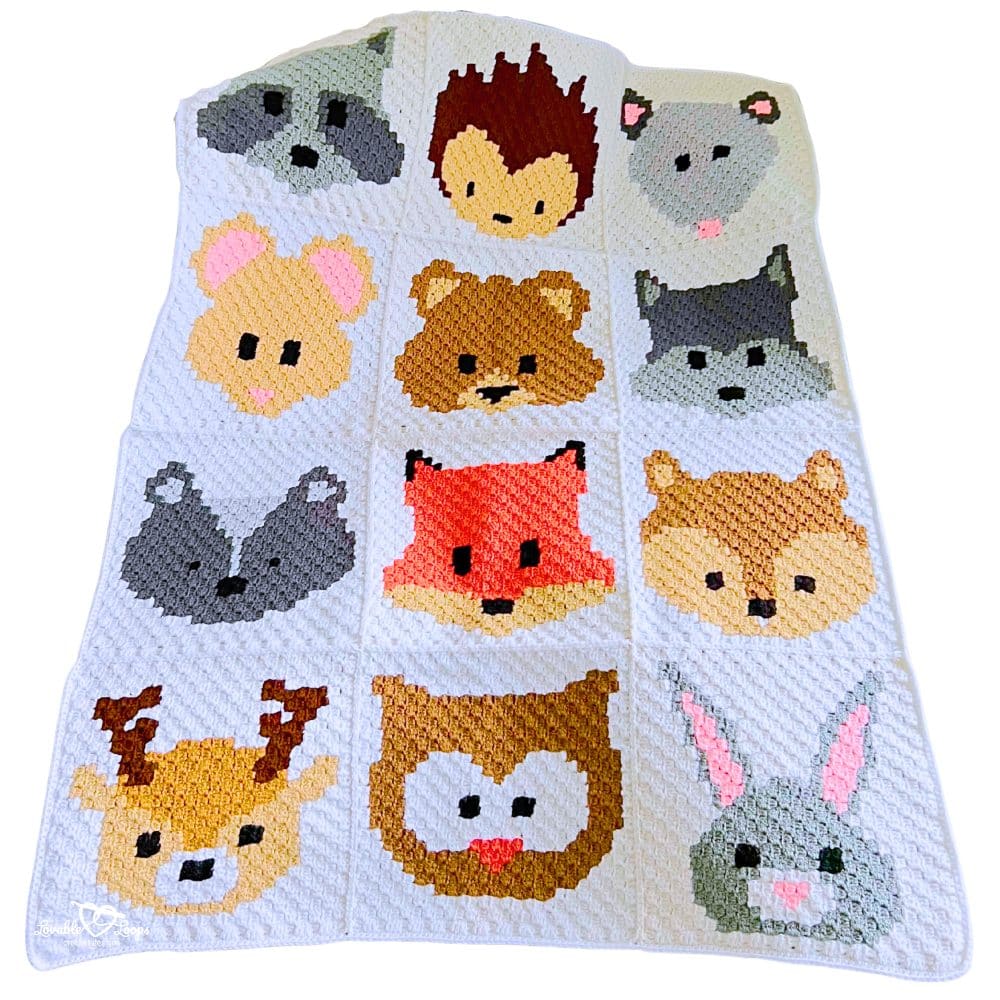
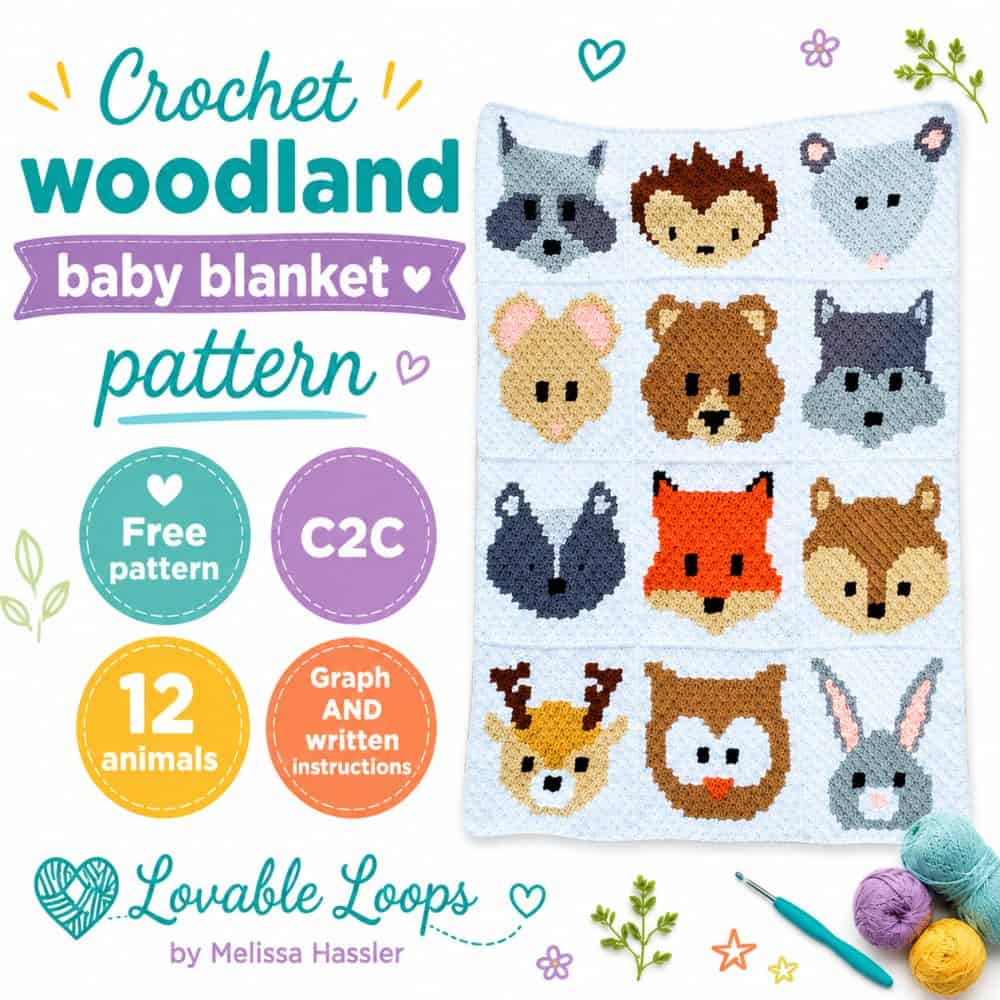
Crochet woodland baby blanket pattern
Love forest animals and cozy baby blankets? This crochet woodland baby blanket pattern is a corner-to-corner (C2C) design made from 12 individual animal panels that are sewn together. It’s a fun project for advanced beginners and includes graphs, written instructions, and finishing details.
Quick answer
This crochet woodland baby blanket pattern is a corner-to-corner (C2C) blanket made from 12 separate animal panels that are crocheted one at a time, then sewn together. It’s best for advanced beginners who are comfortable with basic C2C color changes, and the post includes graphs, written instructions, and finishing help.
Best for: Advanced beginners
Style: C2C woodland baby blanket made from animal panels
Includes: Graphs, written instructions, and finishing details
Corner-to-corner (C2C) crochet explained
Corner-to-corner crochet, also called C2C, is a method worked diagonally in small blocks of chains and double crochet stitches. This woodland blanket is made from individual C2C animal panels that are sewn together at the end. Scroll down for the full panel patterns, or tap an image below to view a specific animal.
Looking for a different kind of woodland animal project? You may also like my woodland animal crochet square patterns, which are worked in rows of single crochet.


Pattern details
Here’s everything you need to know before you start this free woodland C2C baby blanket, including materials, finished size, and helpful notes.
Skill level
Advanced beginner. This C2C crochet baby blanket uses simple stitches, but you’ll work with multiple colors and follow a graph (or written instructions) for the woodland animals.
Materials needed
- G/6 (4 mm) crochet hook: Use this size or the hook size needed to meet gauge.
- Worsted weight yarn (#4): Acrylic yarn is soft, washable, and great for baby blankets. (See colors below.)
- Yarn needle: For sewing the panels together and weaving in ends.
- Scissors: For cutting yarn.
- Stitch markers (optional): Helpful for counting rows or marking corners.
Yarn colors by animal (Red Heart Super Saver)
- Raccoon: white, black, dusty grey, charcoal
- Fox: white, black, buff, carrot
- Bear: white, black, buff, cafe latte
- Hedgehog: white, black, buff, coffee
- Deer: white, black, buff, coffee, cafe latte
- Bunny: white, black, dusty grey, baby pink
- Wolf: white, black, dusty grey, charcoal
- Squirrel: white, black, buff, cafe latte
- Owl: white, black, cafe latte, carrot
- Skunk: white, black, light gray, charcoal
- Mouse: white, black, buff, baby pink
- Opossum: white, black, light gray, charcoal, baby pink

Finished size
Finished baby blanket size: 41 in x 54 in (104 cm x 137 cm)
Each animal panel size: 13.5 in x 13.5 in (34.3 cm x 34.3 cm)
Blanket layout: 3 panels x 4 panels (12 total)
Gauge
Gauge isn’t critical for this blanket, but it will affect the finished size. If your stitches are looser or tighter than mine, your blanket may turn out slightly larger or smaller.
8 C2C blocks (ch 3 + 3 dc) = 4 inches (10 cm)
Too many blocks in 4 inches? Try a larger hook.
Too few blocks in 4 inches? Try a smaller hook.
Crochet abbreviations
- dc = double crochet stitch
- sc = single crochet stitch
- hdc = half double crochet stitch
- ch/chs = chain/chains
- st/sts = stitch/stitches
- sl st = slip stitch
Terminology note: In this post, a panel is the finished 25 x 25 design. A C2C block is the small stitch unit (ch 3 + 3 dc) that makes up the panel.
Pattern notes
- This blanket uses the corner-to-corner (C2C) technique.
- You will crochet all 12 animal panels first, then sew them together to make the blanket.
- You can follow the graph or the written instructions for each animal.
- Each C2C block is made of ch 3 + 3 dc.
- ↙ Right-side rows: You are looking at the front of the panel.
- ↗ Wrong-side rows: You are looking at the back of the panel.
- Tip: In C2C, you turn your work at the end of each row, so the front and back alternate.
- The pattern is written in US crochet terms.
Woodland animal C2C panels — graphs + written instructions
Each animal pattern includes a C2C graph (printable PDF) and written instructions—use whichever is easier for you. Once all 12 panels are finished, sew them together to assemble the baby blanket.
Border for each panel: Join yarn, ch 1, then work 2 sc in the side of each C2C block. In each corner, work (2 sc, ch 2, 2 sc). Sl st to join and fasten off.
1. C2C raccoon crochet panel
Printable graph (PDF): Raccoon C2C graph
Written instructions:
↙ Row 1: white x 1
↗ Row 2: white x 2
↙ Row 3: white x 3
↗ Row 4: white x 4
↙ Row 5: white x 5
↗ Row 6: white x 6
↙ Row 7: white x 1, dark gray x 2, white x 4
↗ Row 8: white x 4, dark gray x 3, white x 1
↙ Row 9: white x 1, dark gray x 4, white x 4
↗ Row 10: white x 3, gray x 1, dark gray x 5, white x 1
↙ Row 11: white x 2, dark gray x 4, gray x 2, white x 3
↗ Row 12: white x 2, gray x 3, dark gray x 5, white x 2
↙ Row 13: white x 3, dark gray x 4, gray x 5, white x 1
↗ Row 14: white x 1, gray x 5, dark gray x 5, white x 3
↙ Row 15: white x 3, gray x 1, dark gray x 5, gray x 5, white x 1
↗ Row 16: white x 2, gray x 2, black x 1, gray x 2, dark gray x 4, gray x 1, white x 4
↙ Row 17: white x 4, gray x 1, dark gray x 5, gray x 1, black x 2, gray x 2, white x 2
↗ Row 18: white x 2, gray x 2, black x 2, gray x 2, dark gray x 1, black x 1, dark gray x 2, gray x 2, white x 4
↙ Row 19: white x 4, gray x 2, dark gray x 2, black x 2, dark gray x 1, gray x 2, black x 1, gray x 2, white x 3
↗ Row 20: white x 3, gray x 6, dark gray x 1, black x 2, dark gray x 1, gray x 3, white x 4
↙ Row 21: white x 3, gray x 5, dark gray x 1, black x 1, dark gray x 1, gray x 7, white x 3
↗ Row 22: white x 3, gray x 8, dark gray x 2, gray x 6, white x 3
↙ Row 23: white x 3, gray x 7, dark gray x 1, gray x 3, dark gray x 3, gray x 2, white x 4
↗ Row 24: white x 4, dark gray x 6, gray x 9, dark gray x 1, gray x 1, white x 3
↙ Row 25: white x 3, gray x 1, dark gray x 1, gray x 9, dark gray x 1, black x 1, dark gray x 5, white x 4
Corner: Start decreasing on both ends
↗ Row 26: white x 3, dark gray x 5, black x 2, dark gray x 1, gray x 8, dark gray x 2, gray x 1, white x 2
↙ Row 27: white x 1, gray x 1, dark gray x 2, gray x 8, dark gray x 1, black x 2, dark gray x 6, white x 2
↗ Row 28: white x 2, dark gray x 6, black x 1, dark gray x 1, gray x 11, white x 1
↙ Row 29: white x 4, gray x 8, dark gray x 8, white x 1
↗ Row 30: white x 1, dark gray x 7, gray x 8, white x 4
↙ Row 31: white x 4, gray x 8, dark gray x 6, white x 1
↗ Row 32: white x 1, dark gray x 3, gray x 10, white x 4
↙ Row 33: white x 4, gray x 10, white x 3
↗ Row 34: white x 4, gray x 8, white x 4
↙ Row 35: white x 4, gray x 7, white x 4
↗ Row 36: white x 4, gray x 6, white x 4
↙ Row 37: white x 4, gray x 5, white x 4
↗ Row 38: white x 4, gray x 4, white x 4
↙ Row 39: white x 4, gray x 4, white x 3
↗ Row 40: white x 3, gray x 1, dark gray x 2, gray x 1, white x 3
↙ Row 41: white x 3, dark gray x 2, gray x 1, white x 3
↗ Row 42: white x 3, gray x 1, dark gray x 1, gray x 1, white x 2
↙ Row 43: white x 2, dark gray x 1, gray x 1, white x 3
↗ Row 44: white x 3, gray x 2, white x 1
↙ Row 45: white x 1, gray x 1, white x 3
↗ Row 46: white x 4
↙ Row 47: white x 3
↗ Row 48: white x 2
↙ Row 49: white x 1
2. C2C fox crochet panel
Printable graph (PDF): Fox C2C graph
Written instructions:
↙ Row 1: white x 1
↗ Row 2: white x 2
↙ Row 3: white x 3
↗ Row 4: white x 4
↙ Row 5: white x 5
↗ Row 6: white x 6
↙ Row 7: white x 1, tan x 2, white x 4
↗ Row 8: white x 4, tan x 2, orange x 1, white x 1
↙ Row 9: white x 1, orange x 1, tan x 3, white x 4
↗ Row 10: white x 3, tan x 4, orange x 2, white x 1
↙ Row 11: white x 2, orange x 2, tan x 4, white x 3
↗ Row 12: white x 2, tan x 5, orange x 3, white x 2
↙ Row 13: white x 3, orange x 3, tan x 6, white x 1
↗ Row 14: white x 1, tan x 6, orange x 4, white x 3
↙ Row 15: white x 3, orange x 5, tan x 6, white x 1
↗ Row 16: white x 2, tan x 2, black x 1, tan x 2, orange x 5, white x 4
↙ Row 17: white x 4, orange x 7, black x 2, tan x 2, white x 2
↗ Row 18: white x 2, tan x 2, black x 2, orange x 3, black x 1, orange x 4, white x 4
↙ Row 19: white x 4, orange x 4, black x 2, orange x 3, black x 1, tan x 2, white x 3
↗ Row 20: white x 3, tan x 3, orange x 4, black x 2, orange x 4, white x 4
↙ Row 21: white x 3, orange x 6, black x 1, orange x 5, tan x 3, white x 3
↗ Row 22: white x 3, tan x 4, orange x 12, white x 3
↙ Row 23: white x 3, orange x 13, tan x 3, white x 4
↗ Row 24: white x 4, tan x 3, orange x 13, black x 1, white x 3
↙ Row 25: white x 3, black x 1, orange x 11, black x 1, orange x 2, tan x 3, white x 4
Corner: Start decreasing on both ends
↗ Row 26: white x 3, tan x 3, orange x 2, black x 2, orange x 11, black x 1, white x 2
↙ Row 27: white x 1, black x 1, orange x 11, black x 2, orange x 3, tan x 3, white x 2
↗ Row 28: white x 2, tan x 2, orange x 4, black x 1, orange x 9, black x 3, white x 1
↙ Row 29: white x 4, orange x 14, tan x 2, white x 1
↗ Row 30: white x 1, orange x 15, white x 4
↙ Row 31: white x 4, orange x 14, white x 1
↗ Row 32: white x 1, orange x 13, white x 4
↙ Row 33: white x 4, orange x 10, white x 3
↗ Row 34: white x 4, orange x 8, white x 4
↙ Row 35: white x 4, orange x 7, white x 4
↗ Row 36: white x 4, orange x 6, white x 4
↙ Row 37: white x 4, orange x 5, white x 4
↗ Row 38: white x 4, orange x 4, white x 4
↙ Row 39: white x 4, orange x 4, white x 3
↗ Row 40: white x 3, orange x 3, black x 1, white x 3
↙ Row 41: white x 3, orange x 3, white x 3
↗ Row 42: white x 3, black x 1, orange x 1, black x 1, white x 2
↙ Row 43: white x 2, orange x 1, black x 1, white x 3
↗ Row 44: white x 3, black x 2, white x 1
↙ Row 45: white x 1, black x 1, white x 3
↗ Row 46: white x 4
↙ Row 47: white x 3
↗ Row 48: white x 2
↙ Row 49: white x 1
3. C2C bear crochet panel
Printable graph (PDF): Bear C2C graph
Written instructions:
↙ Row 1: white x 1
↗ Row 2: white x 2
↙ Row 3: white x 3
↗ Row 4: white x 4
↙ Row 5: white x 5
↗ Row 6: white x 6
↙ Row 7: white x 7
↗ Row 8: white x 4, brown x 1, white x 3
↙ Row 9: white x 2, brown x 4, white x 3
↗ Row 10: white x 3, brown x 6, white x 1
↙ Row 11: white x 1, brown x 7, white x 3
↗ Row 12: white x 3, brown x 8, white x 1
↙ Row 13: white x 2, brown x 6, tan x 2, white x 3
↗ Row 14: white x 2, tan x 4, brown x 6, white x 2
↙ Row 15: white x 2, brown x 7, tan x 4, white x 2
↗ Row 16: white x 2, tan x 5, brown x 6, white x 3
↙ Row 17: white x 3, brown x 7, black x 3, tan x 1, white x 3
↗ Row 18: white x 3, tan x 2, black x 2, tan x 1, brown x 1, black x 1, brown x 4, white x 4
↙ Row 19: white x 4, brown x 4, black x 2, brown x 1, tan x 1, black x 2, tan x 2, white x 3
↗ Row 20: white x 3, brown x 1, tan x 2, black x 1, tan x 2, brown x 1, black x 2, brown x 5, white x 3
↙ Row 21: white x 2, brown x 7, black x 1, brown x 2, tan x 2, black x 1, tan x 2, brown x 1, white x 3
↗ Row 22: white x 3, brown x 2, tan x 5, brown x 7, tan x 1, brown x 2, white x 2
↙ Row 23: white x 2, brown x 2, tan x 1, brown x 15, white x 3
↗ Row 24: white x 4, brown x 14, tan x 2, brown x 1, white x 3
↙ Row 25: white x 3, brown x 1, tan x 2, brown x 9, black x 1, brown x 5, white x 4
Corner: Start decreasing on both ends
↗ Row 26: white x 3, brown x 5, black x 2, brown x 8, tan x 2, brown x 1, white x 3
↙ Row 27: white x 2, brown x 2, tan x 1, brown x 8, black x 2, brown x 5, white x 3
↗ Row 28: white x 3, brown x 5, black x 1, brown x 8, tan x 1, brown x 2, white x 2
↙ Row 29: white x 2, brown x 17, white x 2
↗ Row 30: white x 2, brown x 16, white x 2
↙ Row 31: white x 3, brown x 14, white x 2
↗ Row 32: white x 1, brown x 13, white x 4
↙ Row 33: white x 3, brown x 13, white x 1
↗ Row 34: white x 1, brown x 12, white x 3
↙ Row 35: white x 3, brown x 10, white x 2
↗ Row 36: white x 4, brown x 6, white x 4
↙ Row 37: white x 3, brown x 6, white x 4
↗ Row 38: white x 3, brown x 1, tan x 4, brown x 1, white x 3
↙ Row 39: white x 3, brown x 1, tan x 3, brown x 1, white x 3
↗ Row 40: white x 3, brown x 1, tan x 2, brown x 2, white x 2
↙ Row 41: white x 2, brown x 2, tan x 1, brown x 2, white x 2
↗ Row 42: white x 2, brown x 4, white x 2
↙ Row 43: white x 2, brown x 3, white x 2
↗ Row 44: white x 6
↙ Row 45: white x 5
↗ Row 46: white x 4
↙ Row 47: white x 3
↗ Row 48: white x 2
↙ Row 49: white x 1
4. C2C hedgehog crochet panel
Printable graph (PDF): Hedgehog C2C graph
Written instructions:
↙ Row 1: white x 1
↗ Row 2: white x 2
↙ Row 3: white x 3
↗ Row 4: white x 4
↙ Row 5: white x 5
↗ Row 6: white x 6
↙ Row 7: white x 7
↗ Row 8: white x 8
↙ Row 9: white x 2, dark brown x 3, tan x 2, white x 2
↗ Row 10: white x 2, tan x 5, dark brown x 2, white x 1
↙ Row 11: white x 1, dark brown x 2, tan x 7, white x 1
↗ Row 12: white x 1, tan x 8, dark brown x 2, white x 1
↙ Row 13: white x 1, dark brown x 2, tan x 4, black x 1, tan x 4, white x 1
↗ Row 14: white x 1, tan x 5, black x 1, tan x 4, dark brown x 2, white x 1
↙ Row 15: white x 1, dark brown x 3, tan x 7, black x 1, tan x 2, white x 1
↗ Row 16: white x 1, tan x 2, black x 1, tan x 8, dark brown x 3, white x 1
↙ Row 17: white x 2, dark brown x 3, tan x 8, black x 1, tan x 2, white x 1
↗ Row 18: white x 2, tan x 11, dark brown x 3, white x 2
↙ Row 19: white x 2, dark brown x 4, tan x 11, white x 2
↗ Row 20: white x 2, tan x 11, dark brown x 4, white x 3
↙ Row 21: white x 3, dark brown x 6, tan x 10, white x 2
↗ Row 22: white x 3, tan x 6, dark brown x 10, white x 3
↙ Row 23: white x 5, dark brown x 8, tan x 4, black x 1, tan x 2, white x 3
↗ Row 24: white x 4, tan x 2, black x 1, tan x 3, dark brown x 9, white x 5
↙ Row 25: white x 6, dark brown x 8, tan x 6, dark brown x 1, white x 4
Corner: Start decreasing on both ends
↗ Row 26: white x 4, tan x 6, dark brown x 9, white x 5
↙ Row 27: white x 4, dark brown x 9, tan x 6, dark brown x 1, white x 3
↗ Row 28: white x 3, tan x 6, dark brown x 7, white x 1, dark brown x 2, white x 3
↙ Row 29: white x 5, dark brown x 8, tan x 5, dark brown x 1, white x 2
↗ Row 30: white x 2, dark brown x 1, tan x 5, dark brown x 7, white x 5
↙ Row 31: white x 4, dark brown x 8, tan x 4, dark brown x 1, white x 2
↗ Row 32: white x 1, dark brown x 2, tan x 3, dark brown x 8, white x 4
↙ Row 33: white x 3, dark brown x 13, white x 1
↗ Row 34: white x 1, dark brown x 12, white x 3
↙ Row 35: white x 2, dark brown x 2, white x 1, dark brown x 9, white x 1
↗ Row 36: white x 1, dark brown x 9, white x 1, dark brown x 1, white x 2
↙ Row 37: white x 1, dark brown x 1, white x 2, dark brown x 2, white x 1, dark brown x 5, white x 1
↗ Row 38: white x 1, dark brown x 5, white x 1, dark brown x 1, white x 4
↙ Row 39: white x 3, dark brown x 1, white x 2, dark brown x 4, white x 1
↗ Row 40: white x 2, dark brown x 1, white x 1, dark brown x 1, white x 5
↙ Row 41: white x 6, dark brown x 1, white x 2
↗ Row 42: white x 8
↙ Row 43: white x 7
↗ Row 44: white x 6
↙ Row 45: white x 5
↗ Row 46: white x 4
↙ Row 47: white x 3
↗ Row 48: white x 2
↙ Row 49: white x 1
5. C2C deer crochet panel
Printable graph (PDF): Deer C2C graph
Written instructions:
↙ Row 1: white x 1
↗ Row 2: white x 2
↙ Row 3: white x 3
↗ Row 4: white x 4
↙ Row 5: white x 5
↗ Row 6: white x 6
↙ Row 7: white x 7
↗ Row 8: white x 8
↙ Row 9: white x 9
↗ Row 10: white x 10
↙ Row 11: white x 4, tan x 4, white x 3
↗ Row 12: white x 2, tan x 6, white x 4
↙ Row 13: white x 4, tan x 7, white x 2
↗ Row 14: white x 2, tan x 1, white x 2, tan x 5, white x 4
↙ Row 15: white x 1, tan x 2, white x 1, tan x 5, white x 3, tan x 1, white x 2
↗ Row 16: white x 2, tan x 1, white x 4, tan x 1, black x 1, tan x 6, white x 1
↙ Row 17: white x 1, tan x 6, black x 2, tan x 1, white x 1, black x 1, white x 2, tan x 1, white x 2
↗ Row 18: white x 2, tan x 1, white x 2, black x 2, white x 1, tan x 1, black x 1, tan x 6, white x 2
↙ Row 19: white x 5, brown x 2, tan x 4, white x 1, black x 2, white x 1, tan x 1, white x 3
↗ Row 20: white x 3, tan x 1, white x 2, black x 1, white x 1, brown x 1, tan x 2, brown x 4, white x 5
↙ Row 21: white x 5, dark brown x 2, brown x 6, white x 3, tan x 2, white x 3
↗ Row 22: white x 4, tan x 2, white x 2, brown x 6, dark brown x 4, white x 4
↙ Row 23: white x 2, dark brown x 6, brown x 6, tan x 5, white x 4
↗ Row 24: white x 5, tan x 5, brown x 7, dark brown x 5, white x 2
↙ Row 25: white x 3, dark brown x 2, white x 1, dark brown x 1, white x 1, brown x 7, tan x 1, black x 1, tan x 3, white x 5
Corner: Start decreasing on both ends
↗ Row 26: white x 5, tan x 2, black x 2, tan x 1, brown x 6, white x 1, dark brown x 4, white x 3
↙ Row 27: white x 3, dark brown x 1, white x 1, dark brown x 1, white x 2, brown x 6, tan x 1, black x 1, tan x 3, white x 4
↗ Row 28: white x 4, tan x 4, brown x 7, white x 3, dark brown x 1, white x 3
↙ Row 29: white x 2, dark brown x 2, white x 3, brown x 6, tan x 4, white x 4
↗ Row 30: white x 4, tan x 3, brown x 6, white x 4, dark brown x 1, white x 2
↙ Row 31: white x 7, brown x 6, tan x 2, white x 4
↗ Row 32: white x 4, tan x 2, brown x 1, dark brown x 1, brown x 3, white x 7
↙ Row 33: white x 8, brown x 1, dark brown x 2, brown x 1, tan x 1, white x 4
↗ Row 34: white x 3, tan x 2, brown x 1, dark brown x 1, brown x 1, white x 8
↙ Row 35: white x 8, dark brown x 2, white x 1, tan x 2, white x 2
↗ Row 36: white x 2, tan x 2, white x 1, dark brown x 3, white x 6
↙ Row 37: white x 5, dark brown x 3, white x 2, tan x 2, white x 1
↗ Row 38: white x 1, tan x 2, white x 1, dark brown x 3, white x 5
↙ Row 39: white x 3, dark brown x 1, white x 2, dark brown x 1, white x 2, tan x 1, white x 1
↗ Row 40: white x 4, dark brown x 4, white x 2
↙ Row 41: white x 2, dark brown x 4, white x 3
↗ Row 42: white x 3, dark brown x 2, white x 3
↙ Row 43: white x 3, dark brown x 2, white x 2
↗ Row 44: white x 2, dark brown x 1, white x 3
↙ Row 45: white x 5
↗ Row 46: white x 4
↙ Row 47: white x 3
↗ Row 48: white x 2
↙ Row 49: white x 1
6. C2C bunny crochet panel
Printable graph (PDF): Bunny C2C graph
Written instructions:
↙ Row 1: white x 1
↗ Row 2: white x 2
↙ Row 3: white x 3
↗ Row 4: white x 4
↙ Row 5: white x 5
↗ Row 6: white x 6
↙ Row 7: white x 7
↗ Row 8: white x 1, gray x 3, white x 4
↙ Row 9: white x 4, gray x 4, white x 1
↗ Row 10: white x 1, gray x 5, white x 4
↙ Row 11: white x 4, gray x 6, white x 1
↗ Row 12: white x 1, gray x 7, white x 4
↙ Row 13: white x 5, gray x 4, white x 2, gray x 1, white x 1
↗ Row 14: white x 1, gray x 1, white x 3, gray x 4, white x 5
↙ Row 15: white x 6, gray x 2, black x 1, gray x 1, white x 3, gray x 1, white x 1
↗ Row 16: white x 1, gray x 1, white x 1, pink x 2, white x 1, black x 2, gray x 2, white x 6
↙ Row 17: white x 7, gray x 2, black x 1, gray x 1, white x 1, pink x 1, white x 2, gray x 1, white x 1
↗ Row 18: white x 1, gray x 2, white x 1, pink x 1, white x 1, gray x 6, white x 6
↙ Row 19: white x 5, gray x 2, pink x 1, gray x 5, white x 3, gray x 2, white x 1
↗ Row 20: white x 1, gray x 3, white x 2, gray x 6, pink x 2, gray x 2, white x 4
↙ Row 21: white x 4, gray x 1, pink x 4, gray x 10, white x 2
↗ Row 22: white x 2, gray x 4, black x 1, gray x 6, pink x 4, gray x 1, white x 4
↙ Row 23: white x 3, gray x 2, pink x 4, gray x 6, black x 2, gray x 3, white x 3
↗ Row 24: white x 3, gray x 4, black x 1, gray x 5, white x 1, gray x 2, pink x 4, gray x 1, white x 3
↙ Row 25: white x 2, gray x 2, pink x 3, gray x 3, white x 1, gray x 10, white x 4
Corner: Start decreasing on both ends
↗ Row 26: white x 4, gray x 9, white x 3, gray x 7, white x 1
↙ Row 27: white x 1, gray x 6, white x 4, gray x 8, white x 4
↗ Row 28: white x 4, gray x 6, white x 12
↙ Row 29: white x 11, gray x 1, pink x 2, white x 7
↗ Row 30: white x 6, gray x 1, pink x 2, gray x 1, white x 10
↙ Row 31: white x 9, gray x 1, pink x 2, gray x 1, white x 6
↗ Row 32: white x 6, pink x 2, gray x 1, white x 9
↙ Row 33: white x 8, gray x 1, pink x 2, gray x 1, white x 5
↗ Row 34: white x 5, gray x 1, pink x 2, gray x 1, white x 7
↙ Row 35: white x 6, gray x 2, pink x 1, gray x 1, white x 5
↗ Row 36: white x 5, pink x 2, gray x 1, white x 6
↙ Row 37: white x 5, gray x 1, pink x 2, gray x 1, white x 4
↗ Row 38: white x 4, gray x 1, pink x 1, gray x 1, white x 5
↙ Row 39: white x 4, gray x 1, pink x 1, gray x 1, white x 4
↗ Row 40: white x 4, pink x 1, gray x 1, white x 4
↙ Row 41: white x 3, gray x 1, pink x 1, gray x 1, white x 3
↗ Row 42: white x 3, gray x 2, white x 3
↙ Row 43: white x 2, gray x 2, white x 3
↗ Row 44: white x 3, gray x 1, white x 2
↙ Row 45: white x 1, gray x 2, white x 2
↗ Row 46: white x 2, gray x 1, white x 1
↙ Row 47: white x 3
↗ Row 48: white x 2
↙ Row 49: white x 1
7. C2C wolf crochet panel
Printable graph (PDF): Wolf C2C graph
Written instructions:
↙ Row 1: white x 1
↗ Row 2: white x 2
↙ Row 3: white x 3
↗ Row 4: white x 4
↙ Row 5: white x 5
↗ Row 6: white x 6
↙ Row 7: white x 1, gray x 2, white x 4
↗ Row 8: white x 4, gray x 3, white x 1
↙ Row 9: white x 1, gray x 4, white x 4
↗ Row 10: white x 3, gray x 6, white x 1
↙ Row 11: white x 2, gray x 6, white x 3
↗ Row 12: white x 2, gray x 8, white x 2
↙ Row 13: white x 3, gray x 9, white x 1
↗ Row 14: white x 1, gray x 9, dark gray x 1, white x 3
↙ Row 15: white x 3, dark gray x 1, gray x 10, white x 1
↗ Row 16: white x 2, gray x 2, black x 1, gray x 6, dark gray x 1, white x 4
↙ Row 17: white x 4, dark gray x 1, gray x 6, black x 2, gray x 2, white x 2
↗ Row 18: white x 2, gray x 2, black x 2, gray x 3, black x 1, gray x 2, dark gray x 2, white x 4
↙ Row 19: white x 4, dark gray x 2, gray x 2, black x 2, gray x 3, black x 1, gray x 2, white x 3
↗ Row 20: white x 3, gray x 7, black x 2, gray x 1, dark gray x 3, white x 4
↙ Row 21: white x 3, dark gray x 5, gray x 1, black x 1, gray x 8, white x 3
↗ Row 22: white x 3, gray x 10, dark gray x 6, white x 3
↙ Row 23: white x 3, dark gray x 7, gray x 9, white x 4
↗ Row 24: white x 4, gray x 7, dark gray x 8, gray x 1, dark gray x 1, white x 3
↙ Row 25: white x 3, dark gray x 1, gray x 1, dark gray x 8, gray x 2, black x 1, gray x 5, white x 4
Corner: Start decreasing on both ends
↗ Row 26: white x 3, gray x 5, black x 2, gray x 1, dark gray x 8, gray x 2, dark gray x 1, white x 2
↙ Row 27: white x 1, dark gray x 1, gray x 2, dark gray x 8, gray x 1, black x 2, gray x 6, white x 2
↗ Row 28: white x 2, gray x 6, black x 1, gray x 1, dark gray x 11, white x 1
↙ Row 29: white x 4, dark gray x 8, gray x 8, white x 1
↗ Row 30: white x 1, gray x 7, dark gray x 8, white x 4
↙ Row 31: white x 4, dark gray x 8, gray x 6, white x 1
↗ Row 32: white x 1, gray x 2, dark gray x 11, white x 4
↙ Row 33: white x 4, dark gray x 10, white x 3
↗ Row 34: white x 4, dark gray x 8, white x 4
↙ Row 35: white x 4, dark gray x 7, white x 4
↗ Row 36: white x 4, dark gray x 6, white x 4
↙ Row 37: white x 4, dark gray x 5, white x 4
↗ Row 38: white x 4, dark gray x 4, white x 4
↙ Row 39: white x 4, dark gray x 4, white x 3
↗ Row 40: white x 3, dark gray x 1, gray x 2, dark gray x 1, white x 3
↙ Row 41: white x 3, gray x 2, dark gray x 1, white x 3
↗ Row 42: white x 3, dark gray x 1, gray x 1, dark gray x 1, white x 2
↙ Row 43: white x 2, gray x 1, dark gray x 1, white x 3
↗ Row 44: white x 3, dark gray x 2, white x 1
↙ Row 45: white x 1, dark gray x 1, white x 3
↗ Row 46: white x 4
↙ Row 47: white x 3
↗ Row 48: white x 2
↙ Row 49: white x 1
8. C2C squirrel crochet panel
Printable graph (PDF): Squirrel C2C graph
Written instructions:
↙ Row 1: white x 1
↗ Row 2: white x 2
↙ Row 3: white x 3
↗ Row 4: white x 4
↙ Row 5: white x 5
↗ Row 6: white x 6
↙ Row 7: white x 7
↗ Row 8: white x 3, tan x 4, white x 1
↙ Row 9: white x 1, tan x 6, white x 2
↗ Row 10: white x 1, tan x 8, white x 1
↙ Row 11: white x 1, tan x 9, white x 1
↗ Row 12: white x 1, tan x 10, white x 1
↙ Row 13: white x 1, brown x 1, tan x 10, white x 1
↗ Row 14: white x 1, tan x 5, black x 1, tan x 5, brown x 1, white x 1
↙ Row 15: white x 1, brown x 2, tan x 4, black x 2, tan x 2, black x 1, white x 1, tan x 1, white x 1
↗ Row 16: white x 1, tan x 2, black x 2, tan x 2, black x 1, tan x 5, brown x 1, white x 2
↙ Row 17: white x 2, brown x 2, tan x 7, brown x 1, black x 2, tan x 2, white x 1
↗ Row 18: white x 1, tan x 3, black x 1, brown x 2, tan x 6, brown x 2, white x 3
↙ Row 19: white x 3, brown x 3, tan x 5, brown x 3, tan x 3, white x 2
↗ Row 20: white x 2, tan x 4, brown x 3, tan x 4, brown x 5, white x 2
↙ Row 21: white x 2, brown x 12, tan x 5, white x 2
↗ Row 22: white x 3, tan x 5, brown x 10, tan x 1, brown x 1, white x 2
↙ Row 23: white x 2, brown x 1, tan x 2, brown x 9, tan x 2, black x 1, tan x 3, white x 3
↗ Row 24: white x 3, tan x 3, black x 2, tan x 2, brown x 9, tan x 2, brown x 1, white x 2
↙ Row 25: white x 3, brown x 1, tan x 1, brown x 10, tan x 2, black x 1, tan x 3, white x 4
Corner: Start decreasing on both ends
↗ Row 26: white x 3, tan x 7, brown x 12, white x 2
↙ Row 27: white x 2, brown x 2, white x 2, brown x 8, tan x 6, white x 3
↗ Row 28: white x 2, tan x 7, brown x 7, white x 6
↙ Row 29: white x 5, brown x 8, tan x 6, white x 2
↗ Row 30: white x 1, tan x 7, brown x 7, white x 5
↙ Row 31: white x 5, brown x 7, tan x 6, white x 1
↗ Row 32: white x 1, tan x 5, brown x 7, white x 5
↙ Row 33: white x 5, brown x 7, tan x 4, white x 1
↗ Row 34: white x 1, tan x 3, brown x 7, white x 5
↙ Row 35: white x 5, brown x 9, white x 1
↗ Row 36: white x 1, brown x 7, white x 6
↙ Row 37: white x 6, brown x 6, white x 1
↗ Row 38: white x 3, brown x 4, white x 5
↙ Row 39: white x 5, brown x 1, tan x 1, brown x 1, white x 3
↗ Row 40: white x 2, brown x 1, tan x 2, brown x 1, white x 4
↙ Row 41: white x 3, brown x 1, tan x 2, brown x 1, white x 2
↗ Row 42: white x 2, brown x 1, tan x 1, brown x 1, white x 3
↙ Row 43: white x 2, brown x 3, white x 2
↗ Row 44: white x 2, brown x 2, white x 2
↙ Row 45: white x 5
↗ Row 46: white x 4
↙ Row 47: white x 3
↗ Row 48: white x 2
↙ Row 49: white x 1
9. C2C owl crochet panel
Printable graph (PDF): Owl C2C graph
Written instructions:
↙ Row 1: white x 1
↗ Row 2: white x 2
↙ Row 3: white x 3
↗ Row 4: white x 4
↙ Row 5: white x 5
↗ Row 6: white x 6
↙ Row 7: white x 7
↗ Row 8: white x 8
↙ Row 9: white x 9
↗ Row 10: white x 4, brown x 4, white x 2
↙ Row 11: white x 1, brown x 7, white x 3
↗ Row 12: white x 3, brown x 8, white x 1
↙ Row 13: white x 1, brown x 9, white x 3
↗ Row 14: white x 3, brown x 4, white x 3, brown x 3, white x 1
↙ Row 15: white x 1, brown x 3, white x 4, brown x 4, white x 3
↗ Row 16: white x 3, brown x 4, white x 5, brown x 3, white x 1
↙ Row 17: white x 1, brown x 3, white x 6, brown x 4, white x 3
↗ Row 18: white x 3, brown x 2, orange x 3, white x 6, brown x 2, white x 2
↙ Row 19: white x 2, brown x 3, white x 6, orange x 2, brown x 3, white x 3
↗ Row 20: white x 3, brown x 3, orange x 2, white x 2, black x 1, white x 4, brown x 3, white x 2
↙ Row 21: white x 2, brown x 4, white x 3, black x 2, white x 2, orange x 1, brown x 4, white x 3
↗ Row 22: white x 4, brown x 3, orange x 1, white x 3, black x 1, white x 4, brown x 4, white x 2
↙ Row 23: white x 1, brown x 6, white x 9, brown x 3, white x 4
↗ Row 24: white x 4, brown x 3, white x 9, brown x 7, white x 1
↙ Row 25: white x 2, brown x 7, white x 5, black x 1, white x 3, brown x 2, white x 5
Corner: Start decreasing on both ends
↗ Row 26: white x 4, brown x 2, white x 3, black x 2, white x 1, brown x 10, white x 2
↙ Row 27: white x 3, brown x 8, white x 2, black x 1, white x 3, brown x 2, white x 4
↗ Row 28: white x 3, brown x 2, white x 6, brown x 7, white x 4
↙ Row 29: white x 4, brown x 6, white x 6, brown x 2, white x 3
↗ Row 30: white x 2, brown x 2, white x 6, brown x 6, white x 4
↙ Row 31: white x 4, brown x 5, white x 6, brown x 2, white x 2
↗ Row 32: white x 2, brown x 2, white x 5, brown x 5, white x 4
↙ Row 33: white x 4, brown x 5, white x 4, brown x 3, white x 1
↗ Row 34: white x 1, brown x 3, white x 3, brown x 5, white x 4
↙ Row 35: white x 4, brown x 10, white x 1
↗ Row 36: white x 1, brown x 9, white x 4
↙ Row 37: white x 4, brown x 8, white x 1
↗ Row 38: white x 1, brown x 7, white x 4
↙ Row 39: white x 4, brown x 5, white x 2
↗ Row 40: white x 2, brown x 4, white x 4
↙ Row 41: white x 3, brown x 4, white x 2
↗ Row 42: white x 2, brown x 3, white x 3
↙ Row 43: white x 3, brown x 2, white x 2
↗ Row 44: white x 2, brown x 2, white x 2
↙ Row 45: white x 2, brown x 2, white x 1
↗ Row 46: white x 1, brown x 1, white x 2
↙ Row 47: white x 3
↗ Row 48: white x 2
↙ Row 49: white x 1
10. C2C skunk crochet panel
Printable graph (PDF): Skunk C2C graph
Written instructions:
↙ Row 1: white x 1
↗ Row 2: white x 2
↙ Row 3: white x 3
↗ Row 4: white x 4
↙ Row 5: white x 5
↗ Row 6: white x 6
↙ Row 7: white x 7
↗ Row 8: white x 8
↙ Row 9: white x 9
↗ Row 10: white x 6, dark gray x 3, white x 1
↙ Row 11: white x 1, dark gray x 6, white x 4
↗ Row 12: white x 4, dark gray x 7, white x 1
↙ Row 13: white x 1, dark gray x 9, white x 3
↗ Row 14: white x 3, dark gray x 10, white x 1
↙ Row 15: white x 2, dark gray x 10, white x 3
↗ Row 16: white x 3, dark gray x 11, white x 2
↙ Row 17: white x 2, dark gray x 12, white x 3
↗ Row 18: white x 3, dark gray x 3, black x 1, dark gray x 2, black x 1, dark gray x 5, white x 3
↙ Row 19: white x 3, dark gray x 8, black x 2, dark gray x 3, white x 3
↗ Row 20: white x 4, dark gray x 2, black x 2, dark gray x 10, white x 2
↙ Row 21: white x 2, dark gray x 10, light gray x 1, black x 1, dark gray x 3, white x 4
↗ Row 22: white x 4, dark gray x 5, light gray x 1, dark gray x 7, light gray x 2, dark gray x 1, white x 2
↙ Row 23: white x 3, dark gray x 1, light gray x 2, dark gray x 6, light gray x 1, dark gray x 6, white x 4
↗ Row 24: white x 5, dark gray x 6, light gray x 1, dark gray x 6, light gray x 2, dark gray x 1, white x 3
↙ Row 25: white x 4, dark gray x 1, light gray x 1, dark gray x 4, light gray x 3, dark gray x 7, white x 5
Corner: Start decreasing on both ends
↗ Row 26: white x 5, dark gray x 3, black x 1, dark gray x 3, light gray x 5, dark gray x 4, white x 3
↙ Row 27: white x 3, dark gray x 2, white x 2, light gray x 5, dark gray x 7, white x 4
↗ Row 28: white x 3, dark gray x 8, light gray x 4, white x 7
↙ Row 29: white x 7, light gray x 4, dark gray x 7, white x 3
↗ Row 30: white x 2, dark gray x 8, light gray x 3, white x 7
↙ Row 31: white x 7, light gray x 2, dark gray x 8, white x 2
↗ Row 32: white x 1, dark gray x 8, light gray x 2, white x 7
↙ Row 33: white x 7, light gray x 1, dark gray x 8, white x 1
↗ Row 34: white x 1, dark gray x 7, light gray x 1, white x 7
↙ Row 35: white x 7, dark gray x 7, white x 1
↗ Row 36: white x 1, dark gray x 7, white x 6
↙ Row 37: white x 6, dark gray x 1, light gray x 1, dark gray x 3, white x 2
↗ Row 38: white x 3, dark gray x 1, light gray x 2, dark gray x 1, white x 5
↙ Row 39: white x 4, dark gray x 1, light gray x 2, dark gray x 1, white x 3
↗ Row 40: white x 2, dark gray x 1, light gray x 2, dark gray x 1, white x 4
↙ Row 41: white x 3, dark gray x 4, white x 2
↗ Row 42: white x 2, dark gray x 3, white x 3
↙ Row 43: white x 7
↗ Row 44: white x 6
↙ Row 45: white x 5
↗ Row 46: white x 4
↙ Row 47: white x 3
↗ Row 48: white x 2
↙ Row 49: white x 1
11. C2C mouse crochet panel
Printable graph (PDF): Mouse C2C graph
Written instructions:
↙ Row 1: white x 1
↗ Row 2: white x 2
↙ Row 3: white x 3
↗ Row 4: white x 4
↙ Row 5: white x 5
↗ Row 6: white x 6
↙ Row 7: white x 7
↗ Row 8: white x 8
↙ Row 9: white x 9
↗ Row 10: white x 10
↙ Row 11: white x 3, tan x 3, white x 5
↗ Row 12: white x 5, tan x 4, white x 3
↙ Row 13: white x 3, tan x 8, white x 2
↗ Row 14: white x 2, tan x 9, white x 3
↙ Row 15: white x 3, tan x 10, white x 2
↗ Row 16: white x 2, tan x 1, pink x 2, tan x 7, white x 4
↙ Row 17: white x 4, tan x 8, pink x 1, tan x 2, white x 2
↗ Row 18: white x 3, tan x 1, pink x 1, tan x 3, black x 1, tan x 4, white x 1, tan x 2, white x 2
↙ Row 19: white x 1, tan x 8, black x 2, tan x 5, white x 3
↗ Row 20: white x 4, tan x 5, black x 2, tan x 4, pink x 2, tan x 2, white x 1
↙ Row 21: white x 2, tan x 1, pink x 2, tan x 5, black x 1, tan x 6, white x 4
↗ Row 22: white x 5, tan x 11, pink x 3, tan x 1, white x 2
↙ Row 23: white x 2, tan x 1, pink x 3, tan x 8, black x 1, tan x 3, white x 5
↗ Row 24: white x 5, tan x 3, black x 2, tan x 7, pink x 3, tan x 2, white x 2
↙ Row 25: white x 3, tan x 1, pink x 3, tan x 7, black x 2, tan x 4, white x 5
Corner: Start decreasing on both ends
↗ Row 26: white x 5, tan x 4, black x 1, tan x 7, pink x 3, tan x 2, white x 2
↙ Row 27: white x 2, tan x 1, pink x 3, tan x 13, white x 4
↗ Row 28: white x 4, tan x 12, pink x 3, tan x 1, white x 2
↙ Row 29: white x 1, tan x 2, pink x 2, tan x 13, white x 3
↗ Row 30: white x 3, tan x 12, pink x 2, tan x 2, white x 1
↙ Row 31: white x 2, tan x 14, white x 3
↗ Row 32: white x 3, tan x 10, white x 1, tan x 2, white x 2
↙ Row 33: white x 5, tan x 9, white x 3
↗ Row 34: white x 5, tan x 6, white x 5
↙ Row 35: white x 4, tan x 7, white x 4
↗ Row 36: white x 3, tan x 1, pink x 6, tan x 1, white x 3
↙ Row 37: white x 3, tan x 1, pink x 5, tan x 1, white x 3
↗ Row 38: white x 2, tan x 1, pink x 6, tan x 1, white x 2
↙ Row 39: white x 2, tan x 1, pink x 5, tan x 1, white x 2
↗ Row 40: white x 2, tan x 1, pink x 4, tan x 1, white x 2
↙ Row 41: white x 1, tan x 2, pink x 3, tan x 2, white x 1
↗ Row 42: white x 1, tan x 6, white x 1
↙ Row 43: white x 2, tan x 3, white x 2
↗ Row 44: white x 2, tan x 1, white x 3
↙ Row 45: white x 5
↗ Row 46: white x 4
↙ Row 47: white x 3
↗ Row 48: white x 2
↙ Row 49: white x 1
12. C2C opossum crochet panel
Printable graph (PDF): Opossum C2C graph
Written instructions:
↙ Row 1: white x 1
↗ Row 2: white x 2
↙ Row 3: white x 3
↗ Row 4: white x 4
↙ Row 5: white x 5
↗ Row 6: white x 6
↙ Row 7: white x 7
↗ Row 8: white x 8
↙ Row 9: white x 9
↗ Row 10: white x 10
↙ Row 11: white x 11
↗ Row 12: white x 3, light gray x 4, white x 5
↙ Row 13: white x 4, light gray x 7, pink x 1, white x 1
↗ Row 14: white x 1, pink x 2, light gray x 8, white x 3
↙ Row 15: white x 3, light gray x 9, pink x 2, white x 1
↗ Row 16: white x 2, pink x 1, light gray x 10, white x 3
↙ Row 17: white x 3, light gray x 12, white x 2
↗ Row 18: white x 3, light gray x 11, white x 4
↙ Row 19: white x 4, light gray x 12, white x 3
↗ Row 20: white x 3, light gray x 7, black x 1, light gray x 5, dark gray x 2, white x 2
↙ Row 21: white x 2, dark gray x 3, light gray x 4, black x 2, light gray x 6, white x 4
↗ Row 22: white x 4, light gray x 7, black x 1, light gray x 5, dark gray x 1, pink x 1, dark gray x 1, white x 2
↙ Row 23: white x 2, dark gray x 1, pink x 2, dark gray x 1, light gray x 12, white x 5
↗ Row 24: white x 5, light gray x 13, dark gray x 1, pink x 2, dark gray x 1, white x 2
↙ Row 25: white x 3, dark gray x 1, pink x 2, dark gray x 1, light gray x 7, black x 1, light gray x 4, white x 6
Corner: Start decreasing on both ends
↗ Row 26: white x 5, light gray x 4, black x 2, light gray x 7, dark gray x 4, white x 2
↙ Row 27: white x 2, dark gray x 3, white x 1, light gray x 7, black x 1, light gray x 4, white x 5
↗ Row 28: white x 5, light gray x 12, white x 5
↙ Row 29: white x 5, light gray x 12, white x 4
↗ Row 30: white x 4, light gray x 11, white x 5
↙ Row 31: white x 5, light gray x 10, white x 4
↗ Row 32: white x 3, light gray x 10, white x 5
↙ Row 33: white x 5, light gray x 9, white x 3
↗ Row 34: white x 3, light gray x 8, white x 5
↙ Row 35: white x 5, light gray x 7, white x 3
↗ Row 36: white x 4, light gray x 5, white x 5
↙ Row 37: white x 6, dark gray x 3, white x 4
↗ Row 38: white x 3, dark gray x 4, white x 5
↙ Row 39: white x 4, dark gray x 1, pink x 2, dark gray x 1, white x 3
↗ Row 40: white x 2, dark gray x 1, pink x 2, dark gray x 1, white x 4
↙ Row 41: white x 3, dark gray x 1, pink x 2, dark gray x 1, white x 2
↗ Row 42: white x 2, dark gray x 1, pink x 1, dark gray x 1, white x 3
↙ Row 43: white x 2, dark gray x 3, white x 2
↗ Row 44: white x 2, dark gray x 2, white x 2
↙ Row 45: white x 5
↗ Row 46: white x 4
↙ Row 47: white x 3
↗ Row 48: white x 2
↙ Row 49: white x 1
Woodland baby blanket sewing + border tutorial
Once all 12 woodland animal panels are finished, it’s time to assemble the blanket.
Step 1: Arrange the panels
Lay the panels right side up in a 3 × 4 grid. Double-check that all animals are facing the same direction.
Step 2: Sew the panels together
Using a yarn needle and matching yarn, sew the panels together through the border stitches to form the full blanket.
Step 3: Add the blanket border
Join white yarn in any corner and ch 2. Work hdc evenly in each stitch around the blanket.
In each corner, crochet (hdc, ch 2, hdc).
Finishing
Fasten off and weave in all ends. Block the blanket if desired to help the panels lie flat and the edges look neat. Your woodland animal baby blanket is now ready to gift or use in the nursery.
Crochet woodland baby blanket pattern FAQs
Is this a free crochet baby blanket pattern?
Yes! This pattern is free on my blog and includes a graph and written instructions for all 12 animal panels.
Is this a corner-to-corner (C2C) crochet blanket?
Yes. This woodland C2C baby blanket is made from 12 separate woodland animal panels that you sew together.
Can I use the graphs or the written instructions?
Yes. Follow the C2C graphs or use the written color changes—whichever is easier for you.
What skill level is this pattern?
Advanced beginner. The stitches are simple, but you’ll do color changes and follow a graph (or written chart).
Do I need to match gauge for a blanket?
Gauge isn’t critical, but it will affect the finished size. Tighter stitches = smaller blanket. Looser stitches = larger blanket.
Can I make the blanket bigger or smaller?
Yes. You can change the finished size by using a larger or smaller hook and yarn, or by adding a border.
What yarn works best for this woodland baby blanket?
Worsted weight (#4) acrylic yarn is a great choice because it’s soft and washable. I used Red Heart Super Saver, but any similar worsted weight yarn works.
Any tips for neat C2C color changes?
Change colors on the last yarn-over of the last double crochet in the block. Weave in ends as you go to avoid a big pile at the end.
How do I join the animal panels together?
Arrange the panels in a 3 × 4 grid, then use a yarn needle to sew them together through the border stitches.
New to C2C? Start with my video tutorial
If you’re new to corner-to-corner crochet, start with my beginner-friendly C2C video tutorial. It walks you through the basic C2C block, plus increases and decreases, using a small practice panel before you begin the animal patterns.

Printable PDF pattern
If you prefer an easy, print-friendly version of this crochet woodland baby blanket pattern, a printable PDF is available in my Etsy shop. The PDF includes the full pattern instructions in a clean, ad-free format, making it perfect for printing or saving on your device.
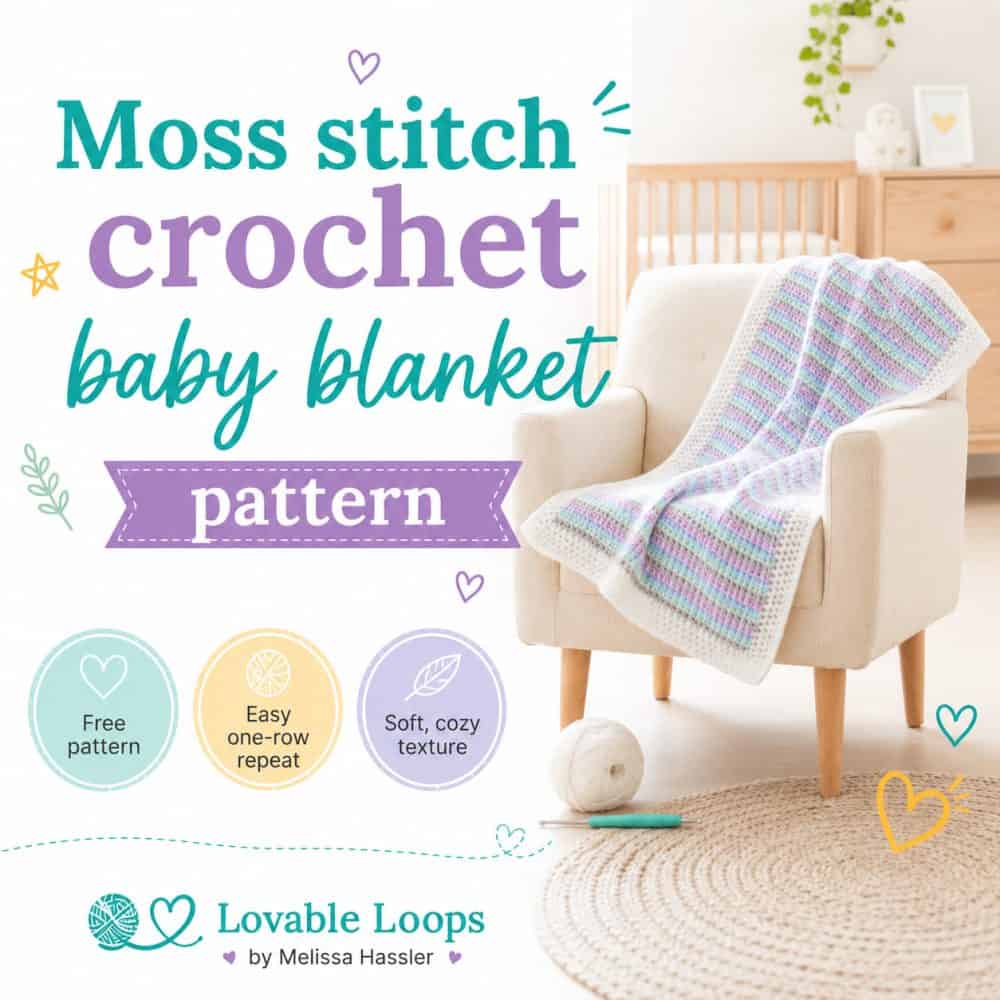
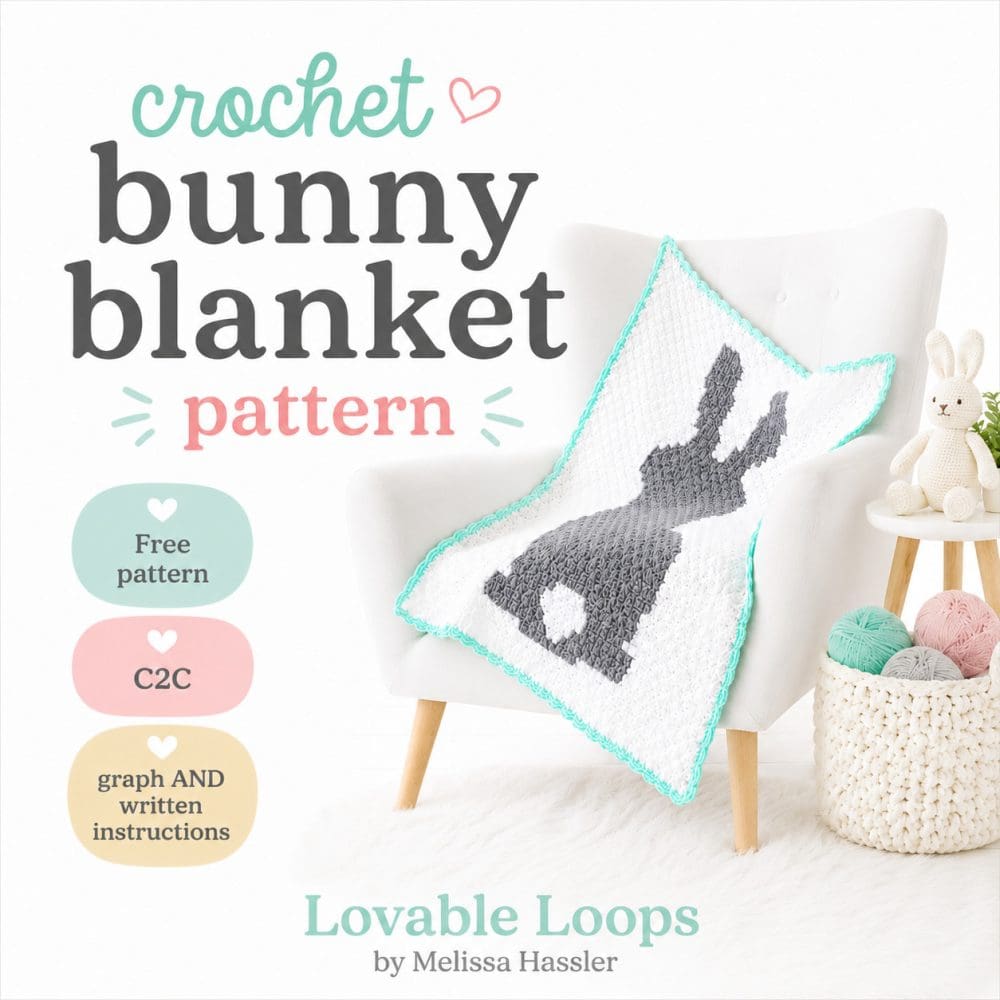
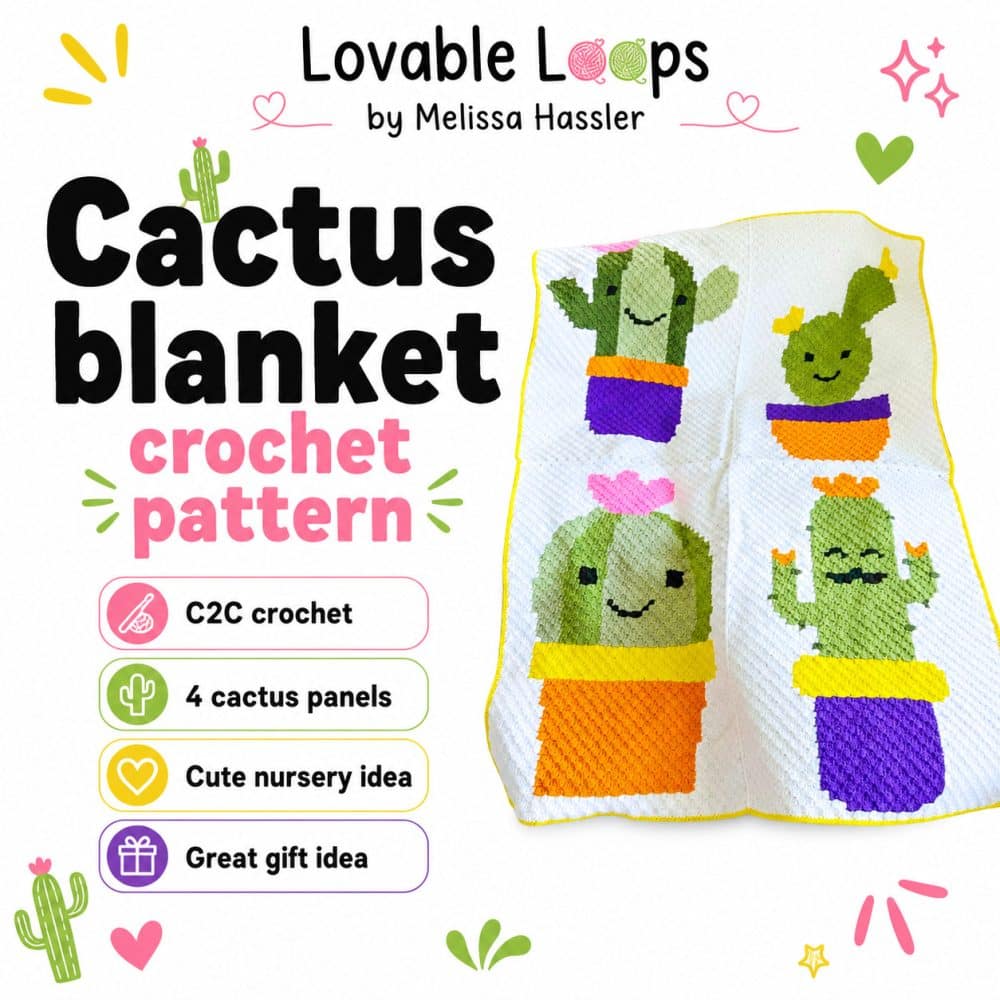
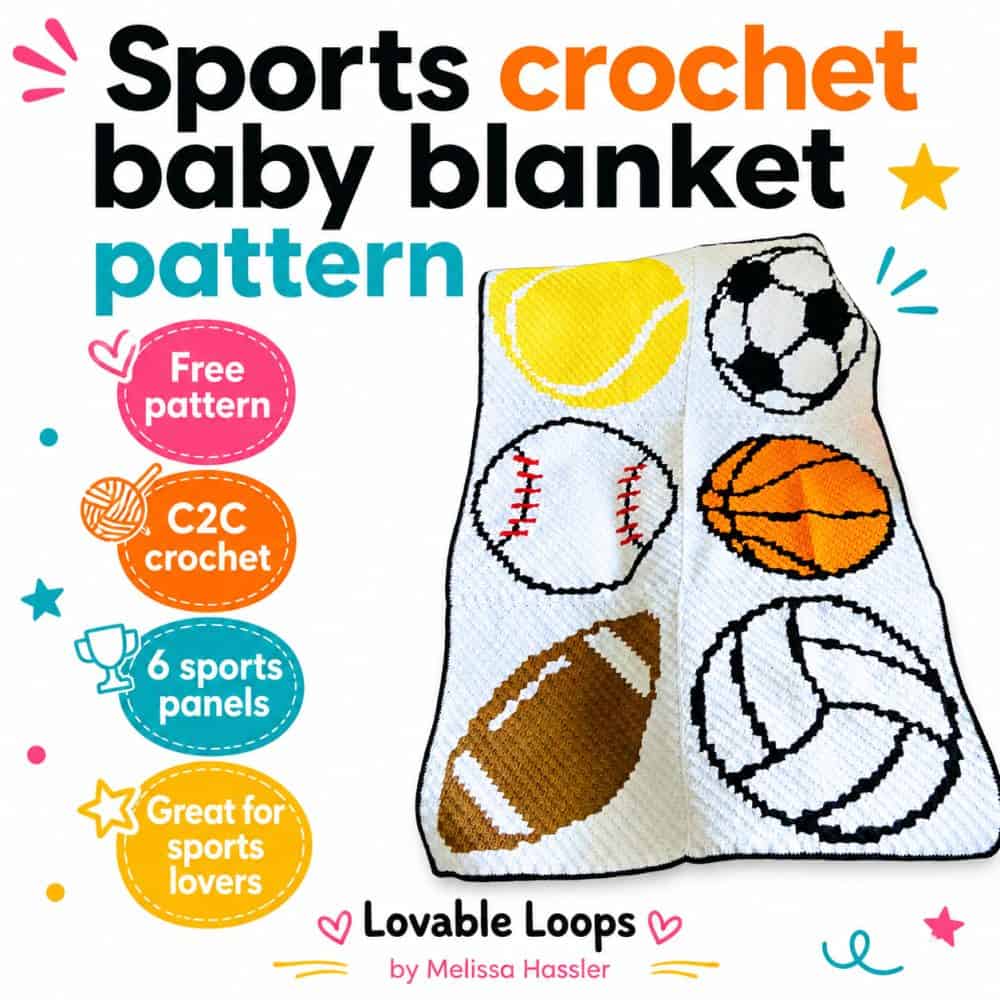
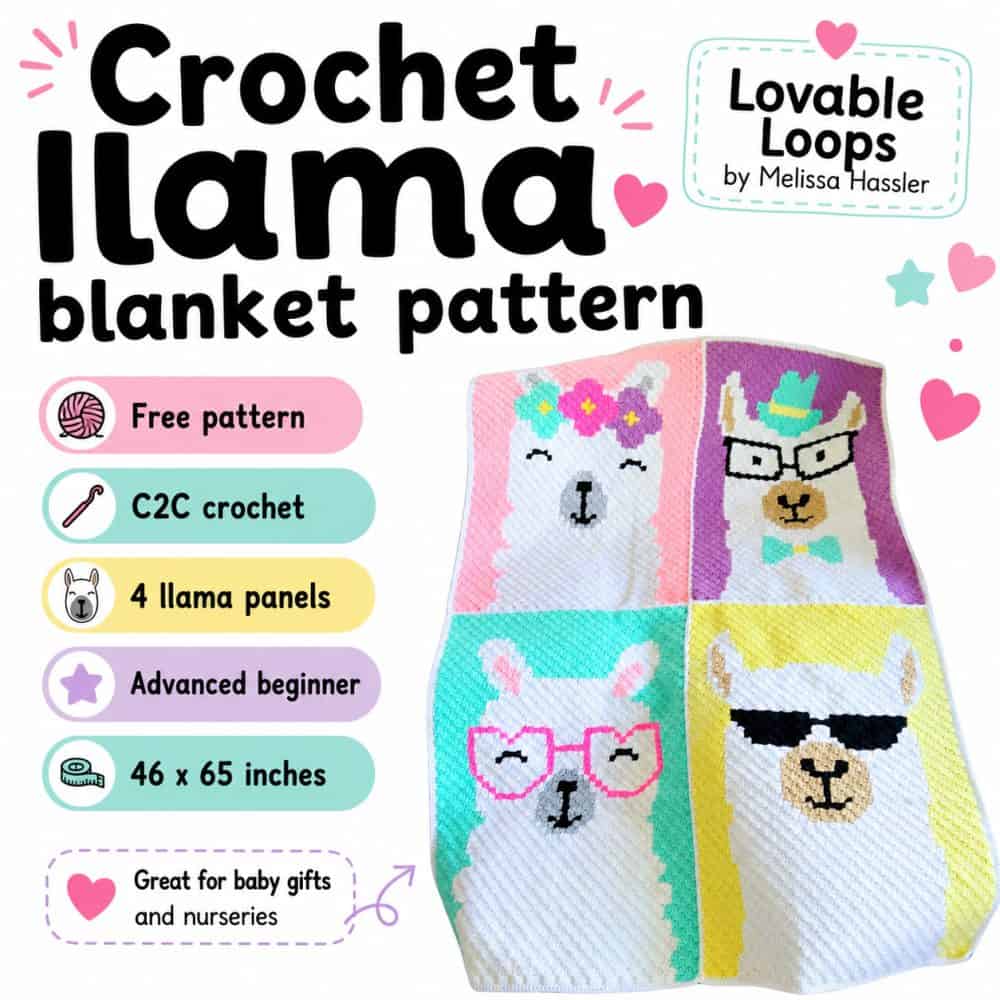
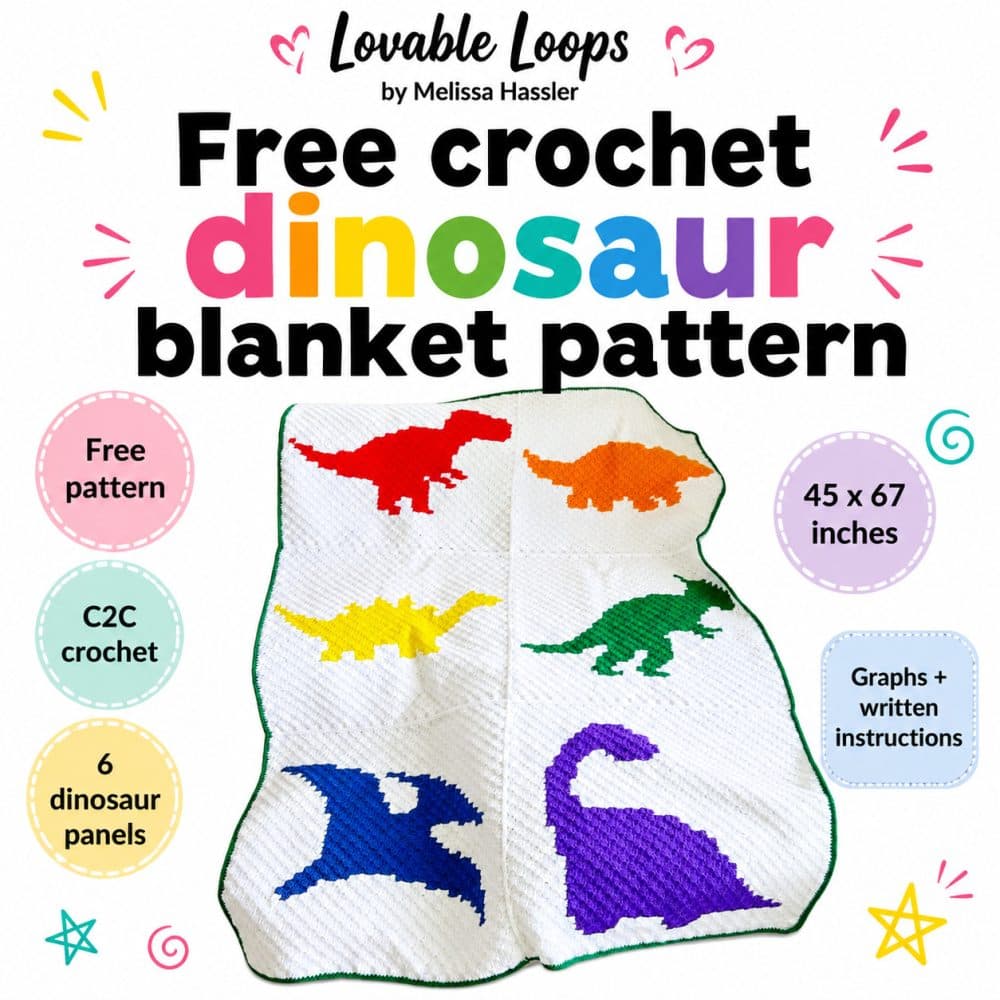
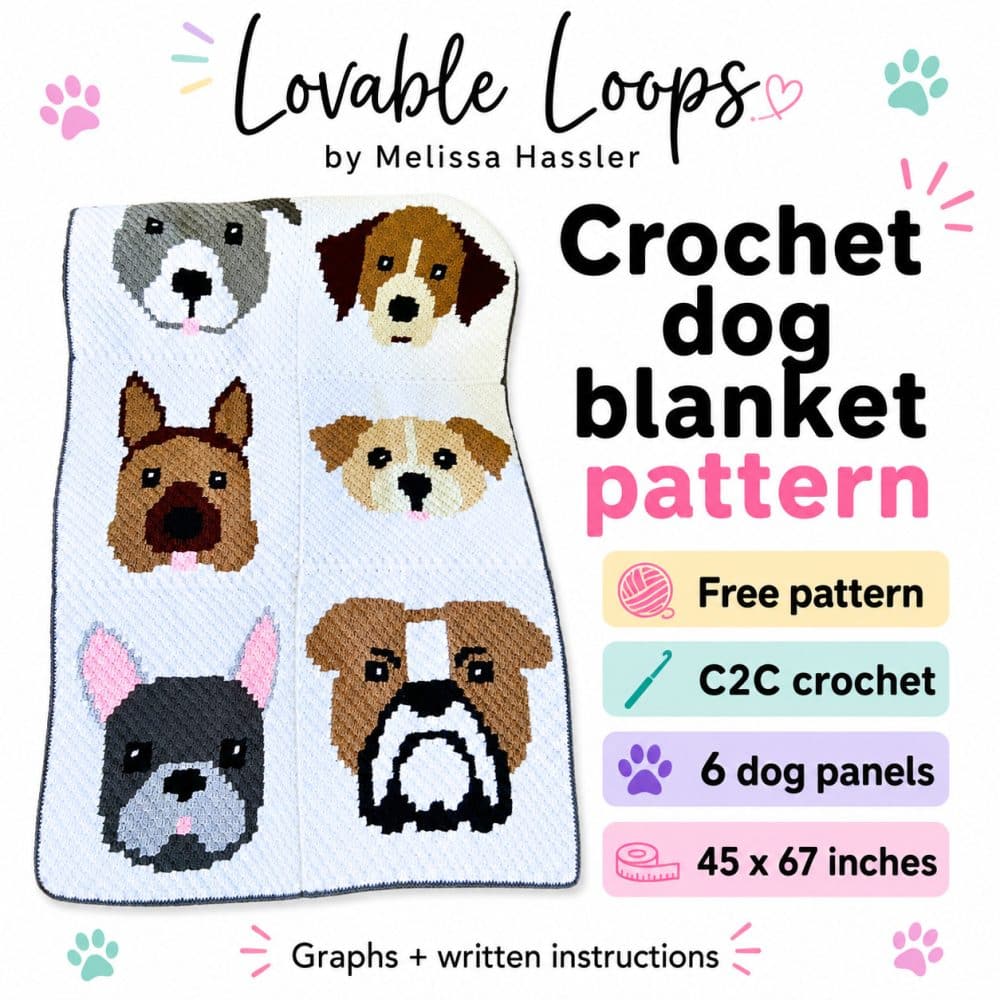
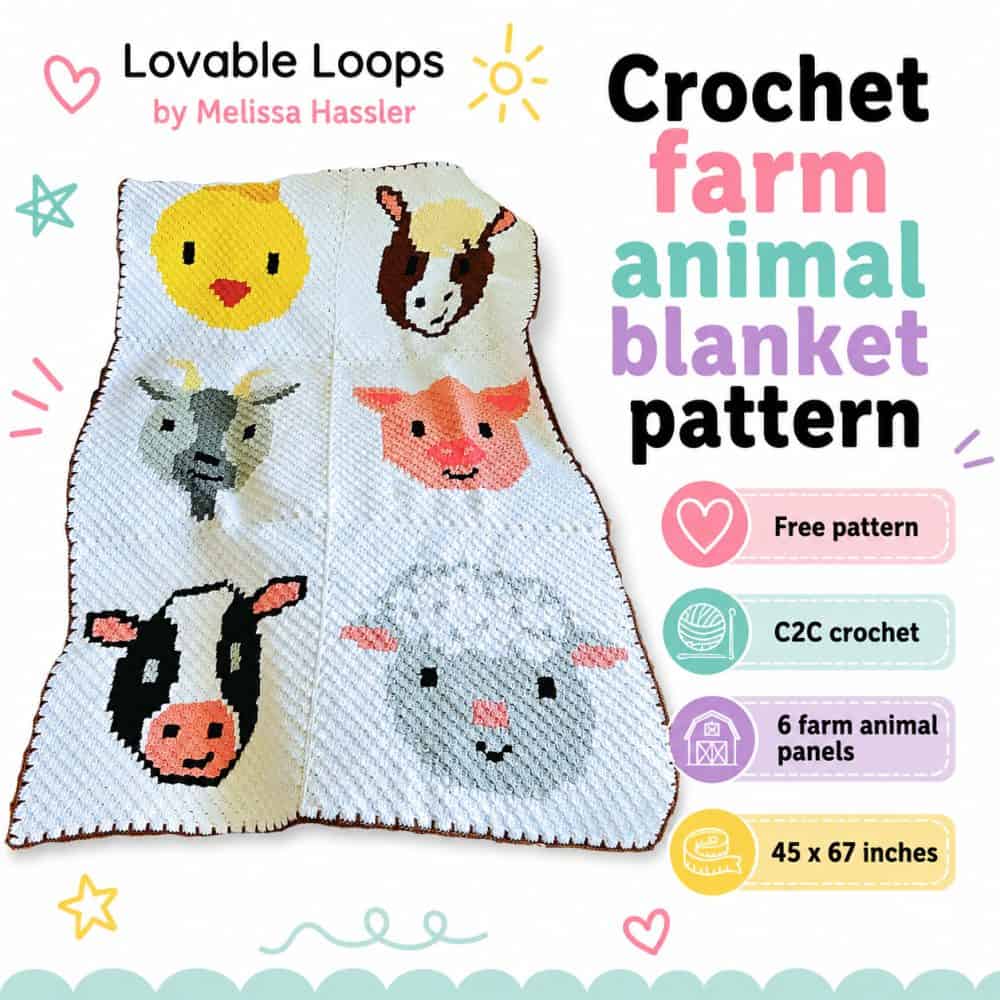
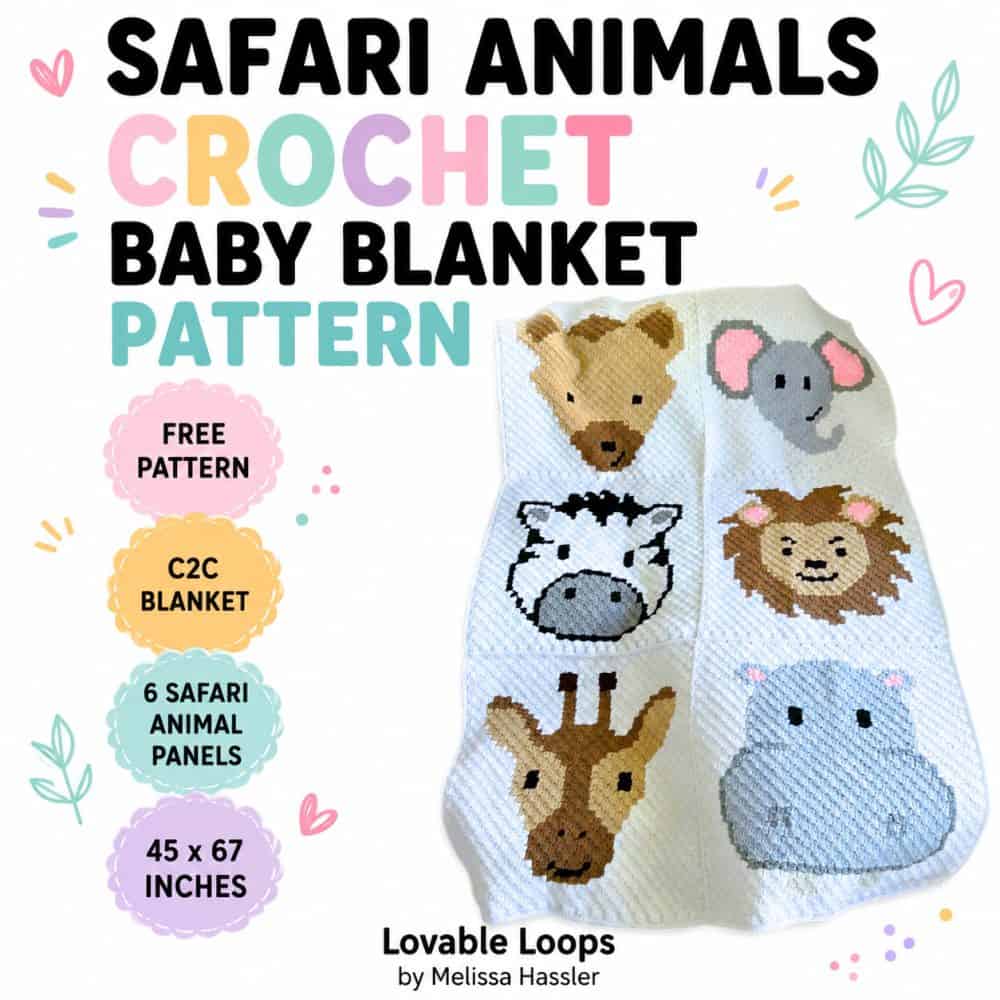
More free crochet baby blanket patterns
You can find more cozy crochet baby blankets in my full baby blanket collection. You can also browse my main collection of free crochet blanket patterns for even more handmade blanket ideas.
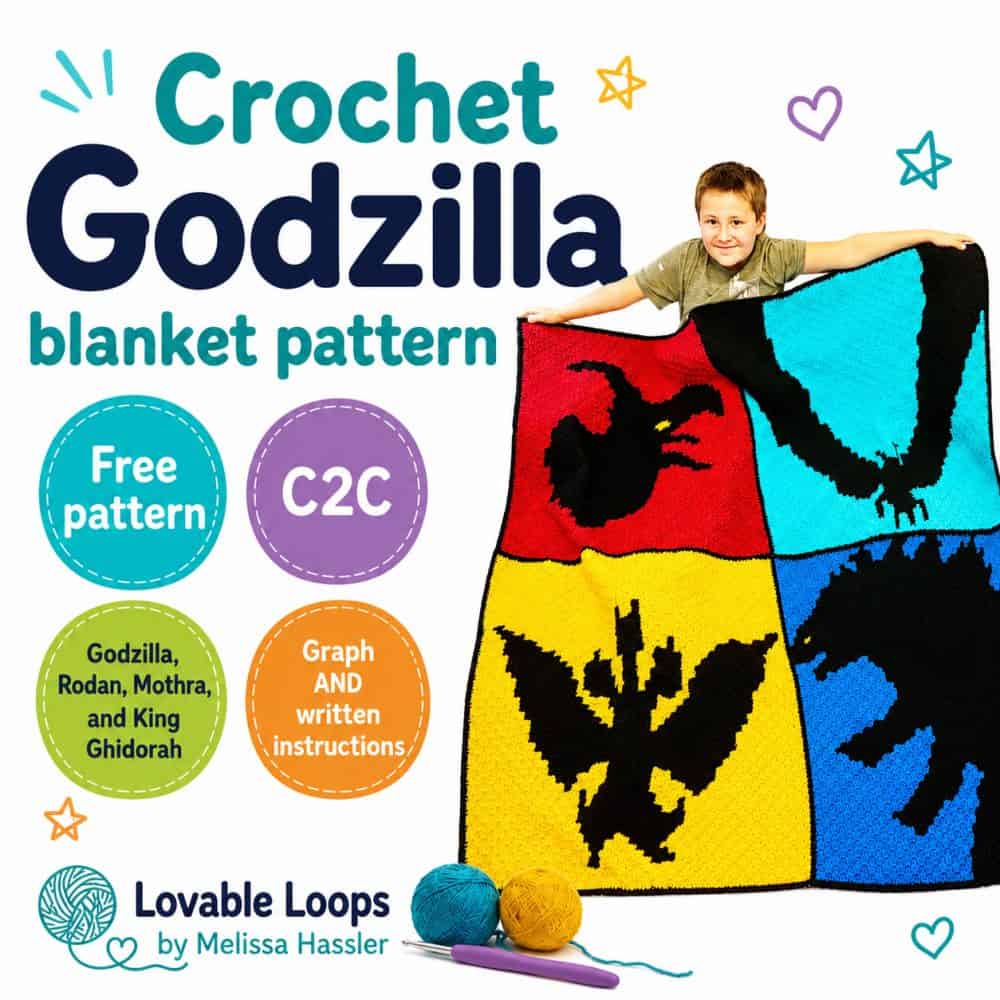
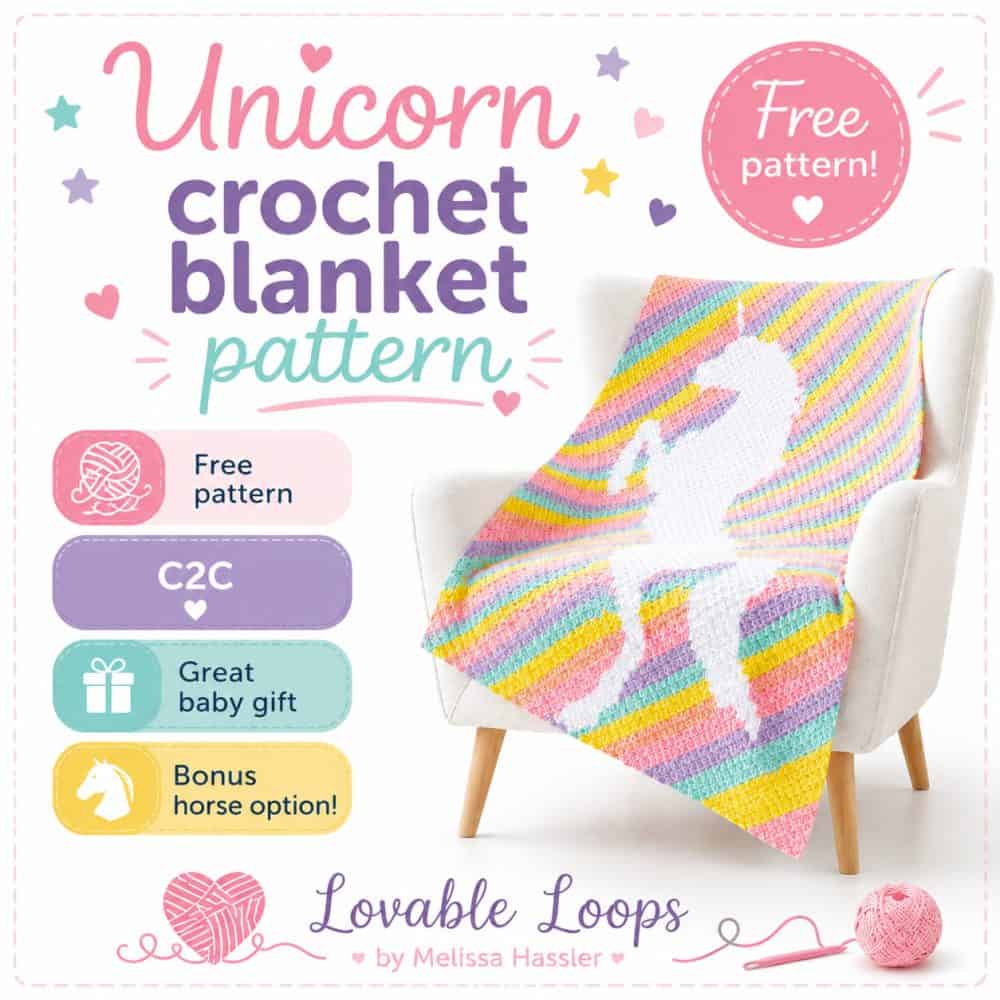
If you love animal graph blankets, visit my collection of C2C crochet blanket patterns for more cozy picture blanket ideas.
Let’s connect!
I’d love to see what you’re making! Share your finished project and follow along for more free crochet patterns and tutorials.
📌 Don’t forget to pin this pattern for later!
Happy crocheting! 🧶
— Melissa