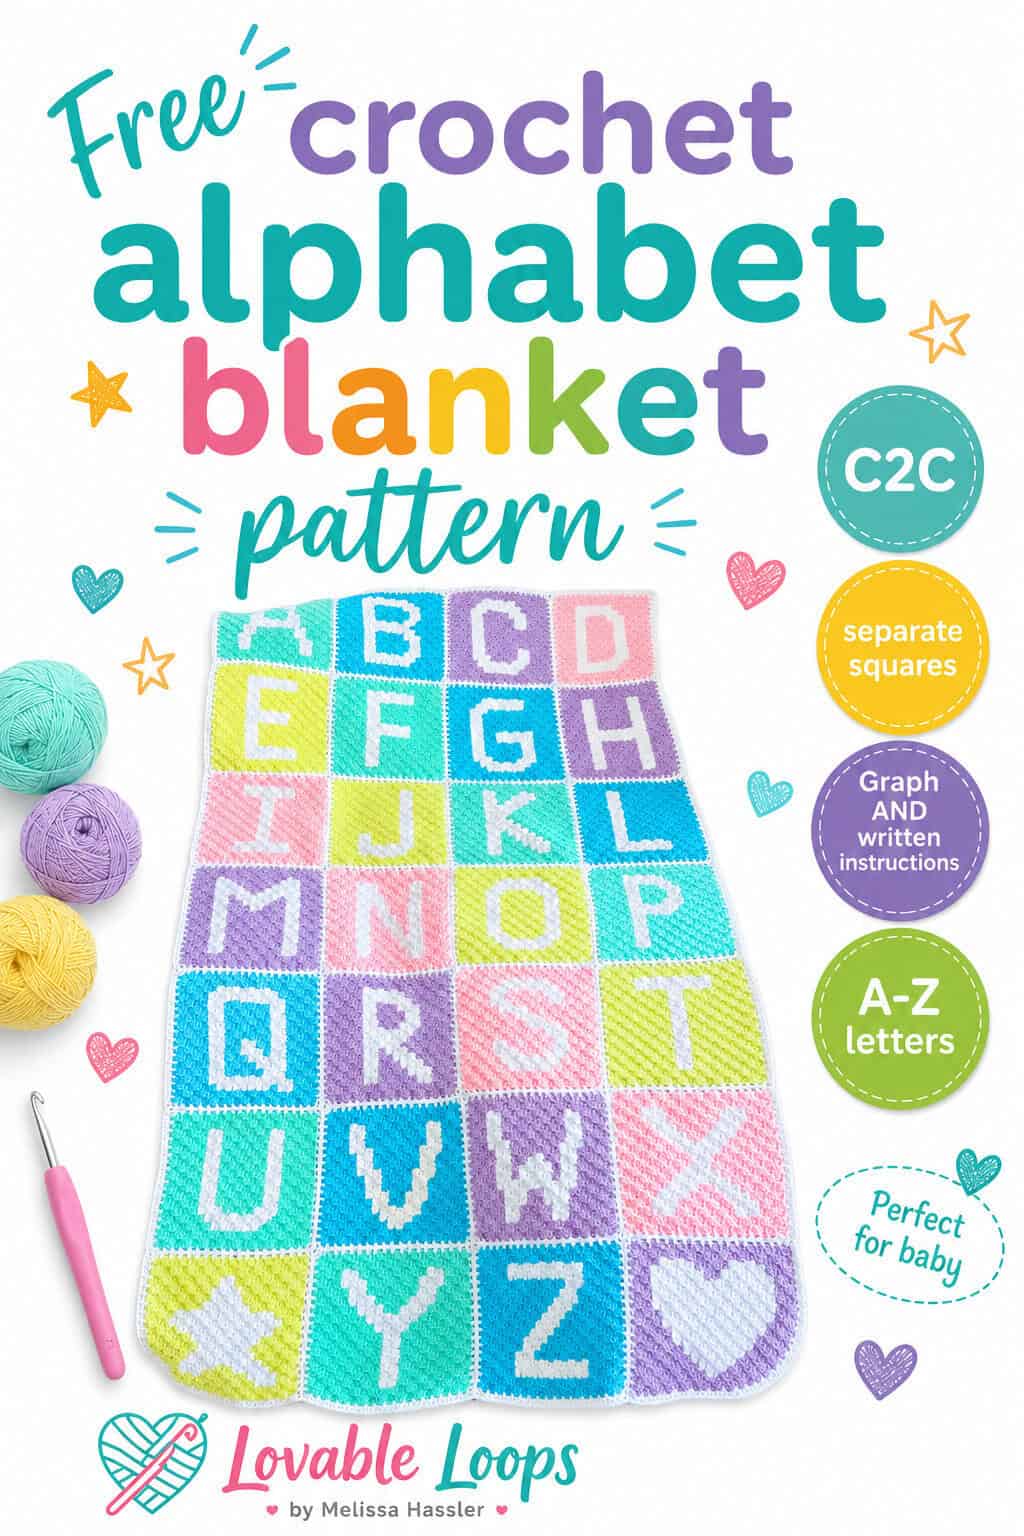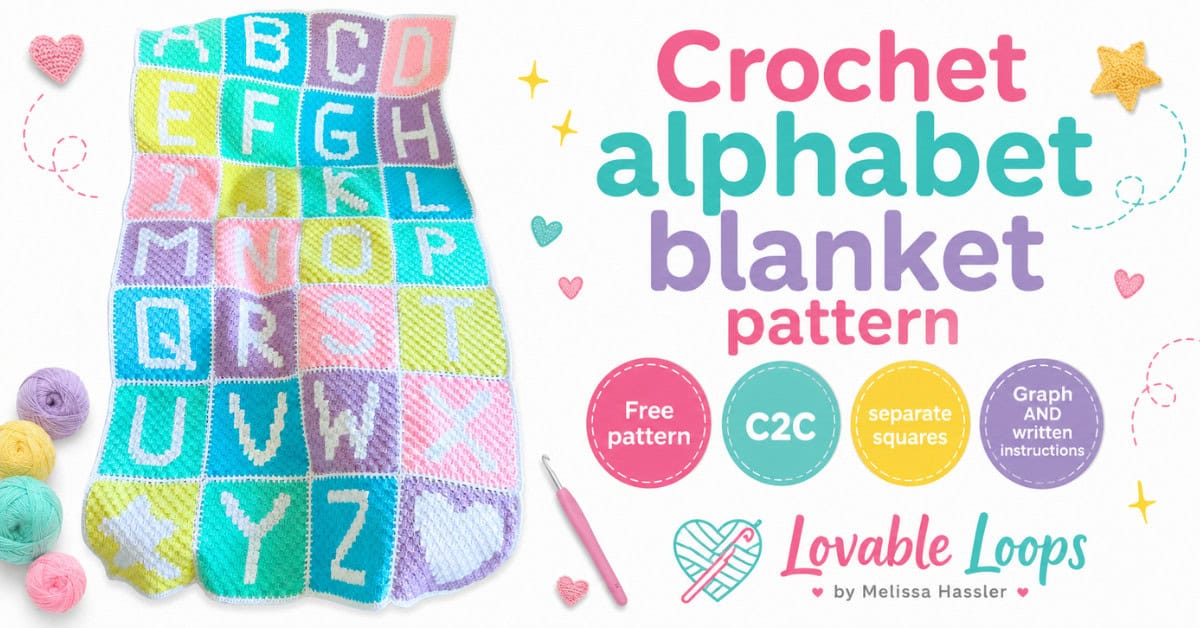
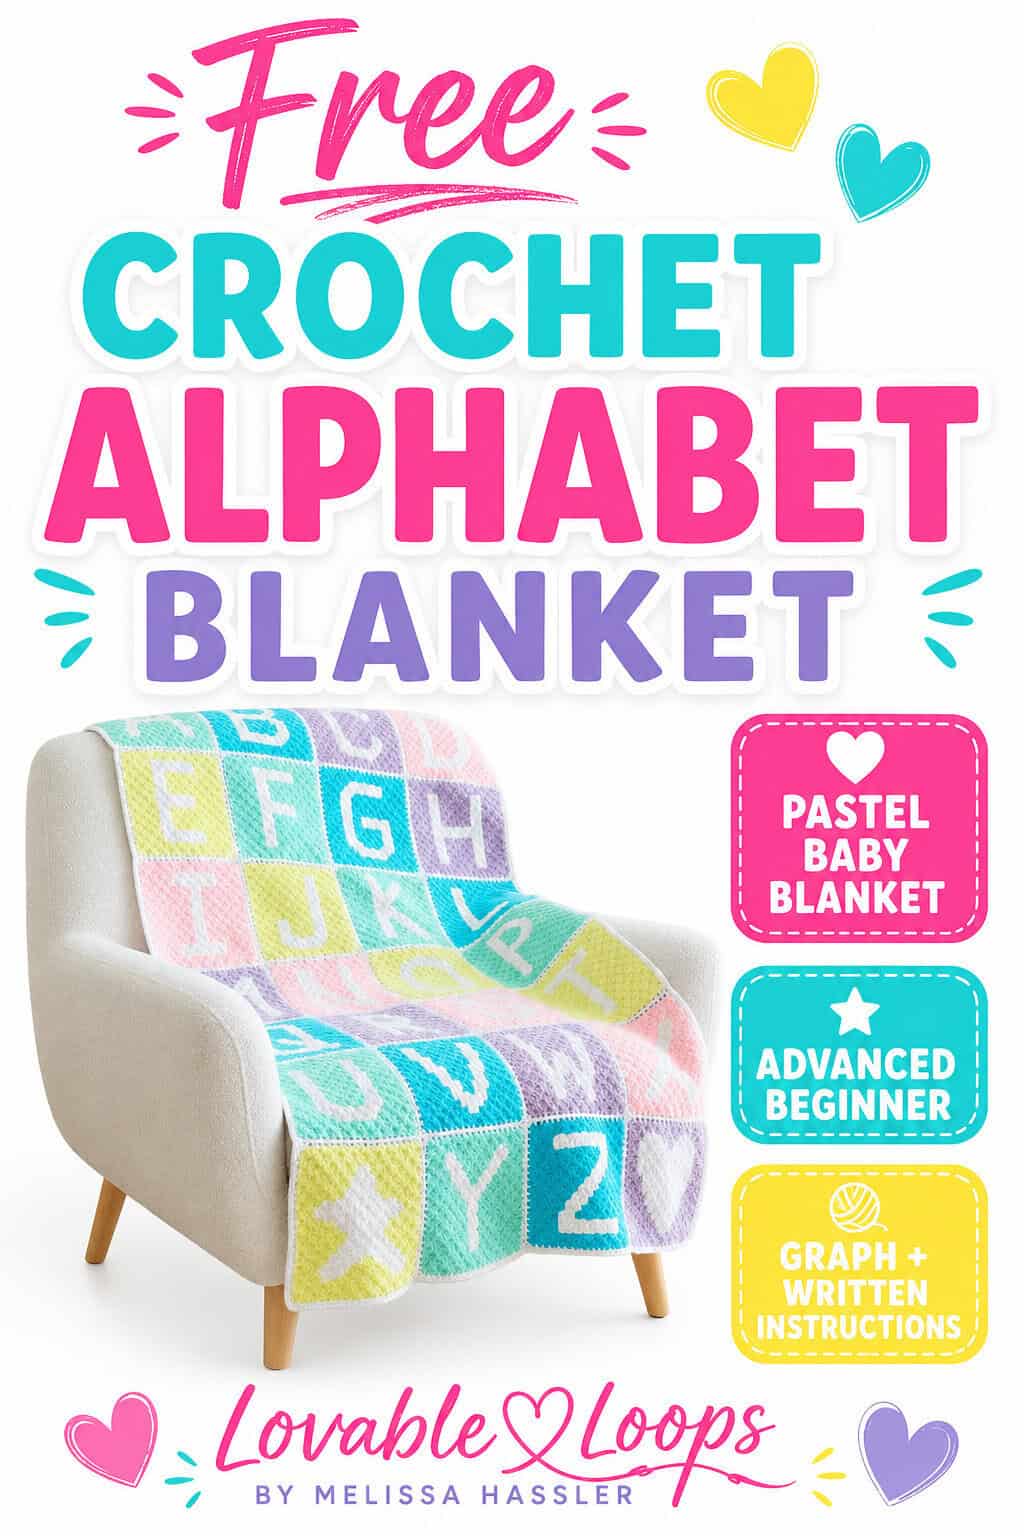
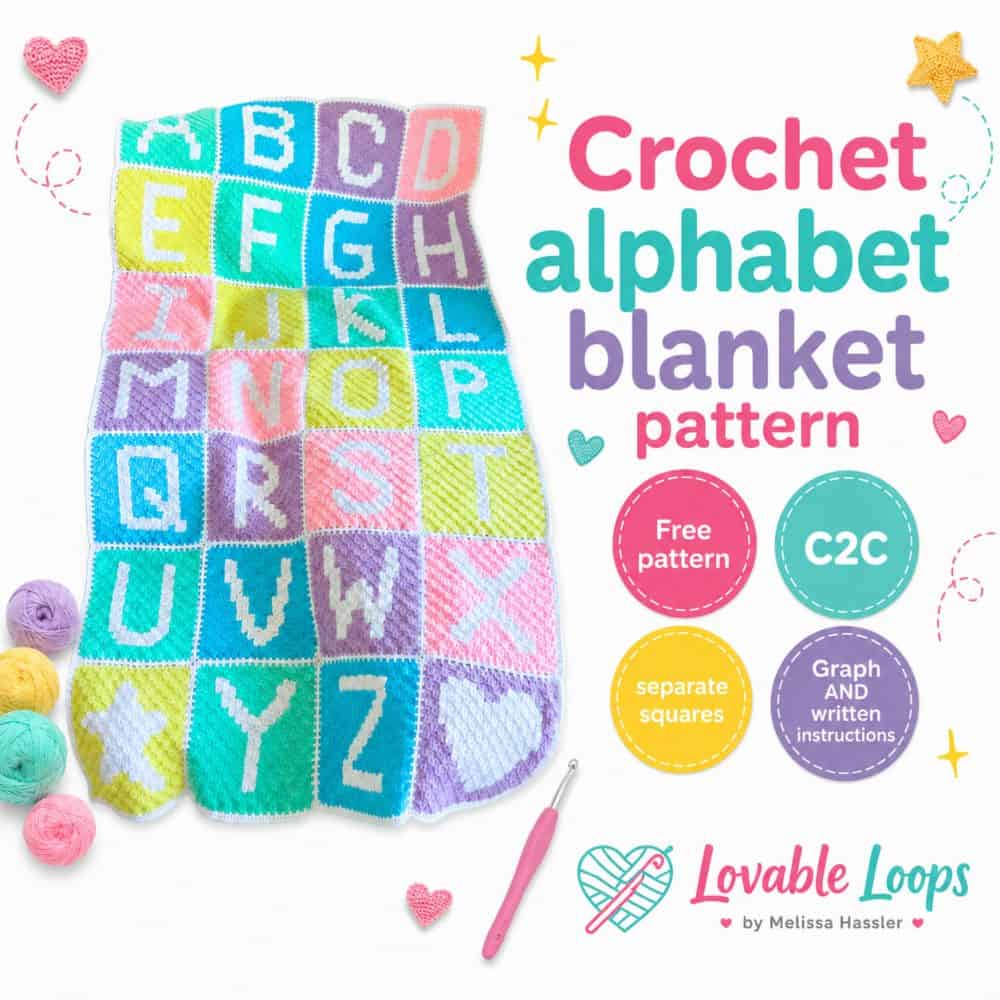
Crochet alphabet blanket pattern
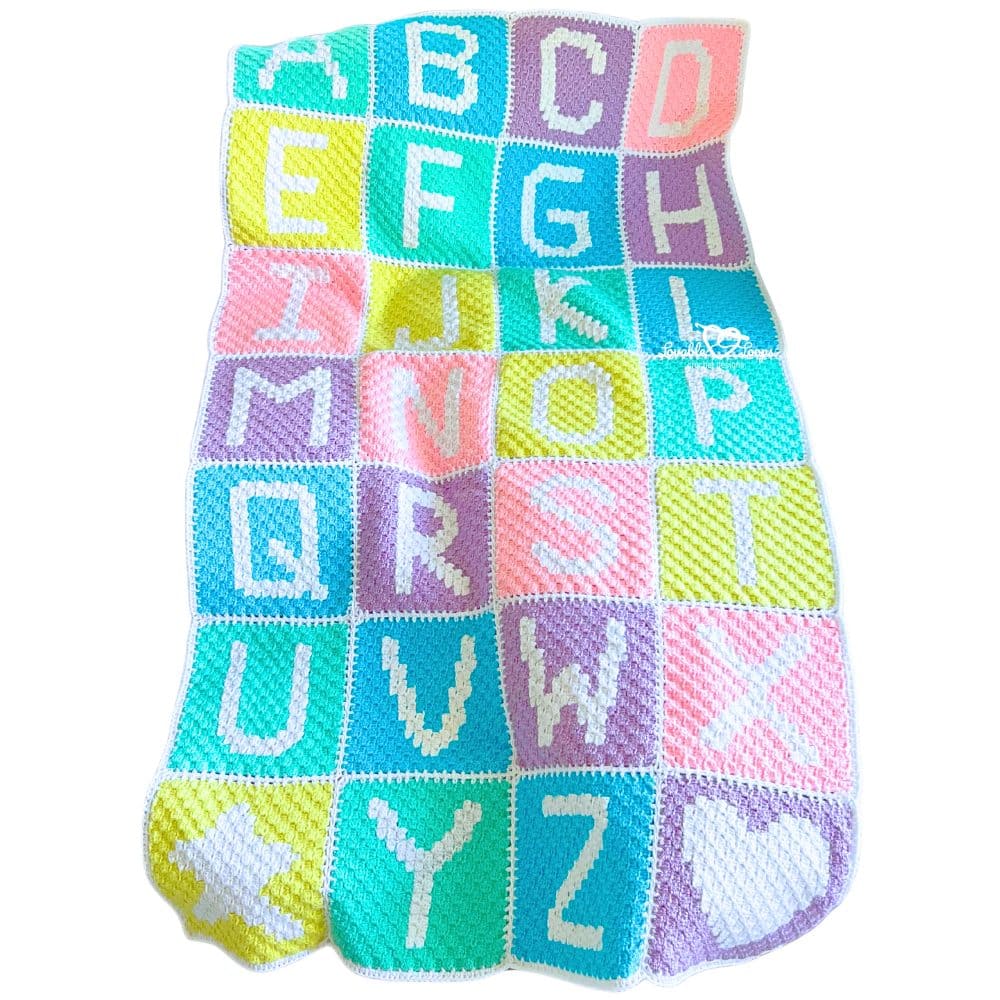
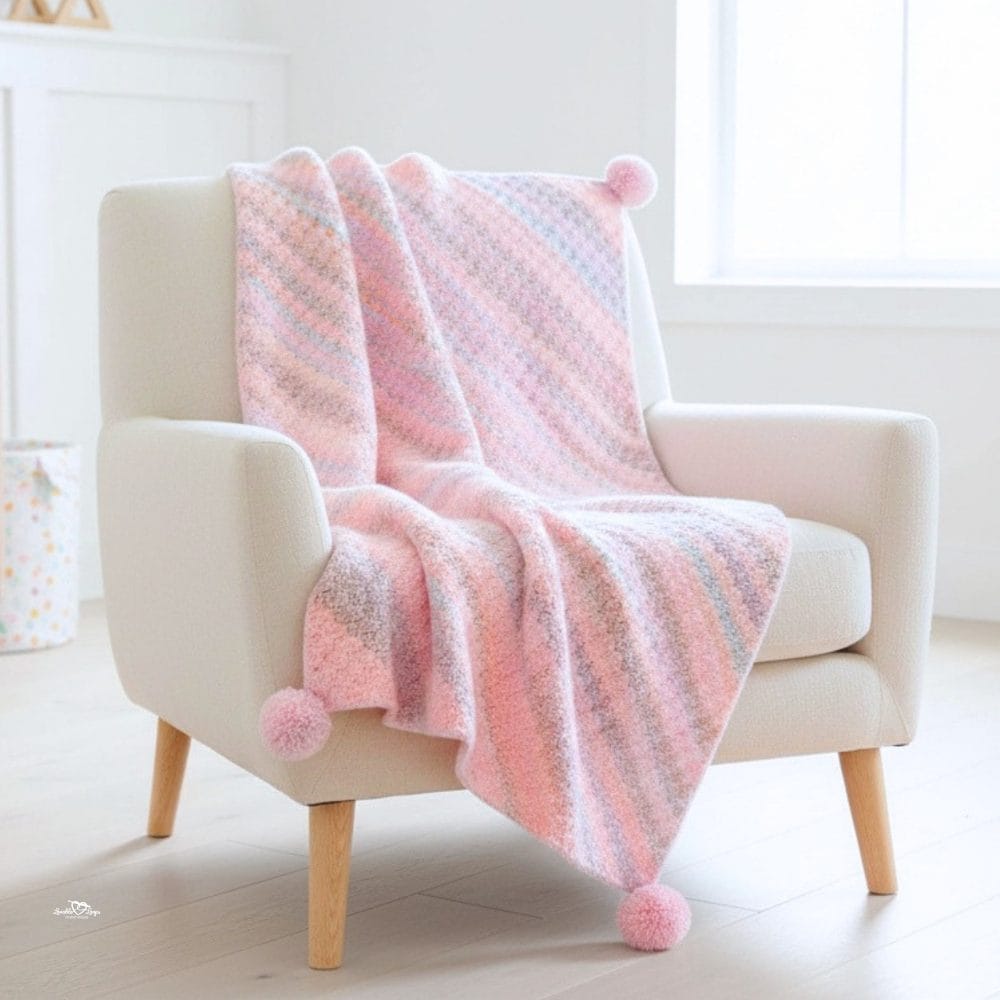
Want a fun way to turn little blocks into a bold personalized blanket? This C2C crochet alphabet blanket pattern uses corner-to-corner letter panels to create easy-to-read letters that are perfect for nursery décor, name blankets, and thoughtful handmade gifts.
Quick answer
This C2C crochet alphabet blanket pattern is made by crocheting individual letter panels and joining them together to create a personalized blanket. It uses worsted weight yarn and includes both a graph and row-by-row written instructions for each letter, making it a great option for confident beginners who are comfortable with basic C2C color changes.
What is corner-to-corner crochet (C2C)?
Corner-to-corner crochet, also called C2C, is a method worked diagonally in small blocks made with chains and double crochet stitches. In this pattern, each alphabet panel is crocheted one block at a time to create clean, easy-to-read letters.
Why you’ll love this crochet alphabet letters blanket pattern
- Educational and fun — Perfect for nurseries, playrooms, and toddler bedrooms.
- Includes all 26 letters — Crochet the full alphabet from A to Z.
- Easy to work one panel at a time — Each letter is its own piece, so the project feels manageable.
- Great for personalized gifts — A thoughtful choice for baby showers, birthdays, or nursery décor.
- Good for confident beginners — A nice way to practice C2C and simple color changes.
Pattern details
Here’s a quick overview of the materials, sizing, gauge, and pattern notes before you begin.
Skill level
Advanced beginner — this C2C alphabet blanket uses basic stitches, but you’ll work with color changes and follow a graph (or row-by-row written instructions).
Materials needed
- Crochet hook (4.5 mm / Size 7): Use this size, or adjust to meet gauge
- Worsted weight yarn (#4): In your chosen colors + white
- Yarn needle: For sewing panels together and weaving in ends
- Scissors: For cutting yarn
- Stitch markers (optional): Helpful for marking rows and keeping panels aligned
Finished size
My completed crochet alphabet letters blanket measures 38 in wide x 67 in long (97 cm x 170 cm).
Gauge
Gauge isn’t critical for a blanket, but it will affect your finished size.
8 C2C blocks (each block = ch 3 + 3 dc) = about 4 inches
Crochet abbreviations
- dc = double crochet
- sc = single crochet
- hdc = half double crochet
- ch/chs = chain/chains
- st/sts = stitch/stitches
- sl st = slip stitch
Terminology note: In this post, a panel is the finished 18 x 18 block design. A C2C block is the small stitch unit (ch 3 + 3 dc) that makes up the panel.
Pattern notes
- This blanket is made using the C2C crochet technique.
- You will make all of the letter panels first, then sew them together to make the blanket.
- You can follow the graph and/or row-by-row written instructions.
- Each block is chain 3 + 3 double crochet.
- Ch 6 to start a new row, and ch 3 to start a new block.
- Increase on both ends until the panel is the widest point, then decrease on both ends.
- ↙ Rows worked this direction are right-side rows.
- ↗ Rows worked this direction are wrong-side rows.
- The pattern is written in US crochet terms.
Quick links
A, B, C, D, E, F, G, H, I, J, K, L, M, N, O, P, Q, R, S, T, U, V, W, X, Y, Z, Heart, Star, Assembling, Border, FAQ
Crochet alphabet letters blanket instructions
Below you’ll find the written C2C instructions for each alphabet letter panel.
After completing each letter panel, add the border below before assembling the blanket.
Border for each letter panel: Ch 2. Work (hdc, ch 1) in each ch-3 space around the panel. In each corner ch-3 space, work (hdc, ch 1, hdc).
Letter A C2C panel
Graph: Download the crochet letter A graph.
Written instructions:
↙ Row 1: green x 1 (1 block)
↗ Row 2: green x 2 (2 blocks)
↙ Row 3: green x 3 (3 blocks)
↗ Row 4: green x 4 (4 blocks)
↙ Row 5: green x 5 (5 blocks)
↗ Row 6: green x 2, white x 1, green x 3 (6 blocks)
↙ Row 7: green x 3, white x 2, green x 2 (7 blocks)
↗ Row 8: green x 3, white x 2, green x 3 (8 blocks)
↙ Row 9: green x 4, white x 1, green x 4 (9 blocks)
↗ Row 10: green x 5, white x 1, green x 4 (10 blocks)
↙ Row 11: green x 4, white x 2, green x 5 (11 blocks)
↗ Row 12: green x 6, white x 1, green x 5 (12 blocks)
↙ Row 13: green x 5, white x 1, green x 7 (13 blocks)
↗ Row 14: green x 7, white x 2, green x 5 (14 blocks)
↙ Row 15: green x 5, white x 3, green x 7 (15 blocks)
↗ Row 16: green x 2, white x 1, green x 4, white x 4, green x 5 (16 blocks)
↙ Row 17: green x 6, white x 1, green x 1, white x 2, green x 3, white x 2, green x 2 (17 blocks)
↗ Row 18: green x 3, white x 3, green x 1, white x 2, green x 2, white x 1, green x 6 (18 blocks)
Corner: Start decreasing on both ends
↙ Row 19: green x 5, white x 1, green x 3, white x 5, green x 3 (17 blocks)
↗ Row 20: green x 4, white x 3, green x 3, white x 2, green x 4 (16 blocks)
↙ Row 21: green x 4, white x 1, green x 3, white x 2, green x 5 (15 blocks)
↗ Row 22: green x 5, white x 2, green x 3, white x 1, green x 3 (14 blocks)
↙ Row 23: green x 2, white x 2, green x 1, white x 3, green x 5 (13 blocks)
↗ Row 24: green x 6, white x 4, green x 2 (12 blocks)
↙ Row 25: green x 2, white x 3, green x 6 (11 blocks)
↗ Row 26: green x 7, white x 1, green x 2 (10 blocks)
↙ Row 27: green x 9 (9 blocks)
↗ Row 28: green x 8 (8 blocks)
↙ Row 29: green x 7 (7 blocks)
↗ Row 30: green x 6 (6 blocks)
↙ Row 31: green x 5 (5 blocks)
↗ Row 32: green x 4 (4 blocks)
↙ Row 33: green x 3 (3 blocks)
↗ Row 34: green x 2 (2 blocks)
↙ Row 35: green x 1 (1 block)
Letter B C2C panel
Graph: Download the crochet letter B graph.
Written instructions:
↙ Row 1: blue x 1 (1 block)
↗ Row 2: blue x 2 (2 blocks)
↙ Row 3: blue x 3 (3 blocks)
↗ Row 4: blue x 4 (4 blocks)
↙ Row 5: blue x 5 (5 blocks)
↗ Row 6: blue x 6 (6 blocks)
↙ Row 7: blue x 7 (7 blocks)
↗ Row 8: blue x 8 (8 blocks)
↙ Row 9: blue x 4, white x 3, blue x 2 (9 blocks)
↗ Row 10: blue x 2, white x 4, blue x 4 (10 blocks)
↙ Row 11: blue x 4, white x 5, blue x 2 (11 blocks)
↗ Row 12: blue x 2, white x 2, blue x 2, white x 2, blue x 4 (12 blocks)
↙ Row 13: blue x 5, white x 1, blue x 3, white x 2, blue x 2 (13 blocks)
↗ Row 14: blue x 2, white x 2, blue x 3, white x 2, blue x 5 (14 blocks)
↙ Row 15: blue x 6, white x 1, blue x 4, white x 2, blue x 2 (15 blocks)
↗ Row 16: blue x 2, white x 2, blue x 4, white x 4, blue x 4 (16 blocks)
↙ Row 17: blue x 4, white x 5, blue x 3, white x 2, blue x 3 (17 blocks)
↗ Row 18: blue x 4, white x 2, blue x 2, white x 2, blue x 2, white x 2, blue x 4 (18 blocks)
Corner: Start decreasing on both ends
↙ Row 19: blue x 4, white x 1, blue x 3, white x 2, blue x 1, white x 2, blue x 4 (17 blocks)
↗ Row 20: blue x 4, white x 4, blue x 3, white x 2, blue x 3 (16 blocks)
↙ Row 21: blue x 3, white x 1, blue x 4, white x 3, blue x 4 (15 blocks)
↗ Row 22: blue x 4, white x 2, blue x 4, white x 2, blue x 2 (14 blocks)
↙ Row 23: blue x 2, white x 2, blue x 3, white x 2, blue x 4 (13 blocks)
↗ Row 24: blue x 4, white x 2, blue x 2, white x 2, blue x 2 (12 blocks)
↙ Row 25: blue x 2, white x 2, blue x 1, white x 2, blue x 4 (11 blocks)
↗ Row 26: blue x 4, white x 4, blue x 2 (10 blocks)
↙ Row 27: blue x 2, white x 3, blue x 4 (9 blocks)
↗ Row 28: blue x 4, white x 2, blue x 2 (8 blocks)
↙ Row 29: blue x 2, white x 1, blue x 4 (7 blocks)
↗ Row 30: blue x 6 (6 blocks)
↙ Row 31: blue x 5 (5 blocks)
↗ Row 32: blue x 4 (4 blocks)
↙ Row 33: blue x 3 (3 blocks)
↗ Row 34: blue x 2 (2 blocks)
↙ Row 35: blue x 1 (1 block)
Letter C C2C panel
Graph: Download the crochet letter C graph.
Written instructions:
↙ Row 1: purple x 1 (1 block)
↗ Row 2: purple x 2 (2 blocks)
↙ Row 3: purple x 3 (3 blocks)
↗ Row 4: purple x 4 (4 blocks)
↙ Row 5: purple x 5 (5 blocks)
↗ Row 6: purple x 6 (6 blocks)
↙ Row 7: purple x 7 (7 blocks)
↗ Row 8: purple x 8 (8 blocks)
↙ Row 9: purple x 4, white x 3, purple x 2 (9 blocks)
↗ Row 10: purple x 2, white x 4, purple x 4 (10 blocks)
↙ Row 11: purple x 4, white x 5, purple x 2 (11 blocks)
↗ Row 12: purple x 2, white x 2, purple x 2, white x 1, purple x 5 (12 blocks)
↙ Row 13: purple x 9, white x 2, purple x 2 (13 blocks)
↗ Row 14: purple x 2, white x 2, purple x 10 (14 blocks)
↙ Row 15: purple x 11, white x 1, purple x 3 (15 blocks)
↗ Row 16: purple x 3, white x 2, purple x 6, white x 1, purple x 4 (16 blocks)
↙ Row 17: purple x 4, white x 2, purple x 6, white x 1, purple x 4 (17 blocks)
↗ Row 18: purple x 4, white x 2, purple x 6, white x 2, purple x 4 (18 blocks)
Corner: Start decreasing on both ends
↙ Row 19: purple x 4, white x 1, purple x 6, white x 2, purple x 4 (17 blocks)
↗ Row 20: purple x 4, white x 2, purple x 5, white x 2, purple x 3 (16 blocks)
↙ Row 21: purple x 3, white x 1, purple x 5, white x 2, purple x 4 (15 blocks)
↗ Row 22: purple x 4, white x 2, purple x 4, white x 2, purple x 2 (14 blocks)
↙ Row 23: purple x 2, white x 2, purple x 3, white x 2, purple x 4 (13 blocks)
↗ Row 24: purple x 4, white x 2, purple x 2, white x 2, purple x 2 (12 blocks)
↙ Row 25: purple x 2, white x 5, purple x 4 (11 blocks)
↗ Row 26: purple x 4, white x 4, purple x 2 (10 blocks)
↙ Row 27: purple x 2, white x 3, purple x 4 (9 blocks)
↗ Row 28: purple x 8 (8 blocks)
↙ Row 29: purple x 7 (7 blocks)
↗ Row 30: purple x 6 (6 blocks)
↙ Row 31: purple x 5 (5 blocks)
↗ Row 32: purple x 4 (4 blocks)
↙ Row 33: purple x 3 (3 blocks)
↗ Row 34: purple x 2 (2 blocks)
↙ Row 35: purple x 1 (1 block)
Letter D C2C panel
Graph: Download the crochet letter D graph.
Written instructions:
↙ Row 1: pink x 1 (1 block)
↗ Row 2: pink x 2 (2 blocks)
↙ Row 3: pink x 3 (3 blocks)
↗ Row 4: pink x 4 (4 blocks)
↙ Row 5: pink x 5 (5 blocks)
↗ Row 6: pink x 6 (6 blocks)
↙ Row 7: pink x 7 (7 blocks)
↗ Row 8: pink x 8 (8 blocks)
↙ Row 9: pink x 4, white x 3, pink x 2 (9 blocks)
↗ Row 10: pink x 2, white x 4, pink x 4 (10 blocks)
↙ Row 11: pink x 4, white x 5, pink x 2 (11 blocks)
↗ Row 12: pink x 2, white x 2, pink x 2, white x 2, pink x 4 (12 blocks)
↙ Row 13: pink x 4, white x 2, pink x 3, white x 2, pink x 2 (13 blocks)
↗ Row 14: pink x 2, white x 2, pink x 4, white x 2, pink x 4 (14 blocks)
↙ Row 15: pink x 4, white x 2, pink x 5, white x 2, pink x 2 (15 blocks)
↗ Row 16: pink x 2, white x 2, pink x 6, white x 2, pink x 4 (16 blocks)
↙ Row 17: pink x 4, white x 2, pink x 6, white x 2, pink x 3 (17 blocks)
↗ Row 18: pink x 4, white x 2, pink x 6, white x 2, pink x 4 (18 blocks)
Corner: Start decreasing on both ends
↙ Row 19: pink x 4, white x 1, pink x 6, white x 2, pink x 4 (17 blocks)
↗ Row 20: pink x 4, white x 2, pink x 5, white x 2, pink x 3 (16 blocks)
↙ Row 21: pink x 3, white x 1, pink x 5, white x 2, pink x 4 (15 blocks)
↗ Row 22: pink x 4, white x 2, pink x 4, white x 2, pink x 2 (14 blocks)
↙ Row 23: pink x 2, white x 2, pink x 3, white x 2, pink x 4 (13 blocks)
↗ Row 24: pink x 4, white x 2, pink x 2, white x 2, pink x 2 (12 blocks)
↙ Row 25: pink x 2, white x 2, pink x 1, white x 2, pink x 4 (11 blocks)
↗ Row 26: pink x 4, white x 4, pink x 2 (10 blocks)
↙ Row 27: pink x 2, white x 3, pink x 4 (9 blocks)
↗ Row 28: pink x 4, white x 2, pink x 2 (8 blocks)
↙ Row 29: pink x 2, white x 1, pink x 4 (7 blocks)
↗ Row 30: pink x 6 (6 blocks)
↙ Row 31: pink x 5 (5 blocks)
↗ Row 32: pink x 4 (4 blocks)
↙ Row 33: pink x 3 (3 blocks)
↗ Row 34: pink x 2 (2 blocks)
↙ Row 35: pink x 1 (1 block)
Letter E C2C panel
Graph: Download the crochet letter E graph.
Written instructions:
↙ Row 1: yellow x 1 (1 block)
↗ Row 2: yellow x 2 (2 blocks)
↙ Row 3: yellow x 3 (3 blocks)
↗ Row 4: yellow x 4 (4 blocks)
↙ Row 5: yellow x 5 (5 blocks)
↗ Row 6: yellow x 6 (6 blocks)
↙ Row 7: yellow x 7 (7 blocks)
↗ Row 8: yellow x 2, white x 1, yellow x 5 (8 blocks)
↙ Row 9: yellow x 5, white x 2, yellow x 2 (9 blocks)
↗ Row 10: yellow x 2, white x 2, yellow x 6 (10 blocks)
↙ Row 11: yellow x 7, white x 2, yellow x 2 (11 blocks)
↗ Row 12: yellow x 2, white x 2, yellow x 8 (12 blocks)
↙ Row 13: yellow x 9, white x 2, yellow x 2 (13 blocks)
↗ Row 14: yellow x 2, white x 2, yellow x 10 (14 blocks)
↙ Row 15: yellow x 6, white x 1, yellow x 4, white x 2, yellow x 2 (15 blocks)
↗ Row 16: yellow x 3, white x 2, yellow x 3, white x 2, yellow x 6 (16 blocks)
↙ Row 17: yellow x 7, white x 2, yellow x 2, white x 2, yellow x 4 (17 blocks)
↗ Row 18: yellow x 5, white x 2, yellow x 1, white x 2, yellow x 8 (18 blocks)
Corner: Start decreasing on both ends
↙ Row 19: yellow x 8, white x 4, yellow x 5 (17 blocks)
↗ Row 20: yellow x 5, white x 3, yellow x 4, white x 1, yellow x 3 (16 blocks)
↙ Row 21: yellow x 2, white x 2, yellow x 4, white x 2, yellow x 5 (15 blocks)
↗ Row 22: yellow x 5, white x 2, yellow x 3, white x 2, yellow x 2 (14 blocks)
↙ Row 23: yellow x 2, white x 2, yellow x 2, white x 2, yellow x 5 (13 blocks)
↗ Row 24: yellow x 5, white x 2, yellow x 1, white x 2, yellow x 2 (12 blocks)
↙ Row 25: yellow x 2, white x 4, yellow x 5 (11 blocks)
↗ Row 26: yellow x 5, white x 3, yellow x 2 (10 blocks)
↙ Row 27: yellow x 2, white x 2, yellow x 5 (9 blocks)
↗ Row 28: yellow x 5, white x 1, yellow x 2 (8 blocks)
↙ Row 29: yellow x 7 (7 blocks)
↗ Row 30: yellow x 6 (6 blocks)
↙ Row 31: yellow x 5 (5 blocks)
↗ Row 32: yellow x 4 (4 blocks)
↙ Row 33: yellow x 3 (3 blocks)
↗ Row 34: yellow x 2 (2 blocks)
↙ Row 35: yellow x 1 (1 block)
Letter F C2C panel
Graph: Download the crochet letter F graph.
Written instructions:
↙ Row 1: green x 1 (1 block)
↗ Row 2: green x 2 (2 blocks)
↙ Row 3: green x 3 (3 blocks)
↗ Row 4: green x 4 (4 blocks)
↙ Row 5: green x 5 (5 blocks)
↗ Row 6: green x 6 (6 blocks)
↙ Row 7: green x 7 (7 blocks)
↗ Row 8: green x 8 (8 blocks)
↙ Row 9: green x 9 (9 blocks)
↗ Row 10: green x 10 (10 blocks)
↙ Row 11: green x 11 (11 blocks)
↗ Row 12: green x 12 (12 blocks)
↙ Row 13: green x 13 (13 blocks)
↗ Row 14: green x 2, white x 1, green x 11 (14 blocks)
↙ Row 15: green x 6, white x 1, green x 4, white x 2, green x 2 (15 blocks)
↗ Row 16: green x 3, white x 2, green x 3, white x 2, green x 6 (16 blocks)
↙ Row 17: green x 7, white x 2, green x 2, white x 2, green x 4 (17 blocks)
↗ Row 18: green x 5, white x 2, green x 1, white x 2, green x 8 (18 blocks)
Corner: Start decreasing on both ends
↙ Row 19: green x 8, white x 4, green x 5 (17 blocks)
↗ Row 20: green x 5, white x 3, green x 4, white x 1, green x 3 (16 blocks)
↙ Row 21: green x 2, white x 2, green x 4, white x 2, green x 5 (15 blocks)
↗ Row 22: green x 5, white x 2, green x 3, white x 2, green x 2 (14 blocks)
↙ Row 23: green x 2, white x 2, green x 2, white x 2, green x 5 (13 blocks)
↗ Row 24: green x 5, white x 2, green x 1, white x 2, green x 2 (12 blocks)
↙ Row 25: green x 2, white x 4, green x 5 (11 blocks)
↗ Row 26: green x 5, white x 3, green x 2 (10 blocks)
↙ Row 27: green x 2, white x 2, green x 5 (9 blocks)
↗ Row 28: green x 5, white x 1, green x 2 (8 blocks)
↙ Row 29: green x 7 (7 blocks)
↗ Row 30: green x 6 (6 blocks)
↙ Row 31: green x 5 (5 blocks)
↗ Row 32: green x 4 (4 blocks)
↙ Row 33: green x 3 (3 blocks)
↗ Row 34: green x 2 (2 blocks)
↙ Row 35: green x 1 (1 block)
Letter G C2C panel
Graph: Download the crochet letter G graph.
Written instructions:
↙ Row 1: blue x 1 (1 block)
↗ Row 2: blue x 2 (2 blocks)
↙ Row 3: blue x 3 (3 blocks)
↗ Row 4: blue x 4 (4 blocks)
↙ Row 5: blue x 5 (5 blocks)
↗ Row 6: blue x 6 (6 blocks)
↙ Row 7: blue x 7 (7 blocks)
↗ Row 8: blue x 8 (8 blocks)
↙ Row 9: blue x 4, white x 3, blue x 2 (9 blocks)
↗ Row 10: blue x 2, white x 4, blue x 4 (10 blocks)
↙ Row 11: blue x 4, white x 5, blue x 2 (11 blocks)
↗ Row 12: blue x 2, white x 2, blue x 2, white x 2, blue x 4 (12 blocks)
↙ Row 13: blue x 4, white x 2, blue x 3, white x 2, blue x 2 (13 blocks)
↗ Row 14: blue x 2, white x 2, blue x 4, white x 2, blue x 4 (14 blocks)
↙ Row 15: blue x 5, white x 2, blue x 4, white x 1, blue x 3 (15 blocks)
↗ Row 16: blue x 3, white x 2, blue x 3, white x 2, blue x 6 (16 blocks)
↙ Row 17: blue x 7, white x 2, blue x 3, white x 1, blue x 4 (17 blocks)
↗ Row 18: blue x 4, white x 2, blue x 2, white x 2, blue x 8 (18 blocks)
Corner: Start decreasing on both ends
↙ Row 19: blue x 8, white x 1, blue x 2, white x 2, blue x 4 (17 blocks)
↗ Row 20: blue x 4, white x 2, blue x 6, white x 1, blue x 3 (16 blocks)
↙ Row 21: blue x 2, white x 2, blue x 5, white x 2, blue x 4 (15 blocks)
↗ Row 22: blue x 4, white x 2, blue x 4, white x 2, blue x 2 (14 blocks)
↙ Row 23: blue x 2, white x 2, blue x 3, white x 2, blue x 4 (13 blocks)
↗ Row 24: blue x 4, white x 2, blue x 2, white x 2, blue x 2 (12 blocks)
↙ Row 25: blue x 2, white x 5, blue x 4 (11 blocks)
↗ Row 26: blue x 4, white x 4, blue x 2 (10 blocks)
↙ Row 27: blue x 2, white x 3, blue x 4 (9 blocks)
↗ Row 28: blue x 8 (8 blocks)
↙ Row 29: blue x 7 (7 blocks)
↗ Row 30: blue x 6 (6 blocks)
↙ Row 31: blue x 5 (5 blocks)
↗ Row 32: blue x 4 (4 blocks)
↙ Row 33: blue x 3 (3 blocks)
↗ Row 34: blue x 2 (2 blocks)
↙ Row 35: blue x 1 (1 block)
Letter H C2C panel
Graph: Download the crochet letter H graph.
Written instructions:
↙ Row 1: purple x 1 (1 block)
↗ Row 2: purple x 2 (2 blocks)
↙ Row 3: purple x 3 (3 blocks)
↗ Row 4: purple x 4 (4 blocks)
↙ Row 5: purple x 5 (5 blocks)
↗ Row 6: purple x 6 (6 blocks)
↙ Row 7: purple x 4, white x 1, purple x 2 (7 blocks)
↗ Row 8: purple x 2, white x 2, purple x 4 (8 blocks)
↙ Row 9: purple x 4, white x 2, purple x 3 (9 blocks)
↗ Row 10: purple x 4, white x 2, purple x 4 (10 blocks)
↙ Row 11: purple x 4, white x 2, purple x 5 (11 blocks)
↗ Row 12: purple x 6, white x 2, purple x 4 (12 blocks)
↙ Row 13: purple x 4, white x 2, purple x 7 (13 blocks)
↗ Row 14: purple x 8, white x 2, purple x 4 (14 blocks)
↙ Row 15: purple x 4, white x 3, purple x 5, white x 1, purple x 2 (15 blocks)
↗ Row 16: purple x 2, white x 2, purple x 4, white x 4, purple x 4 (16 blocks)
↙ Row 17: purple x 4, white x 2, purple x 1, white x 2, purple x 3, white x 2, purple x 3 (17 blocks)
↗ Row 18: purple x 4, white x 2, purple x 2, white x 2, purple x 2, white x 2, purple x 4 (18 blocks)
Corner: Start decreasing on both ends
↙ Row 19: purple x 3, white x 2, purple x 3, white x 2, purple x 1, white x 2, purple x 4 (17 blocks)
↗ Row 20: purple x 4, white x 4, purple x 4, white x 2, purple x 2 (16 blocks)
↙ Row 21: purple x 2, white x 1, purple x 5, white x 3, purple x 4 (15 blocks)
↗ Row 22: purple x 4, white x 2, purple x 8 (14 blocks)
↙ Row 23: purple x 7, white x 2, purple x 4 (13 blocks)
↗ Row 24: purple x 4, white x 2, purple x 6 (12 blocks)
↙ Row 25: purple x 5, white x 2, purple x 4 (11 blocks)
↗ Row 26: purple x 4, white x 2, purple x 4 (10 blocks)
↙ Row 27: purple x 3, white x 2, purple x 4 (9 blocks)
↗ Row 28: purple x 4, white x 2, purple x 2 (8 blocks)
↙ Row 29: purple x 2, white x 1, purple x 4 (7 blocks)
↗ Row 30: purple x 6 (6 blocks)
↙ Row 31: purple x 5 (5 blocks)
↗ Row 32: purple x 4 (4 blocks)
↙ Row 33: purple x 3 (3 blocks)
↗ Row 34: purple x 2 (2 blocks)
↙ Row 35: purple x 1 (1 block)
Letter I C2C panel
Graph: Download the crochet letter I graph.
Written instructions:
↙ Row 1: pink x 1 (1 block)
↗ Row 2: pink x 2 (2 blocks)
↙ Row 3: pink x 3 (3 blocks)
↗ Row 4: pink x 4 (4 blocks)
↙ Row 5: pink x 5 (5 blocks)
↗ Row 6: pink x 6 (6 blocks)
↙ Row 7: pink x 7 (7 blocks)
↗ Row 8: pink x 2, white x 1, pink x 5 (8 blocks)
↙ Row 9: pink x 5, white x 2, pink x 2 (9 blocks)
↗ Row 10: pink x 2, white x 2, pink x 6 (10 blocks)
↙ Row 11: pink x 7, white x 2, pink x 2 (11 blocks)
↗ Row 12: pink x 2, white x 2, pink x 8 (12 blocks)
↙ Row 13: pink x 8, white x 3, pink x 2 (13 blocks)
↗ Row 14: pink x 2, white x 4, pink x 8 (14 blocks)
↙ Row 15: pink x 8, white x 2, pink x 1, white x 2, pink x 2 (15 blocks)
↗ Row 16: pink x 3, white x 1, pink x 2, white x 2, pink x 8 (16 blocks)
↙ Row 17: pink x 8, white x 2, pink x 7 (17 blocks)
↗ Row 18: pink x 8, white x 2, pink x 8 (18 blocks)
Corner: Start decreasing on both ends
↙ Row 19: pink x 7, white x 2, pink x 8 (17 blocks)
↗ Row 20: pink x 8, white x 2, pink x 2, white x 1, pink x 3 (16 blocks)
↙ Row 21: pink x 2, white x 2, pink x 1, white x 2, pink x 8 (15 blocks)
↗ Row 22: pink x 8, white x 4, pink x 2 (14 blocks)
↙ Row 23: pink x 2, white x 3, pink x 8 (13 blocks)
↗ Row 24: pink x 8, white x 2, pink x 2 (12 blocks)
↙ Row 25: pink x 2, white x 2, pink x 7 (11 blocks)
↗ Row 26: pink x 6, white x 2, pink x 2 (10 blocks)
↙ Row 27: pink x 2, white x 2, pink x 5 (9 blocks)
↗ Row 28: pink x 5, white x 1, pink x 2 (8 blocks)
↙ Row 29: pink x 7 (7 blocks)
↗ Row 30: pink x 6 (6 blocks)
↙ Row 31: pink x 5 (5 blocks)
↗ Row 32: pink x 4 (4 blocks)
↙ Row 33: pink x 3 (3 blocks)
↗ Row 34: pink x 2 (2 blocks)
↙ Row 35: pink x 1 (1 block)
Letter J C2C panel
Graph: Download the crochet letter J graph.
Written instructions:
↙ Row 1: yellow x 1 (1 block)
↗ Row 2: yellow x 2 (2 blocks)
↙ Row 3: yellow x 3 (3 blocks)
↗ Row 4: yellow x 4 (4 blocks)
↙ Row 5: yellow x 5 (5 blocks)
↗ Row 6: yellow x 6 (6 blocks)
↙ Row 7: yellow x 7 (7 blocks)
↗ Row 8: yellow x 8 (8 blocks)
↙ Row 9: yellow x 5, white x 2, yellow x 2 (9 blocks)
↗ Row 10: yellow x 2, white x 3, yellow x 5 (10 blocks)
↙ Row 11: yellow x 5, white x 4, yellow x 2 (11 blocks)
↗ Row 12: yellow x 2, white x 2, yellow x 1, white x 2, yellow x 5 (12 blocks)
↙ Row 13: yellow x 5, white x 2, yellow x 2, white x 2, yellow x 2 (13 blocks)
↗ Row 14: yellow x 2, white x 2, yellow x 3, white x 2, yellow x 5 (14 blocks)
↙ Row 15: yellow x 5, white x 2, yellow x 4, white x 2, yellow x 2 (15 blocks)
↗ Row 16: yellow x 3, white x 1, yellow x 5, white x 2, yellow x 5 (16 blocks)
↙ Row 17: yellow x 5, white x 2, yellow x 5, white x 2, yellow x 3 (17 blocks)
↗ Row 18: yellow x 4, white x 2, yellow x 5, white x 2, yellow x 5 (18 blocks)
Corner: Start decreasing on both ends
↙ Row 19: yellow x 4, white x 2, yellow x 5, white x 2, yellow x 4 (17 blocks)
↗ Row 20: yellow x 4, white x 1, yellow x 6, white x 2, yellow x 3 (16 blocks)
↙ Row 21: yellow x 2, white x 2, yellow x 11 (15 blocks)
↗ Row 22: yellow x 11, white x 1, yellow x 2 (14 blocks)
↙ Row 23: yellow x 13 (13 blocks)
↗ Row 24: yellow x 12 (12 blocks)
↙ Row 25: yellow x 11 (11 blocks)
↗ Row 26: yellow x 10 (10 blocks)
↙ Row 27: yellow x 9 (9 blocks)
↗ Row 28: yellow x 8 (8 blocks)
↙ Row 29: yellow x 7 (7 blocks)
↗ Row 30: yellow x 6 (6 blocks)
↙ Row 31: yellow x 5 (5 blocks)
↗ Row 32: yellow x 4 (4 blocks)
↙ Row 33: yellow x 3 (3 blocks)
↗ Row 34: yellow x 2 (2 blocks)
↙ Row 35: yellow x 1 (1 block)
Letter K C2C panel
Graph:
Download the letter K graph.
Written instructions:
↙ Row 1: green x 1 (1 block)
↗ Row 2: green x 2 (2 blocks)
↙ Row 3: green x 3 (3 blocks)
↗ Row 4: green x 4 (4 blocks)
↙ Row 5: green x 5 (5 blocks)
↗ Row 6: green x 6 (6 blocks)
↙ Row 7: green x 4, white x 1, green x 2 (7 blocks)
↗ Row 8: green x 2, white x 2, green x 4 (8 blocks)
↙ Row 9: green x 5, white x 1, green x 3 (9 blocks)
↗ Row 10: green x 3, white x 2, green x 5 (10 blocks)
↙ Row 11: green x 6, white x 1, green x 4 (11 blocks)
↗ Row 12: green x 4, white x 2, green x 6 (12 blocks)
↙ Row 13: green x 7, white x 1, green x 5 (13 blocks)
↗ Row 14: green x 2, white x 1, green x 2, white x 2, green x 7 (14 blocks)
↙ Row 15: green x 8, white x 1, green x 2, white x 2, green x 2 (15 blocks)
↗ Row 16: green x 3, white x 2, green x 1, white x 2, green x 8 (16 blocks)
↙ Row 17: green x 9, white x 1, green x 1, white x 2, green x 4 (17 blocks)
↗ Row 18: green x 5, white x 4, green x 9 (18 blocks)
Corner: Start decreasing on both ends
↙ Row 19: green x 9, white x 3, green x 5 (17 blocks)
↗ Row 20: green x 5, white x 8, green x 3 (16 blocks)
↙ Row 21: green x 2, white x 8, green x 5 (15 blocks)
↗ Row 22: green x 5, white x 7, green x 2 (14 blocks)
↙ Row 23: green x 6, white x 2, green x 5 (13 blocks)
↗ Row 24: green x 5, white x 2, green x 5 (12 blocks)
↙ Row 25: green x 4, white x 2, green x 5 (11 blocks)
↗ Row 26: green x 5, white x 2, green x 3 (10 blocks)
↙ Row 27: green x 2, white x 2, green x 5 (9 blocks)
↗ Row 28: green x 5, white x 1, green x 2 (8 blocks)
↙ Row 29: green x 7 (7 blocks)
↗ Row 30: green x 6 (6 blocks)
↙ Row 31: green x 5 (5 blocks)
↗ Row 32: green x 4 (4 blocks)
↙ Row 33: green x 3 (3 blocks)
↗ Row 34: green x 2 (2 blocks)
↙ Row 35: green x 1 (1 block)
Letter L C2C panel
Graph: Download the crochet letter L graph.
Written instructions:
↙ Row 1: blue x 1 (1 block)
↗ Row 2: blue x 2 (2 blocks)
↙ Row 3: blue x 3 (3 blocks)
↗ Row 4: blue x 4 (4 blocks)
↙ Row 5: blue x 5 (5 blocks)
↗ Row 6: blue x 6 (6 blocks)
↙ Row 7: blue x 7 (7 blocks)
↗ Row 8: blue x 2, white x 1, blue x 5 (8 blocks)
↙ Row 9: blue x 5, white x 2, blue x 2 (9 blocks)
↗ Row 10: blue x 2, white x 2, blue x 6 (10 blocks)
↙ Row 11: blue x 7, white x 2, blue x 2 (11 blocks)
↗ Row 12: blue x 2, white x 2, blue x 8 (12 blocks)
↙ Row 13: blue x 9, white x 2, blue x 2 (13 blocks)
↗ Row 14: blue x 2, white x 2, blue x 10 (14 blocks)
↙ Row 15: blue x 11, white x 2, blue x 2 (15 blocks)
↗ Row 16: blue x 3, white x 2, blue x 11 (16 blocks)
↙ Row 17: blue x 11, white x 2, blue x 4 (17 blocks)
↗ Row 18: blue x 5, white x 2, blue x 11 (18 blocks)
Corner: Start decreasing on both ends
↙ Row 19: blue x 10, white x 2, blue x 5 (17 blocks)
↗ Row 20: blue x 5, white x 2, blue x 9 (16 blocks)
↙ Row 21: blue x 8, white x 2, blue x 5 (15 blocks)
↗ Row 22: blue x 5, white x 2, blue x 7 (14 blocks)
↙ Row 23: blue x 6, white x 2, blue x 5 (13 blocks)
↗ Row 24: blue x 5, white x 2, blue x 5 (12 blocks)
↙ Row 25: blue x 4, white x 2, blue x 5 (11 blocks)
↗ Row 26: blue x 5, white x 2, blue x 3 (10 blocks)
↙ Row 27: blue x 2, white x 2, blue x 5 (9 blocks)
↗ Row 28: blue x 5, white x 1, blue x 2 (8 blocks)
↙ Row 29: blue x 7 (7 blocks)
↗ Row 30: blue x 6 (6 blocks)
↙ Row 31: blue x 5 (5 blocks)
↗ Row 32: blue x 4 (4 blocks)
↙ Row 33: blue x 3 (3 blocks)
↗ Row 34: blue x 2 (2 blocks)
↙ Row 35: blue x 1 (1 block)
Letter M C2C panel
Graph: Download the crochet letter M graph.
Written instructions:
↙ Row 1: purple x 1 (1 block)
↗ Row 2: purple x 2 (2 blocks)
↙ Row 3: purple x 3 (3 blocks)
↗ Row 4: purple x 4 (4 blocks)
↙ Row 5: purple x 5 (5 blocks)
↗ Row 6: purple x 2, white x 1, purple x 3 (6 blocks)
↙ Row 7: purple x 3, white x 2, purple x 2 (7 blocks)
↗ Row 8: purple x 3, white x 2, purple x 3 (8 blocks)
↙ Row 9: purple x 3, white x 2, purple x 4 (9 blocks)
↗ Row 10: purple x 5, white x 2, purple x 3 (10 blocks)
↙ Row 11: purple x 3, white x 2, purple x 6 (11 blocks)
↗ Row 12: purple x 7, white x 2, purple x 3 (12 blocks)
↙ Row 13: purple x 3, white x 2, purple x 8 (13 blocks)
↗ Row 14: purple x 9, white x 2, purple x 3 (14 blocks)
↙ Row 15: purple x 3, white x 2, purple x 10 (15 blocks)
↗ Row 16: purple x 2, white x 1, purple x 8, white x 2, purple x 3 (16 blocks)
↙ Row 17: purple x 3, white x 2, purple x 8, white x 2, purple x 2 (17 blocks)
↗ Row 18: purple x 3, white x 2, purple x 4, white x 6, purple x 3 (18 blocks)
Corner: Start decreasing on both ends
↙ Row 19: purple x 2, white x 7, purple x 3, white x 2, purple x 3 (17 blocks)
↗ Row 20: purple x 3, white x 2, purple x 3, white x 6, purple x 2 (16 blocks)
↙ Row 21: purple x 6, white x 2, purple x 2, white x 2, purple x 3 (15 blocks)
↗ Row 22: purple x 3, white x 2, purple x 2, white x 1, purple x 6 (14 blocks)
↙ Row 23: purple x 5, white x 2, purple x 1, white x 2, purple x 3 (13 blocks)
↗ Row 24: purple x 3, white x 2, purple x 1, white x 1, purple x 5 (12 blocks)
↙ Row 25: purple x 4, white x 4, purple x 3 (11 blocks)
↗ Row 26: purple x 3, white x 3, purple x 4 (10 blocks)
↙ Row 27: purple x 3, white x 3, purple x 3 (9 blocks)
↗ Row 28: purple x 3, white x 2, purple x 3 (8 blocks)
↙ Row 29: purple x 2, white x 2, purple x 3 (7 blocks)
↗ Row 30: purple x 3, white x 1, purple x 2 (6 blocks)
↙ Row 31: purple x 5 (5 blocks)
↗ Row 32: purple x 4 (4 blocks)
↙ Row 33: purple x 3 (3 blocks)
↗ Row 34: purple x 2 (2 blocks)
↙ Row 35: purple x 1 (1 block)
Letter N C2C panel
Graph: Download the crochet letter N graph.
Written instructions:
↙ Row 1: pink x 1 (1 block)
↗ Row 2: pink x 2 (2 blocks)
↙ Row 3: pink x 3 (3 blocks)
↗ Row 4: pink x 4 (4 blocks)
↙ Row 5: pink x 5 (5 blocks)
↗ Row 6: pink x 6 (6 blocks)
↙ Row 7: pink x 4, white x 1, pink x 2 (7 blocks)
↗ Row 8: pink x 2, white x 2, pink x 4 (8 blocks)
↙ Row 9: pink x 4, white x 3, pink x 2 (9 blocks)
↗ Row 10: pink x 3, white x 3, pink x 4 (10 blocks)
↙ Row 11: pink x 4, white x 3, pink x 4 (11 blocks)
↗ Row 12: pink x 4, white x 4, pink x 4 (12 blocks)
↙ Row 13: pink x 4, white x 2, pink x 1, white x 1, pink x 5 (13 blocks)
↗ Row 14: pink x 6, white x 1, pink x 1, white x 2, pink x 4 (14 blocks)
↙ Row 15: pink x 4, white x 2, pink x 1, white x 2, pink x 3, white x 1, pink x 2 (15 blocks)
↗ Row 16: pink x 2, white x 2, pink x 3, white x 1, pink x 2, white x 2, pink x 4 (16 blocks)
↙ Row 17: pink x 4, white x 2, pink x 2, white x 1, pink x 3, white x 2, pink x 3 (17 blocks)
↗ Row 18: pink x 4, white x 2, pink x 2, white x 2, pink x 2, white x 2, pink x 4 (18 blocks)
Corner: Start decreasing on both ends
↙ Row 19: pink x 3, white x 2, pink x 3, white x 1, pink x 2, white x 2, pink x 4 (17 blocks)
↗ Row 20: pink x 4, white x 2, pink x 2, white x 1, pink x 3, white x 2, pink x 2 (16 blocks)
↙ Row 21: pink x 2, white x 1, pink x 3, white x 2, pink x 1, white x 2, pink x 4 (15 blocks)
↗ Row 22: pink x 4, white x 2, pink x 1, white x 1, pink x 6 (14 blocks)
↙ Row 23: pink x 5, white x 1, pink x 1, white x 2, pink x 4 (13 blocks)
↗ Row 24: pink x 4, white x 4, pink x 4 (12 blocks)
↙ Row 25: pink x 4, white x 3, pink x 4 (11 blocks)
↗ Row 26: pink x 4, white x 3, pink x 3 (10 blocks)
↙ Row 27: pink x 2, white x 3, pink x 4 (9 blocks)
↗ Row 28: pink x 4, white x 2, pink x 2 (8 blocks)
↙ Row 29: pink x 2, white x 1, pink x 4 (7 blocks)
↗ Row 30: pink x 6 (6 blocks)
↙ Row 31: pink x 5 (5 blocks)
↗ Row 32: pink x 4 (4 blocks)
↙ Row 33: pink x 3 (3 blocks)
↗ Row 34: pink x 2 (2 blocks)
↙ Row 35: pink x 1 (1 block)
Letter O C2C panel
Graph: Download the crochet letter O graph.
Written instructions:
↙ Row 1: yellow x 1 (1 block)
↗ Row 2: yellow x 2 (2 blocks)
↙ Row 3: yellow x 3 (3 blocks)
↗ Row 4: yellow x 4 (4 blocks)
↙ Row 5: yellow x 5 (5 blocks)
↗ Row 6: yellow x 6 (6 blocks)
↙ Row 7: yellow x 7 (7 blocks)
↗ Row 8: yellow x 8 (8 blocks)
↙ Row 9: yellow x 4, white x 3, yellow x 2 (9 blocks)
↗ Row 10: yellow x 2, white x 4, yellow x 4 (10 blocks)
↙ Row 11: yellow x 4, white x 5, yellow x 2 (11 blocks)
↗ Row 12: yellow x 2, white x 2, yellow x 2, white x 2, yellow x 4 (12 blocks)
↙ Row 13: yellow x 4, white x 2, yellow x 3, white x 2, yellow x 2 (13 blocks)
↗ Row 14: yellow x 2, white x 2, yellow x 4, white x 2, yellow x 4 (14 blocks)
↙ Row 15: yellow x 4, white x 2, yellow x 5, white x 1, yellow x 3 (15 blocks)
↗ Row 16: yellow x 3, white x 2, yellow x 5, white x 2, yellow x 4 (16 blocks)
↙ Row 17: yellow x 4, white x 2, yellow x 6, white x 1, yellow x 4 (17 blocks)
↗ Row 18: yellow x 4, white x 2, yellow x 6, white x 2, yellow x 4 (18 blocks)
Corner: Start decreasing on both ends
↙ Row 19: yellow x 4, white x 1, yellow x 6, white x 2, yellow x 4 (17 blocks)
↗ Row 20: yellow x 4, white x 2, yellow x 5, white x 2, yellow x 3 (16 blocks)
↙ Row 21: yellow x 3, white x 1, yellow x 5, white x 2, yellow x 4 (15 blocks)
↗ Row 22: yellow x 4, white x 2, yellow x 4, white x 2, yellow x 2 (14 blocks)
↙ Row 23: yellow x 2, white x 2, yellow x 3, white x 2, yellow x 4 (13 blocks)
↗ Row 24: yellow x 4, white x 2, yellow x 2, white x 2, yellow x 2 (12 blocks)
↙ Row 25: yellow x 2, white x 5, yellow x 4 (11 blocks)
↗ Row 26: yellow x 4, white x 4, yellow x 2 (10 blocks)
↙ Row 27: yellow x 2, white x 3, yellow x 4 (9 blocks)
↗ Row 28: yellow x 8 (8 blocks)
↙ Row 29: yellow x 7 (7 blocks)
↗ Row 30: yellow x 6 (6 blocks)
↙ Row 31: yellow x 5 (5 blocks)
↗ Row 32: yellow x 4 (4 blocks)
↙ Row 33: yellow x 3 (3 blocks)
↗ Row 34: yellow x 2 (2 blocks)
↙ Row 35: yellow x 1 (1 block)
Letter P C2C panel
Graph: Download the crochet letter P graph.
Written instructions:
↙ Row 1: green x 1 (1 block)
↗ Row 2: green x 2 (2 blocks)
↙ Row 3: green x 3 (3 blocks)
↗ Row 4: green x 4 (4 blocks)
↙ Row 5: green x 5 (5 blocks)
↗ Row 6: green x 6 (6 blocks)
↙ Row 7: green x 7 (7 blocks)
↗ Row 8: green x 8 (8 blocks)
↙ Row 9: green x 9 (9 blocks)
↗ Row 10: green x 10 (10 blocks)
↙ Row 11: green x 11 (11 blocks)
↗ Row 12: green x 12 (12 blocks)
↙ Row 13: green x 13 (13 blocks)
↗ Row 14: green x 2, white x 1, green x 11 (14 blocks)
↙ Row 15: green x 11, white x 2, green x 2 (15 blocks)
↗ Row 16: green x 3, white x 2, green x 3, white x 3, green x 5 (16 blocks)
↙ Row 17: green x 5, white x 4, green x 2, white x 2, green x 4 (17 blocks)
↗ Row 18: green x 5, white x 2, green x 1, white x 5, green x 5 (18 blocks)
Corner: Start decreasing on both ends
↙ Row 19: green x 4, white x 2, green x 2, white x 4, green x 5 (17 blocks)
↗ Row 20: green x 5, white x 3, green x 3, white x 1, green x 4 (16 blocks)
↙ Row 21: green x 3, white x 2, green x 3, white x 2, green x 5 (15 blocks)
↗ Row 22: green x 5, white x 2, green x 3, white x 1, green x 3 (14 blocks)
↙ Row 23: green x 2, white x 2, green x 2, white x 2, green x 5 (13 blocks)
↗ Row 24: green x 5, white x 2, green x 1, white x 2, green x 2 (12 blocks)
↙ Row 25: green x 2, white x 4, green x 5 (11 blocks)
↗ Row 26: green x 5, white x 3, green x 2 (10 blocks)
↙ Row 27: green x 2, white x 2, green x 5 (9 blocks)
↗ Row 28: green x 5, white x 1, green x 2 (8 blocks)
↙ Row 29: green x 7 (7 blocks)
↗ Row 30: green x 6 (6 blocks)
↙ Row 31: green x 5 (5 blocks)
↗ Row 32: green x 4 (4 blocks)
↙ Row 33: green x 3 (3 blocks)
↗ Row 34: green x 2 (2 blocks)
↙ Row 35: green x 1 (1 block)
Letter Q C2C panel
Graph: Download the crochet letter Q graph.
Written instructions:
↙ Row 1: blue x 1 (1 block)
↗ Row 2: blue x 2 (2 blocks)
↙ Row 3: blue x 3 (3 blocks)
↗ Row 4: blue x 4 (4 blocks)
↙ Row 5: blue x 5 (5 blocks)
↗ Row 6: blue x 2, white x 1, blue x 3 (6 blocks)
↙ Row 7: blue x 3, white x 2, blue x 2 (7 blocks)
↗ Row 8: blue x 3, white x 1, blue x 4 (8 blocks)
↙ Row 9: blue x 4, white x 3, blue x 2 (9 blocks)
↗ Row 10: blue x 2, white x 4, blue x 4 (10 blocks)
↙ Row 11: blue x 4, white x 5, blue x 2 (11 blocks)
↗ Row 12: blue x 2, white x 2, blue x 1, white x 3, blue x 4 (12 blocks)
↙ Row 13: blue x 4, white x 4, blue x 1, white x 2, blue x 2 (13 blocks)
↗ Row 14: blue x 2, white x 2, blue x 2, white x 1, blue x 1, white x 2, blue x 4 (14 blocks)
↙ Row 15: blue x 4, white x 2, blue x 1, white x 2, blue x 2, white x 2, blue x 2 (15 blocks)
↗ Row 16: blue x 3, white x 1, blue x 3, white x 1, blue x 2, white x 2, blue x 4 (16 blocks)
↙ Row 17: blue x 4, white x 2, blue x 2, white x 2, blue x 2, white x 2, blue x 3 (17 blocks)
↗ Row 18: blue x 4, white x 2, blue x 2, white x 1, blue x 3, white x 2, blue x 4 (18 blocks)
Corner: Start decreasing on both ends
↙ Row 19: blue x 3, white x 2, blue x 6, white x 2, blue x 4 (17 blocks)
↗ Row 20: blue x 4, white x 2, blue x 6, white x 1, blue x 3 (16 blocks)
↙ Row 21: blue x 2, white x 2, blue x 5, white x 2, blue x 4 (15 blocks)
↗ Row 22: blue x 4, white x 2, blue x 4, white x 2, blue x 2 (14 blocks)
↙ Row 23: blue x 2, white x 2, blue x 3, white x 2, blue x 4 (13 blocks)
↗ Row 24: blue x 4, white x 2, blue x 2, white x 2, blue x 2 (12 blocks)
↙ Row 25: blue x 2, white x 2, blue x 1, white x 2, blue x 4 (11 blocks)
↗ Row 26: blue x 4, white x 4, blue x 2 (10 blocks)
↙ Row 27: blue x 2, white x 3, blue x 4 (9 blocks)
↗ Row 28: blue x 4, white x 2, blue x 2 (8 blocks)
↙ Row 29: blue x 7 (7 blocks)
↗ Row 30: blue x 6 (6 blocks)
↙ Row 31: blue x 5 (5 blocks)
↗ Row 32: blue x 4 (4 blocks)
↙ Row 33: blue x 3 (3 blocks)
↗ Row 34: blue x 2 (2 blocks)
↙ Row 35: blue x 1 (1 block)
Letter R C2C panel
Graph: Download the crochet letter R graph.
Written instructions:
↙ Row 1: purple x 1 (1 block)
↗ Row 2: purple x 2 (2 blocks)
↙ Row 3: purple x 3 (3 blocks)
↗ Row 4: purple x 4 (4 blocks)
↙ Row 5: purple x 5 (5 blocks)
↗ Row 6: purple x 6 (6 blocks)
↙ Row 7: purple x 4, white x 1, purple x 2 (7 blocks)
↗ Row 8: purple x 2, white x 2, purple x 4 (8 blocks)
↙ Row 9: purple x 5, white x 1, purple x 3 (9 blocks)
↗ Row 10: purple x 3, white x 2, purple x 5 (10 blocks)
↙ Row 11: purple x 6, white x 1, purple x 4 (11 blocks)
↗ Row 12: purple x 4, white x 2, purple x 6 (12 blocks)
↙ Row 13: purple x 7, white x 1, purple x 5 (13 blocks)
↗ Row 14: purple x 2, white x 1, purple x 2, white x 2, purple x 7 (14 blocks)
↙ Row 15: purple x 8, white x 1, purple x 2, white x 2, purple x 2 (15 blocks)
↗ Row 16: purple x 3, white x 2, purple x 1, white x 5, purple x 5 (16 blocks)
↙ Row 17: purple x 5, white x 5, purple x 1, white x 2, purple x 4 (17 blocks)
↗ Row 18: purple x 5, white x 8, purple x 5 (18 blocks)
Corner: Start decreasing on both ends
↙ Row 19: purple x 4, white x 2, purple x 2, white x 4, purple x 5 (17 blocks)
↗ Row 20: purple x 5, white x 3, purple x 3, white x 1, purple x 4 (16 blocks)
↙ Row 21: purple x 3, white x 2, purple x 3, white x 2, purple x 5 (15 blocks)
↗ Row 22: purple x 5, white x 2, purple x 3, white x 1, purple x 3 (14 blocks)
↙ Row 23: purple x 2, white x 2, purple x 2, white x 2, purple x 5 (13 blocks)
↗ Row 24: purple x 5, white x 2, purple x 1, white x 2, purple x 2 (12 blocks)
↙ Row 25: purple x 2, white x 4, purple x 5 (11 blocks)
↗ Row 26: purple x 5, white x 3, purple x 2 (10 blocks)
↙ Row 27: purple x 2, white x 2, purple x 5 (9 blocks)
↗ Row 28: purple x 5, white x 1, purple x 2 (8 blocks)
↙ Row 29: purple x 7 (7 blocks)
↗ Row 30: purple x 6 (6 blocks)
↙ Row 31: purple x 5 (5 blocks)
↗ Row 32: purple x 4 (4 blocks)
↙ Row 33: purple x 3 (3 blocks)
↗ Row 34: purple x 2 (2 blocks)
↙ Row 35: purple x 1 (1 block)
Letter S C2C panel
Graph: Download the crochet letter S graph.
Written instructions:
↙ Row 1: pink x 1 (1 block)
↗ Row 2: pink x 2 (2 blocks)
↙ Row 3: pink x 3 (3 blocks)
↗ Row 4: pink x 4 (4 blocks)
↙ Row 5: pink x 5 (5 blocks)
↗ Row 6: pink x 6 (6 blocks)
↙ Row 7: pink x 7 (7 blocks)
↗ Row 8: pink x 8 (8 blocks)
↙ Row 9: pink x 4, white x 3, pink x 2 (9 blocks)
↗ Row 10: pink x 2, white x 4, pink x 4 (10 blocks)
↙ Row 11: pink x 4, white x 5, pink x 2 (11 blocks)
↗ Row 12: pink x 2, white x 2, pink x 2, white x 2, pink x 4 (12 blocks)
↙ Row 13: pink x 5, white x 1, pink x 3, white x 2, pink x 2 (13 blocks)
↗ Row 14: pink x 2, white x 2, pink x 3, white x 2, pink x 5 (14 blocks)
↙ Row 15: pink x 6, white x 1, pink x 4, white x 1, pink x 3 (15 blocks)
↗ Row 16: pink x 3, white x 2, pink x 3, white x 1, pink x 7 (16 blocks)
↙ Row 17: pink x 4, white x 1, pink x 2, white x 2, pink x 3, white x 1, pink x 4 (17 blocks)
↗ Row 18: pink x 4, white x 2, pink x 3, white x 1, pink x 2, white x 2, pink x 4 (18 blocks)
Corner: Start decreasing on both ends
↙ Row 19: pink x 4, white x 1, pink x 3, white x 1, pink x 3, white x 1, pink x 4 (17 blocks)
↗ Row 20: pink x 7, white x 2, pink x 2, white x 2, pink x 3 (16 blocks)
↙ Row 21: pink x 3, white x 1, pink x 3, white x 1, pink x 7 (15 blocks)
↗ Row 22: pink x 6, white x 1, pink x 3, white x 2, pink x 2 (14 blocks)
↙ Row 23: pink x 2, white x 2, pink x 2, white x 2, pink x 5 (13 blocks)
↗ Row 24: pink x 5, white x 1, pink x 2, white x 2, pink x 2 (12 blocks)
↙ Row 25: pink x 2, white x 5, pink x 4 (11 blocks)
↗ Row 26: pink x 4, white x 4, pink x 2 (10 blocks)
↙ Row 27: pink x 2, white x 3, pink x 4 (9 blocks)
↗ Row 28: pink x 8 (8 blocks)
↙ Row 29: pink x 7 (7 blocks)
↗ Row 30: pink x 6 (6 blocks)
↙ Row 31: pink x 5 (5 blocks)
↗ Row 32: pink x 4 (4 blocks)
↙ Row 33: pink x 3 (3 blocks)
↗ Row 34: pink x 2 (2 blocks)
↙ Row 35: pink x 1 (1 block)
Letter T C2C panel
Graph: Download the crochet letter T graph.
Written instructions:
↙ Row 1: yellow x 1 (1 block)
↗ Row 2: yellow x 2 (2 blocks)
↙ Row 3: yellow x 3 (3 blocks)
↗ Row 4: yellow x 4 (4 blocks)
↙ Row 5: yellow x 5 (5 blocks)
↗ Row 6: yellow x 6 (6 blocks)
↙ Row 7: yellow x 7 (7 blocks)
↗ Row 8: yellow x 8 (8 blocks)
↙ Row 9: yellow x 9 (9 blocks)
↗ Row 10: yellow x 10 (10 blocks)
↙ Row 11: yellow x 8, white x 1, yellow x 2 (11 blocks)
↗ Row 12: yellow x 2, white x 2, yellow x 8 (12 blocks)
↙ Row 13: yellow x 8, white x 2, yellow x 3 (13 blocks)
↗ Row 14: yellow x 4, white x 2, yellow x 8 (14 blocks)
↙ Row 15: yellow x 8, white x 2, yellow x 5 (15 blocks)
↗ Row 16: yellow x 6, white x 2, yellow x 8 (16 blocks)
↙ Row 17: yellow x 8, white x 2, yellow x 7 (17 blocks)
↗ Row 18: yellow x 8, white x 2, yellow x 8 (18 blocks)
Corner: Start decreasing on both ends
↙ Row 19: yellow x 3, white x 1, yellow x 3, white x 2, yellow x 8 (17 blocks)
↗ Row 20: yellow x 8, white x 2, yellow x 2, white x 2, yellow x 2 (16 blocks)
↙ Row 21: yellow x 2, white x 2, yellow x 1, white x 2, yellow x 8 (15 blocks)
↗ Row 22: yellow x 8, white x 4, yellow x 2 (14 blocks)
↙ Row 23: yellow x 2, white x 3, yellow x 8 (13 blocks)
↗ Row 24: yellow x 8, white x 2, yellow x 2 (12 blocks)
↙ Row 25: yellow x 2, white x 2, yellow x 7 (11 blocks)
↗ Row 26: yellow x 6, white x 2, yellow x 2 (10 blocks)
↙ Row 27: yellow x 2, white x 2, yellow x 5 (9 blocks)
↗ Row 28: yellow x 4, white x 2, yellow x 2 (8 blocks)
↙ Row 29: yellow x 2, white x 1, yellow x 4 (7 blocks)
↗ Row 30: yellow x 6 (6 blocks)
↙ Row 31: yellow x 5 (5 blocks)
↗ Row 32: yellow x 4 (4 blocks)
↙ Row 33: yellow x 3 (3 blocks)
↗ Row 34: yellow x 2 (2 blocks)
↙ Row 35: yellow x 1 (1 block)
Letter U C2C panel
Graph: Download the crochet letter U graph.
Written instructions:
↙ Row 1: green x 1 (1 block)
↗ Row 2: green x 2 (2 blocks)
↙ Row 3: green x 3 (3 blocks)
↗ Row 4: green x 4 (4 blocks)
↙ Row 5: green x 5 (5 blocks)
↗ Row 6: green x 6 (6 blocks)
↙ Row 7: green x 7 (7 blocks)
↗ Row 8: green x 8 (8 blocks)
↙ Row 9: green x 4, white x 3, green x 2 (9 blocks)
↗ Row 10: green x 2, white x 4, green x 4 (10 blocks)
↙ Row 11: green x 4, white x 5, green x 2 (11 blocks)
↗ Row 12: green x 2, white x 2, green x 2, white x 2, green x 4 (12 blocks)
↙ Row 13: green x 4, white x 2, green x 3, white x 2, green x 2 (13 blocks)
↗ Row 14: green x 2, white x 2, green x 4, white x 2, green x 4 (14 blocks)
↙ Row 15: green x 4, white x 2, green x 5, white x 1, green x 3 (15 blocks)
↗ Row 16: green x 3, white x 2, green x 5, white x 2, green x 4 (16 blocks)
↙ Row 17: green x 4, white x 2, green x 6, white x 1, green x 4 (17 blocks)
↗ Row 18: green x 4, white x 2, green x 6, white x 2, green x 4 (18 blocks)
Corner: Start decreasing on both ends
↙ Row 19: green x 3, white x 2, green x 6, white x 2, green x 4 (17 blocks)
↗ Row 20: green x 4, white x 2, green x 6, white x 2, green x 2 (16 blocks)
↙ Row 21: green x 2, white x 1, green x 6, white x 2, green x 4 (15 blocks)
↗ Row 22: green x 4, white x 2, green x 8 (14 blocks)
↙ Row 23: green x 7, white x 2, green x 4 (13 blocks)
↗ Row 24: green x 4, white x 2, green x 6 (12 blocks)
↙ Row 25: green x 5, white x 2, green x 4 (11 blocks)
↗ Row 26: green x 4, white x 2, green x 4 (10 blocks)
↙ Row 27: green x 3, white x 2, green x 4 (9 blocks)
↗ Row 28: green x 4, white x 2, green x 2 (8 blocks)
↙ Row 29: green x 2, white x 1, green x 4 (7 blocks)
↗ Row 30: green x 6 (6 blocks)
↙ Row 31: green x 5 (5 blocks)
↗ Row 32: green x 4 (4 blocks)
↙ Row 33: green x 3 (3 blocks)
↗ Row 34: green x 2 (2 blocks)
↙ Row 35: green x 1 (1 block)
Letter V C2C panel
Graph: Download the crochet letter V graph.
Written instructions:
↙ Row 1: blue x 1 (1 block)
↗ Row 2: blue x 2 (2 blocks)
↙ Row 3: blue x 3 (3 blocks)
↗ Row 4: blue x 4 (4 blocks)
↙ Row 5: blue x 5 (5 blocks)
↗ Row 6: blue x 6 (6 blocks)
↙ Row 7: blue x 7 (7 blocks)
↗ Row 8: blue x 8 (8 blocks)
↙ Row 9: blue x 9 (9 blocks)
↗ Row 10: blue x 10 (10 blocks)
↙ Row 11: blue x 6, white x 3, blue x 2 (11 blocks)
↗ Row 12: blue x 2, white x 5, blue x 5 (12 blocks)
↙ Row 13: blue x 5, white x 5, blue x 3 (13 blocks)
↗ Row 14: blue x 3, white x 2, blue x 1, white x 4, blue x 4 (14 blocks)
↙ Row 15: blue x 4, white x 3, blue x 3, white x 1, blue x 4 (15 blocks)
↗ Row 16: blue x 4, white x 2, blue x 3, white x 4, blue x 3 (16 blocks)
↙ Row 17: blue x 3, white x 3, blue x 4, white x 2, blue x 5 (17 blocks)
↗ Row 18: blue x 6, white x 1, blue x 5, white x 3, blue x 3 (18 blocks)
Corner: Start decreasing on both ends
↙ Row 19: blue x 2, white x 2, blue x 6, white x 2, blue x 5 (17 blocks)
↗ Row 20: blue x 5, white x 2, blue x 6, white x 1, blue x 2 (16 blocks)
↙ Row 21: blue x 8, white x 2, blue x 5 (15 blocks)
↗ Row 22: blue x 5, white x 1, blue x 8 (14 blocks)
↙ Row 23: blue x 7, white x 2, blue x 4 (13 blocks)
↗ Row 24: blue x 4, white x 2, blue x 6 (12 blocks)
↙ Row 25: blue x 5, white x 2, blue x 4 (11 blocks)
↗ Row 26: blue x 4, white x 1, blue x 5 (10 blocks)
↙ Row 27: blue x 4, white x 2, blue x 3 (9 blocks)
↗ Row 28: blue x 3, white x 2, blue x 3 (8 blocks)
↙ Row 29: blue x 2, white x 2, blue x 3 (7 blocks)
↗ Row 30: blue x 3, white x 1, blue x 2 (6 blocks)
↙ Row 31: blue x 5 (5 blocks)
↗ Row 32: blue x 4 (4 blocks)
↙ Row 33: blue x 3 (3 blocks)
↗ Row 34: blue x 2 (2 blocks)
↙ Row 35: blue x 1 (1 block)
Letter W C2C panel
Graph: Download the crochet letter W graph.
Written instructions:
↙ Row 1: purple x 1 (1 block)
↗ Row 2: purple x 2 (2 blocks)
↙ Row 3: purple x 3 (3 blocks)
↗ Row 4: purple x 4 (4 blocks)
↙ Row 5: purple x 5 (5 blocks)
↗ Row 6: purple x 6 (6 blocks)
↙ Row 7: purple x 7 (7 blocks)
↗ Row 8: purple x 2, white x 1, purple x 5 (8 blocks)
↙ Row 9: purple x 5, white x 2, purple x 2 (9 blocks)
↗ Row 10: purple x 3, white x 2, purple x 5 (10 blocks)
↙ Row 11: purple x 4, white x 3, purple x 4 (11 blocks)
↗ Row 12: purple x 4, white x 4, purple x 4 (12 blocks)
↙ Row 13: purple x 4, white x 4, purple x 5 (13 blocks)
↗ Row 14: purple x 2, white x 1, purple x 3, white x 1, purple x 1, white x 2, purple x 4 (14 blocks)
↙ Row 15: purple x 3, white x 3, purple x 1, white x 2, purple x 1, white x 3, purple x 2 (15 blocks)
↗ Row 16: purple x 3, white x 6, purple x 1, white x 3, purple x 3 (16 blocks)
↙ Row 17: purple x 3, white x 3, purple x 2, white x 5, purple x 4 (17 blocks)
↗ Row 18: purple x 5, white x 5, purple x 3, white x 2, purple x 3 (18 blocks)
Corner: Start decreasing on both ends
↙ Row 19: purple x 2, white x 2, purple x 4, white x 2, purple x 1, white x 1, purple x 5 (17 blocks)
↗ Row 20: purple x 4, white x 2, purple x 7, white x 1, purple x 2 (16 blocks)
↙ Row 21: purple x 9, white x 2, purple x 4 (15 blocks)
↗ Row 22: purple x 4, white x 2, purple x 8 (14 blocks)
↙ Row 23: purple x 7, white x 2, purple x 4 (13 blocks)
↗ Row 24: purple x 4, white x 2, purple x 6 (12 blocks)
↙ Row 25: purple x 6, white x 1, purple x 4 (11 blocks)
↗ Row 26: purple x 3, white x 2, purple x 5 (10 blocks)
↙ Row 27: purple x 4, white x 2, purple x 3 (9 blocks)
↗ Row 28: purple x 3, white x 2, purple x 3 (8 blocks)
↙ Row 29: purple x 2, white x 2, purple x 3 (7 blocks)
↗ Row 30: purple x 3, white x 1, purple x 2 (6 blocks)
↙ Row 31: purple x 5 (5 blocks)
↗ Row 32: purple x 4 (4 blocks)
↙ Row 33: purple x 3 (3 blocks)
↗ Row 34: purple x 2 (2 blocks)
↙ Row 35: purple x 1 (1 block)
Letter X C2C panel
Graph: Download the crochet letter X graph.
Written instructions:
↙ Row 1: pink x 1 (1 block)
↗ Row 2: pink x 2 (2 blocks)
↙ Row 3: pink x 3 (3 blocks)
↗ Row 4: pink x 4 (4 blocks)
↙ Row 5: pink x 5 (5 blocks)
↗ Row 6: pink x 2, white x 1, pink x 3 (6 blocks)
↙ Row 7: pink x 3, white x 2, pink x 2 (7 blocks)
↗ Row 8: pink x 2, white x 2, pink x 4 (8 blocks)
↙ Row 9: pink x 4, white x 2, pink x 3 (9 blocks)
↗ Row 10: pink x 4, white x 1, pink x 5 (10 blocks)
↙ Row 11: pink x 5, white x 2, pink x 4 (11 blocks)
↗ Row 12: pink x 5, white x 1, pink x 6 (12 blocks)
↙ Row 13: pink x 6, white x 2, pink x 5 (13 blocks)
↗ Row 14: pink x 6, white x 1, pink x 7 (14 blocks)
↙ Row 15: pink x 7, white x 2, pink x 3, white x 1, pink x 2 (15 blocks)
↗ Row 16: pink x 2, white x 6, pink x 8 (16 blocks)
↙ Row 17: pink x 8, white x 7, pink x 2 (17 blocks)
↗ Row 18: pink x 3, white x 12, pink x 3 (18 blocks)
Corner: Start decreasing on both ends
↙ Row 19: pink x 2, white x 7, pink x 8 (17 blocks)
↗ Row 20: pink x 8, white x 6, pink x 2 (16 blocks)
↙ Row 21: pink x 2, white x 1, pink x 3, white x 2, pink x 7 (15 blocks)
↗ Row 22: pink x 7, white x 1, pink x 6 (14 blocks)
↙ Row 23: pink x 5, white x 2, pink x 6 (13 blocks)
↗ Row 24: pink x 6, white x 1, pink x 5 (12 blocks)
↙ Row 25: pink x 4, white x 2, pink x 5 (11 blocks)
↗ Row 26: pink x 5, white x 1, pink x 4 (10 blocks)
↙ Row 27: pink x 3, white x 2, pink x 4 (9 blocks)
↗ Row 28: pink x 4, white x 2, pink x 2 (8 blocks)
↙ Row 29: pink x 2, white x 2, pink x 3 (7 blocks)
↗ Row 30: pink x 3, white x 1, pink x 2 (6 blocks)
↙ Row 31: pink x 5 (5 blocks)
↗ Row 32: pink x 4 (4 blocks)
↙ Row 33: pink x 3 (3 blocks)
↗ Row 34: pink x 2 (2 blocks)
↙ Row 35: pink x 1 (1 block)
Letter Y C2C panel
Graph: Download the crochet letter Y graph.
Written instructions:
↙ Row 1: green x 1 (1 block)
↗ Row 2: green x 2 (2 blocks)
↙ Row 3: green x 3 (3 blocks)
↗ Row 4: green x 4 (4 blocks)
↙ Row 5: green x 5 (5 blocks)
↗ Row 6: green x 6 (6 blocks)
↙ Row 7: green x 7 (7 blocks)
↗ Row 8: green x 8 (8 blocks)
↙ Row 9: green x 9 (9 blocks)
↗ Row 10: green x 10 (10 blocks)
↙ Row 11: green x 8, white x 1, green x 2 (11 blocks)
↗ Row 12: green x 2, white x 2, green x 8 (12 blocks)
↙ Row 13: green x 8, white x 2, green x 3 (13 blocks)
↗ Row 14: green x 4, white x 2, green x 8 (14 blocks)
↙ Row 15: green x 8, white x 2, green x 5 (15 blocks)
↗ Row 16: green x 6, white x 2, green x 8 (16 blocks)
↙ Row 17: green x 4, white x 6, green x 7 (17 blocks)
↗ Row 18: green x 8, white x 7, green x 3 (18 blocks)
Corner: Start decreasing on both ends
↙ Row 19: green x 2, white x 7, green x 8 (17 blocks)
↗ Row 20: green x 7, white x 2, green x 3, white x 2, green x 2 (16 blocks)
↙ Row 21: green x 7, white x 1, green x 7 (15 blocks)
↗ Row 22: green x 6, white x 2, green x 6 (14 blocks)
↙ Row 23: green x 6, white x 1, green x 6 (13 blocks)
↗ Row 24: green x 5, white x 2, green x 5 (12 blocks)
↙ Row 25: green x 5, white x 1, green x 5 (11 blocks)
↗ Row 26: green x 4, white x 2, green x 4 (10 blocks)
↙ Row 27: green x 3, white x 2, green x 4 (9 blocks)
↗ Row 28: green x 4, white x 1, green x 3 (8 blocks)
↙ Row 29: green x 2, white x 2, green x 3 (7 blocks)
↗ Row 30: green x 3, white x 1, green x 2 (6 blocks)
↙ Row 31: green x 5 (5 blocks)
↗ Row 32: green x 4 (4 blocks)
↙ Row 33: green x 3 (3 blocks)
↗ Row 34: green x 2 (2 blocks)
↙ Row 35: green x 1 (1 block)
Letter Z C2C panel
Graph: Download the crochet letter Z graph.
Written instructions:
↙ Row 1: blue x 1 (1 block)
↗ Row 2: blue x 2 (2 blocks)
↙ Row 3: blue x 3 (3 blocks)
↗ Row 4: blue x 4 (4 blocks)
↙ Row 5: blue x 5 (5 blocks)
↗ Row 6: blue x 6 (6 blocks)
↙ Row 7: blue x 4, white x 1, blue x 2 (7 blocks)
↗ Row 8: blue x 2, white x 2, blue x 4 (8 blocks)
↙ Row 9: blue x 5, white x 2, blue x 2 (9 blocks)
↗ Row 10: blue x 2, white x 2, blue x 6 (10 blocks)
↙ Row 11: blue x 7, white x 2, blue x 2 (11 blocks)
↗ Row 12: blue x 2, white x 2, blue x 8 (12 blocks)
↙ Row 13: blue x 9, white x 2, blue x 2 (13 blocks)
↗ Row 14: blue x 2, white x 2, blue x 10 (14 blocks)
↙ Row 15: blue x 11, white x 2, blue x 2 (15 blocks)
↗ Row 16: blue x 2, white x 2, blue x 12 (16 blocks)
↙ Row 17: blue x 5, white x 9, blue x 3 (17 blocks)
↗ Row 18: blue x 4, white x 10, blue x 4 (18 blocks)
Corner: Start decreasing on both ends
↙ Row 19: blue x 3, white x 9, blue x 5 (17 blocks)
↗ Row 20: blue x 12, white x 2, blue x 2 (16 blocks)
↙ Row 21: blue x 2, white x 2, blue x 11 (15 blocks)
↗ Row 22: blue x 10, white x 2, blue x 2 (14 blocks)
↙ Row 23: blue x 2, white x 2, blue x 9 (13 blocks)
↗ Row 24: blue x 8, white x 2, blue x 2 (12 blocks)
↙ Row 25: blue x 2, white x 2, blue x 7 (11 blocks)
↗ Row 26: blue x 6, white x 2, blue x 2 (10 blocks)
↙ Row 27: blue x 2, white x 2, blue x 5 (9 blocks)
↗ Row 28: blue x 4, white x 2, blue x 2 (8 blocks)
↙ Row 29: blue x 2, white x 1, blue x 4 (7 blocks)
↗ Row 30: blue x 6 (6 blocks)
↙ Row 31: blue x 5 (5 blocks)
↗ Row 32: blue x 4 (4 blocks)
↙ Row 33: blue x 3 (3 blocks)
↗ Row 34: blue x 2 (2 blocks)
↙ Row 35: blue x 1 (1 block)
C2C heart panel
Graph: Download the crochet heart graph.
Written instructions:
↙ Row 1: purple x 1 (1 block)
↗ Row 2: purple x 2 (2 blocks)
↙ Row 3: purple x 3 (3 blocks)
↗ Row 4: purple x 4 (4 blocks)
↙ Row 5: purple x 5 (5 blocks)
↗ Row 6: purple x 6 (6 blocks)
↙ Row 7: purple x 7 (7 blocks)
↗ Row 8: purple x 8 (8 blocks)
↙ Row 9: purple x 9 (9 blocks)
↗ Row 10: purple x 10 (10 blocks)
↙ Row 11: purple x 4, white x 5, purple x 2 (11 blocks)
↗ Row 12: purple x 2, white x 7, purple x 3 (12 blocks)
↙ Row 13: purple x 2, white x 8, purple x 3 (13 blocks)
↗ Row 14: purple x 3, white x 9, purple x 2 (14 blocks)
↙ Row 15: purple x 2, white x 9, purple x 4 (15 blocks)
↗ Row 16: purple x 4, white x 10, purple x 2 (16 blocks)
↙ Row 17: purple x 2, white x 10, purple x 5 (17 blocks)
↗ Row 18: purple x 5, white x 10, purple x 3 (18 blocks)
Corner: Start decreasing on both ends
↙ Row 19: purple x 2, white x 10, purple x 5 (17 blocks)
↗ Row 20: purple x 4, white x 10, purple x 2 (16 blocks)
↙ Row 21: purple x 2, white x 9, purple x 4 (15 blocks)
↗ Row 22: purple x 4, white x 8, purple x 2 (14 blocks)
↙ Row 23: purple x 4, white x 6, purple x 3 (13 blocks)
↗ Row 24: purple x 3, white x 5, purple x 4 (12 blocks)
↙ Row 25: purple x 3, white x 5, purple x 3 (11 blocks)
↗ Row 26: purple x 2, white x 5, purple x 3 (10 blocks)
↙ Row 27: purple x 2, white x 5, purple x 2 (9 blocks)
↗ Row 28: purple x 2, white x 4, purple x 2 (8 blocks)
↙ Row 29: purple x 2, white x 3, purple x 2 (7 blocks)
↗ Row 30: purple x 2, white x 2, purple x 2 (6 blocks)
↙ Row 31: purple x 5 (5 blocks)
↗ Row 32: purple x 4 (4 blocks)
↙ Row 33: purple x 3 (3 blocks)
↗ Row 34: purple x 2 (2 blocks)
↙ Row 35: purple x 1 (1 block)
C2C star panel
Graph: Download the crochet star graph.
Written instructions:
↙ Row 1: yellow x 1 (1 block)
↗ Row 2: yellow x 2 (2 blocks)
↙ Row 3: yellow x 3 (3 blocks)
↗ Row 4: yellow x 4 (4 blocks)
↙ Row 5: yellow x 2, white x 1, yellow x 2 (5 blocks)
↗ Row 6: yellow x 2, white x 2, yellow x 2 (6 blocks)
↙ Row 7: yellow x 3, white x 2, yellow x 2 (7 blocks)
↗ Row 8: yellow x 3, white x 2, yellow x 3 (8 blocks)
↙ Row 9: yellow x 4, white x 2, yellow x 3 (9 blocks)
↗ Row 10: yellow x 4, white x 2, yellow x 4 (10 blocks)
↙ Row 11: yellow x 5, white x 2, yellow x 4 (11 blocks)
↗ Row 12: yellow x 5, white x 2, yellow x 5 (12 blocks)
↙ Row 13: yellow x 2, white x 2, yellow x 2, white x 2, yellow x 5 (13 blocks)
↗ Row 14: yellow x 5, white x 6, yellow x 3 (14 blocks)
↙ Row 15: yellow x 3, white x 7, yellow x 5 (15 blocks)
↗ Row 16: yellow x 2, white x 10, yellow x 4 (16 blocks)
↙ Row 17: yellow x 5, white x 10, yellow x 2 (17 blocks)
↗ Row 18: yellow x 2, white x 10, yellow x 6 (18 blocks)
Corner: Start decreasing on both ends
↙ Row 19: yellow x 5, white x 10, yellow x 2 (17 blocks)
↗ Row 20: yellow x 6, white x 5, yellow x 5 (16 blocks)
↙ Row 21: yellow x 4, white x 6, yellow x 5 (15 blocks)
↗ Row 22: yellow x 5, white x 6, yellow x 3 (14 blocks)
↙ Row 23: yellow x 3, white x 6, yellow x 4 (13 blocks)
↗ Row 24: yellow x 3, white x 7, yellow x 2 (12 blocks)
↙ Row 25: yellow x 2, white x 2, yellow x 2, white x 2, yellow x 3 (11 blocks)
↗ Row 26: yellow x 2, white x 2, yellow x 6 (10 blocks)
↙ Row 27: yellow x 9 (9 blocks)
↗ Row 28: yellow x 8 (8 blocks)
↙ Row 29: yellow x 7 (7 blocks)
↗ Row 30: yellow x 6 (6 blocks)
↙ Row 31: yellow x 5 (5 blocks)
↗ Row 32: yellow x 4 (4 blocks)
↙ Row 33: yellow x 3 (3 blocks)
↗ Row 34: yellow x 2 (2 blocks)
↙ Row 35: yellow x 1 (1 block)
Tips for assembling the alphabet blanket
Before sewing the panels together, lay all 26 letter panels out on a flat surface to double-check orientation and spacing. This helps you confirm every letter is facing the correct direction before you join.
Locking stitch markers can also help hold the panels in place while you sew, keeping everything lined up and easier to handle.
Assembling the crochet alphabet blanket
Sew your crochet alphabet letters together. Make sure they are facing the correct way. You can use locking stitch markers to hold the panels together.
Border for the finished alphabet blanket
Work this border after you sew all the letter panels together.
Ch 2. Work 1 hdc in each stitch around the blanket.
In each corner, work (hdc, ch 2, hdc).
Finishing the crochet alphabet blanket
Weave in your ends. Block if desired.
Frequently asked questions
Can I make this crochet alphabet blanket bigger or smaller?
Yes. You can use thicker yarn and a larger hook to make bigger panels, or thinner yarn and a smaller hook to make smaller panels. This will change the overall blanket size.
Is this a beginner-friendly C2C alphabet blanket pattern?
This pattern is best for advanced beginners. You’ll need to know basic corner-to-corner (C2C) crochet and how to change colors. A beginner-friendly C2C video tutorial is included to help you get started.
What yarn works best for a crochet baby blanket?
Soft worsted weight (#4) yarn is a great choice for baby blankets. Acrylic yarn is easy to wash and holds up well, while cotton blends can feel extra soft and breathable.
What hook size should I use for this C2C alphabet blanket?
Use the hook size listed in the pattern, but you can adjust if needed. If your blanket feels too stiff, go up a hook size. If it’s coming out too loose or too open, go down a size.
How do I keep my C2C letters looking neat and not jagged?
The best tip is to keep your tension even and pull the new color snug before finishing each block. This helps your letters look cleaner and less jagged. You can also weave in ends as you go to help the blanket lay flat and keep the edges from getting bulky.
Do I have to carry the yarn for the color changes?
Nope! You can carry yarn for short color changes, but for longer jumps it’s usually cleaner to drop the yarn and pick it back up when you need it again. This keeps the back from getting messy or tight.
What size is this crochet alphabet blanket?
The finished size depends on your yarn, hook, and tension. The pattern includes finished measurements for my sample. Since this blanket uses all 26 letter panels, the easiest way to change the size is to use thicker yarn and a larger hook (bigger) or thinner yarn and a smaller hook (smaller).
How do I stop my C2C blanket edges from looking wavy?
Wavy edges usually come from changing tension. Try to keep your stitches the same tightness the whole time, and make sure you’re not accidentally adding extra blocks on the sides. Blocking can also help smooth everything out when you’re finished.
Can I sell blankets made from this pattern?
Yes, you can sell finished blankets you make from this pattern (handmade items only). Just don’t sell or repost the pattern itself.
New to C2C? Watch this beginner video tutorial
If you’re new to corner-to-corner crochet, I recommend starting with my beginner-friendly C2C video tutorial. It walks you through the basic C2C block, plus increases and decreases, using a small practice panel.
This alphabet blanket uses larger C2C panels with color changes, so practicing one small panel first can make the pattern much easier to follow.

Printable PDF pattern
If you prefer an easy, print-friendly version of this crochet alphabet blanket pattern, a printable PDF is available in my Etsy shop. The PDF includes the full pattern instructions in a clean, ad-free format, making it perfect for printing or saving on your device.
More free crochet baby blanket patterns
Looking for more cozy projects for little ones? Browse my favorite crochet baby blanket patterns, including sweet handmade blankets for babies, nurseries, showers, and gifts.
You can also visit my main crochet baby patterns page for more baby and child projects, or explore my full collection of crochet blanket patterns and C2C crochet blanket patterns for even more cozy blanket ideas.
Let’s connect!
I’d love to see what you’re making! Share your finished project and follow along for more free crochet patterns and tutorials.
📌 Don’t forget to pin this pattern for later!
Happy crocheting! 🧶
— Melissa