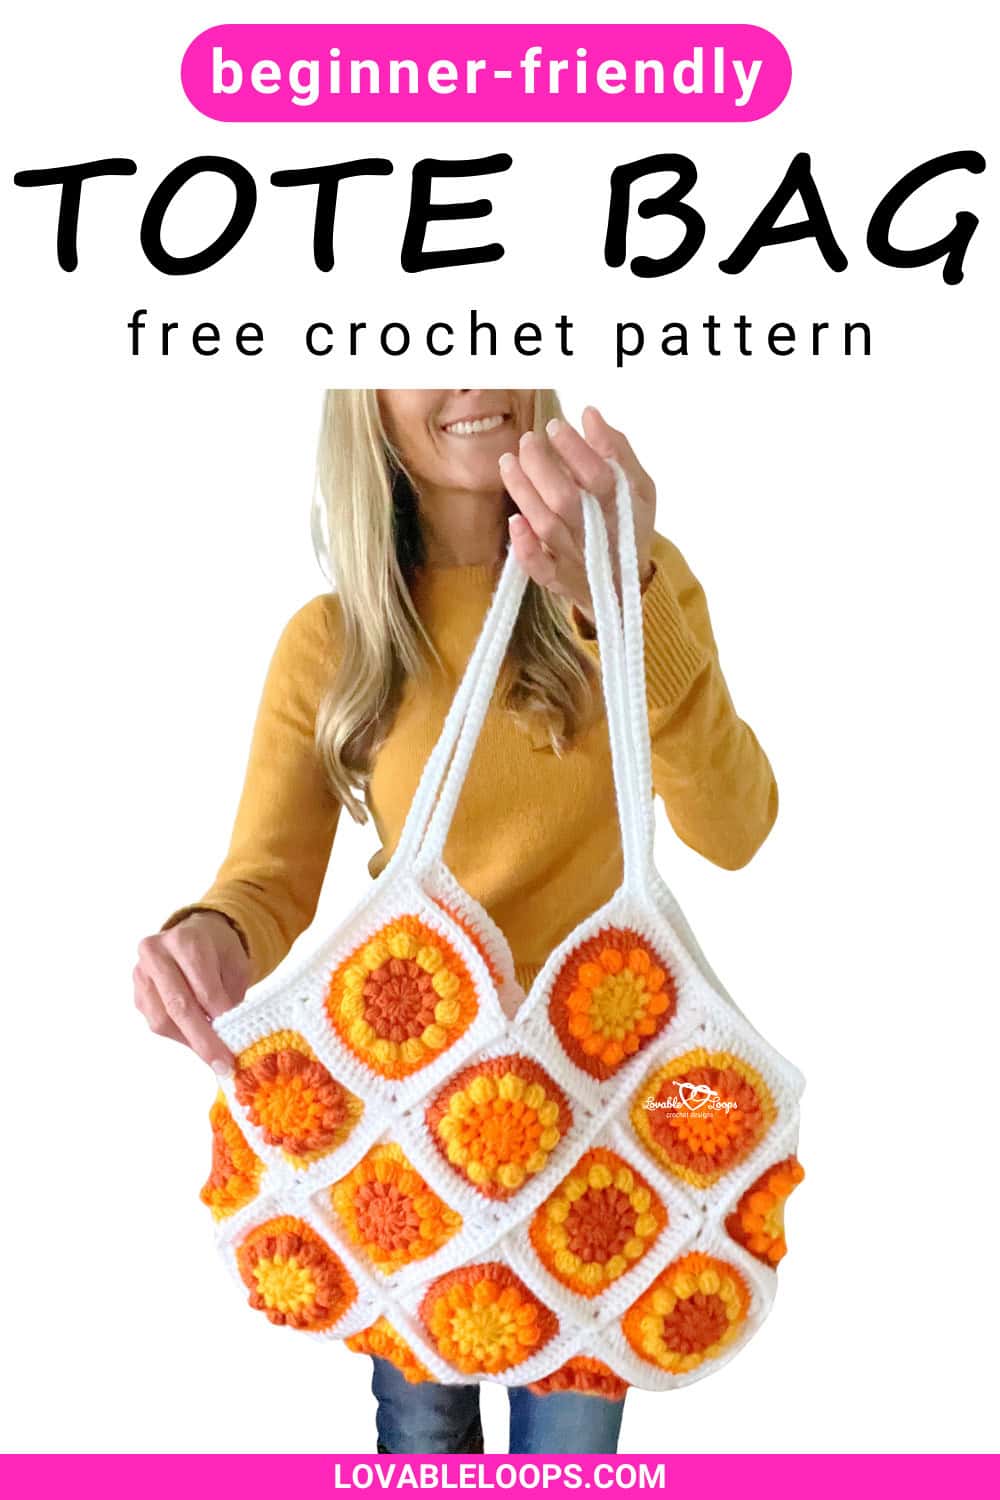

Crochet granny square tote bag pattern
Looking for a modern crochet bag that’s fun to make and actually useful? This crochet granny square tote bag pattern combines classic squares with a clean, updated look—perfect for spring projects and everyday carry.
Made from simple motifs sewn together, this tote feels relaxed and handmade while still being sturdy enough for daily use. It’s a satisfying project that lets you enjoy the rhythm of granny squares while creating something you’ll reach for again and again.
Quick answer:
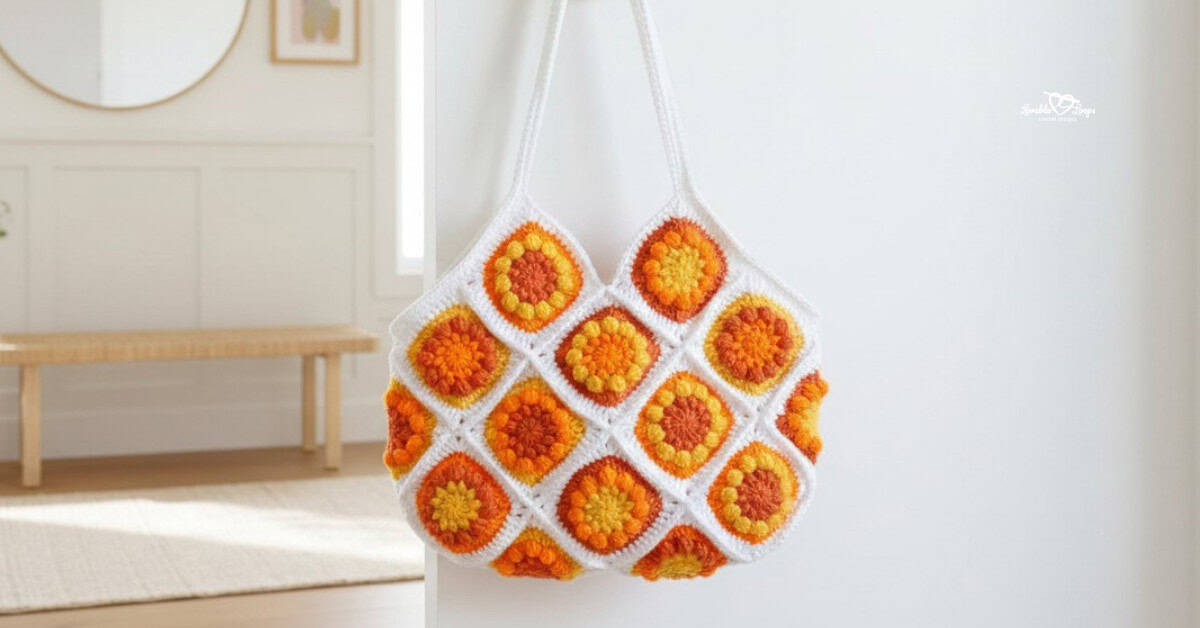
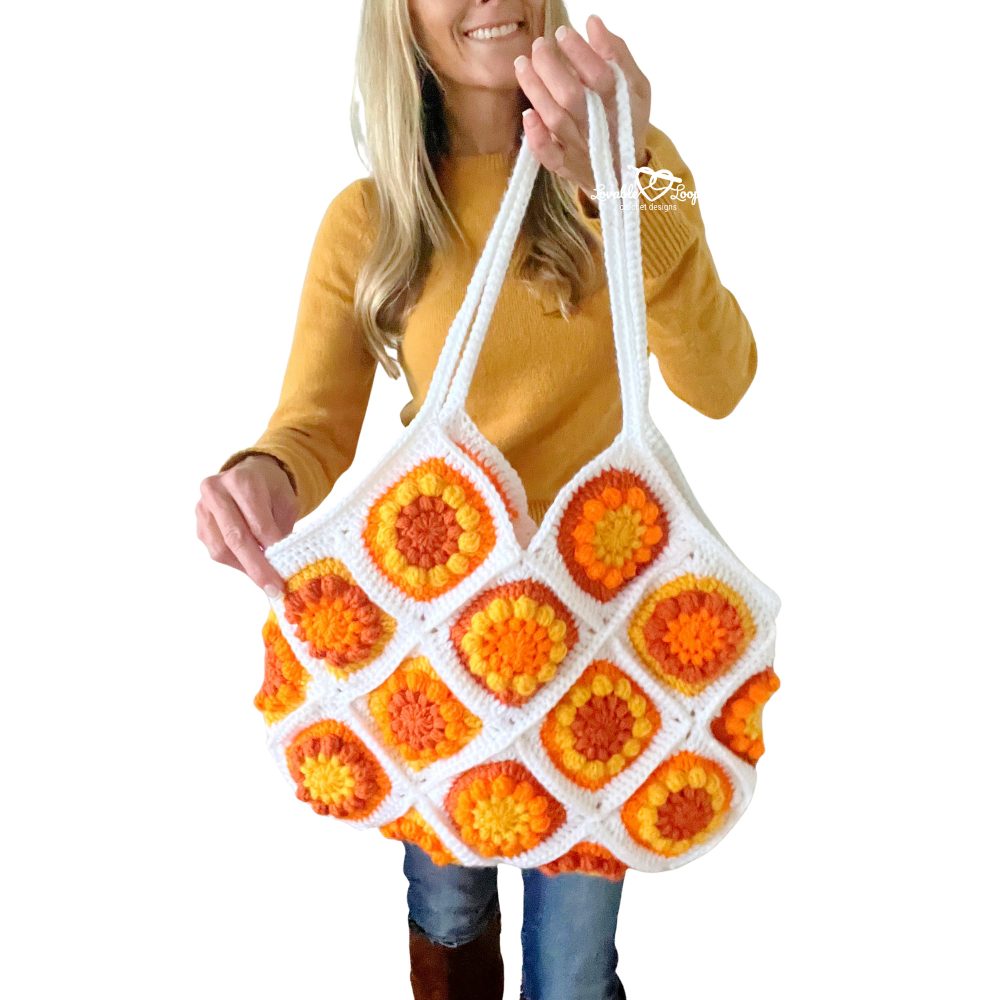
This crochet granny square tote bag pattern is an advanced beginner project made using 24 granny squares that are sewn together and finished with sturdy straps. The finished tote measures 17 inches wide by 22 inches tall (about 43 × 56 cm) and is crocheted with worsted weight yarn (#4) and an I-9 (5.5 mm) hook. It’s a practical, stylish bag that works beautifully for everyday use.

Why you’ll love this pattern
- Classic granny squares with a clean, modern layout
- Made from simple motifs you can crochet anywhere
- Structured but flexible enough for daily use
- Beginner-friendly construction with clear assembly steps
- Easy to customize with different color palettes
Free crochet granny square tote bag pattern details
Below you’ll find all the key details for this crochet granny square tote bag pattern, including the skill level, materials, finished size, and helpful notes to get you started with confidence.
Skill level
Advanced beginner. You should be comfortable crocheting granny squares, sewing pieces together with a yarn needle, and adding simple straps. The pattern is beginner-friendly for anyone familiar with basic crochet stitches.
Materials needed
- I-9 (5.5 mm) crochet hook: Use this size or the hook size needed to meet gauge.
Optional: J-10 (6 mm) hook for the straps. The larger hook creates looser chains that are easier to work into. - Worsted weight yarn (#4): In white and three different shades of orange.
- Yarn needle: For weaving in ends.
- Scissors: For cutting yarn.
- Stitch markers (optional): Helpful for counting rows or marking corners.
Choosing yarn for structure
The yarn you choose will affect how your finished tote bag looks and wears over time. Cotton and cotton-blend yarns tend to hold their shape better and have less stretch, making them a great option for sturdy, everyday bags. Acrylic yarns work well too, especially if you prefer a lighter feel, but they may stretch a bit more with use.
Stitch definition also matters for granny squares. Smooth yarns help highlight the texture of puff and bobble stitches and keep your colorwork looking crisp, especially when the squares are sewn together.

Finished size
The finished tote bag measures 17 inches wide by 22 inches tall (approximately 43 × 56 cm). Size may vary slightly depending on yarn choice and tension.
Gauge
Gauge is not critical for this pattern, but consistent tension will help keep your granny squares uniform and your finished bag looking neat.
Crochet abbreviations
- sc = single crochet stitch
- dc = double crochet stitch
- ch/chs = chain stitch/chains
- ch-sp = chain space
- st/sts = stitch/stitches
- sl st = slip stitch
- rnd/rnds = round/rounds
Pattern notes
- Join each round with slip stitches to the top of the first stitch made in that round.
- The bobble stitches will pop out on the wrong side. Gently push them through so they sit on the right side.
- The beginning chain does not count as a stitch.
- To make color changes, join using the next yarn color needed.
- The pattern is written in US crochet terms.
Design notes & customization ideas
- This tote is made by crocheting 24 granny squares, sewing them together, and then adding the straps.
- Color placement makes a big impact. Try alternating your flower centers, using a single background color, or switching to a tonal palette for a more subtle, modern feel.
- For a sturdier bag, choose a cotton or cotton-blend yarn. Acrylic works well too, but may have more stretch with use.
- You can easily adjust the strap length by crocheting more or fewer rows. Shorter straps work well for handbags, while longer straps are great for shoulder totes.
- Want a larger or smaller bag? Add or remove granny squares, keeping the layout balanced so the bag hangs evenly.
- Blocking your granny squares before sewing can help them line up neatly and give your finished bag a more polished shape.
Special stitches
Puff st (ps):
- YO, insert hook in next stitch & pull up a loop (3 loops on hook)
- YO, insert hook in same stitch and pull up a loop (5 loops on hook)
- YO, insert hook in same stitch and pull up a loop (7 loops on hook)
- YO and pull through all 7 loops.
Bobble st (bo):
- YO, insert hook in next stitch, YO, pull up a loop, YO pull through 2 loops (2 loops on hook)
- YO, insert hook in same stitch, YO, pull up a loop, YO, pull through 2 loops (3 loops on hook)
- YO, insert hook in same stitch, YO, pull up a loop, YO, pull through 2 loops (4 loops on hook)
- YO, insert hook in same stitch, YO, pull up a loop, YO, pull through 2 loops (5 loops on hook)
- YO, insert hook in same stitch, YO, pull up a loop, YO, pull through 2 loops (6 loops on hook)
- YO and pull through all 6 loops.

Color sequences for granny squares
You will make 24 total granny squares, with 4 squares in each color sequence.
For every square:
- Rounds 1 and 2 are worked in the same color (Color A, B, or C)
- Round 3 uses one of the remaining colors
- Round 4 uses the last remaining color
- Round 5 is always white
Use the following color sequences:
- Rounds 1–2: Color A → Round 3: Color B → Round 4: Color C → Round 5: White
- Rounds 1–2: Color A → Round 3: Color C → Round 4: Color B → Round 5: White
- Rounds 1–2: Color B → Round 3: Color A → Round 4: Color C → Round 5: White
- Rounds 1–2: Color B → Round 3: Color C → Round 4: Color A → Round 5: White
- Rounds 1–2: Color C → Round 3: Color A → Round 4: Color B → Round 5: White
- Rounds 1–2: Color C → Round 3: Color B → Round 4: Color A → Round 5: White
Make 4 squares of each sequence for a total of 24 granny squares.
Crochet granny square tote bag pattern instructions
Round 1: Magic circle. Make 11 double crochet (dc) into the ring. Join. (11 sts)
Round 2: Chain 2. (Puff stitch, ch 1) around. Join. (11 puff stitches, 11 ch-1 spaces)
Round 3: Chain 2. (Bobble stitch, single crochet in next ch-1 space) around. Join. (11 bobbles, 11 sc)
Round 4: Chain 2. Work 2 double crochet in each stitch around. Join. (44 dc)
Switch to white yarn.
Round 5: Chain 2. [(2 dc, ch 2, 2 dc) in next stitch, dc in next 10 stitches] around. Join. (56 dc)
Granny square bag layout
Lay the granny squares out exactly as shown in the photo.
- Single crochet or sew the squares together.
- Fold the bag along the dotted lines in the image.
- After folding, single crochet the remaining edges together, following the purple line, to form the bag.
- Leave the top two rows of granny squares open, as marked by the green line. This opening is where the bag straps will be added.


Adding the bag straps
Tip: Use a J-10 (6 mm) crochet hook to make the chains. The slightly larger hook creates looser chains that are easier to work into.
- Join yarn at the bottom right side of the bag opening.
Round 1:
Single crochet up to the peak of the square marked by a pink dot.
Chain 75, then join to the opposite peak (pink dot).
Continue single crocheting around to the next peak on the other side, chain 75, join to the next pink dot, then single crochet to the end of the round and join.
Round 2:
Chain 1. Single crochet in each stitch and in each chain space around. Join.
Round 3:
Chain 1. Single crochet in each stitch around. Join and fasten off.
Finishing
Weave in all remaining yarn tails using a yarn needle.
Frequently asked questions
Is this crochet granny square tote bag pattern beginner-friendly?
Yes. While it’s labeled advanced beginner, the techniques are simple and repeatable. If you’ve made granny squares before, you’ll feel comfortable with this pattern.
What type of yarn works best for this bag?
Worsted weight (#4) yarn works best. Choose a smooth yarn for clean stitches and good structure.
Can I change the colors or layout?
Absolutely. This pattern is easy to customize with different color combinations or square arrangements.
Can I make the bag larger or smaller?
Yes. You can adjust the size by changing the number of granny squares or modifying the strap length.
Can I sell finished bags made from this pattern?
Yes, you may sell finished items made from this pattern. Please do not share, copy, or redistribute the pattern itself.
More free crochet bag patterns
Looking for more handmade bag ideas? Explore my collection of free crochet bag patterns, including totes, purses, and everyday carry bags made with simple stitches and modern designs.
These patterns are designed to be practical, beginner-friendly, and easy to customize—perfect for gifts, craft fairs, or adding a handmade touch to your daily routine.


Let’s connect!
I’d love to see what you’re making! Share your finished project and follow along for more free crochet patterns and tutorials.
📌 Don’t forget to pin this pattern for later!
Happy crocheting! 🧶
— Melissa