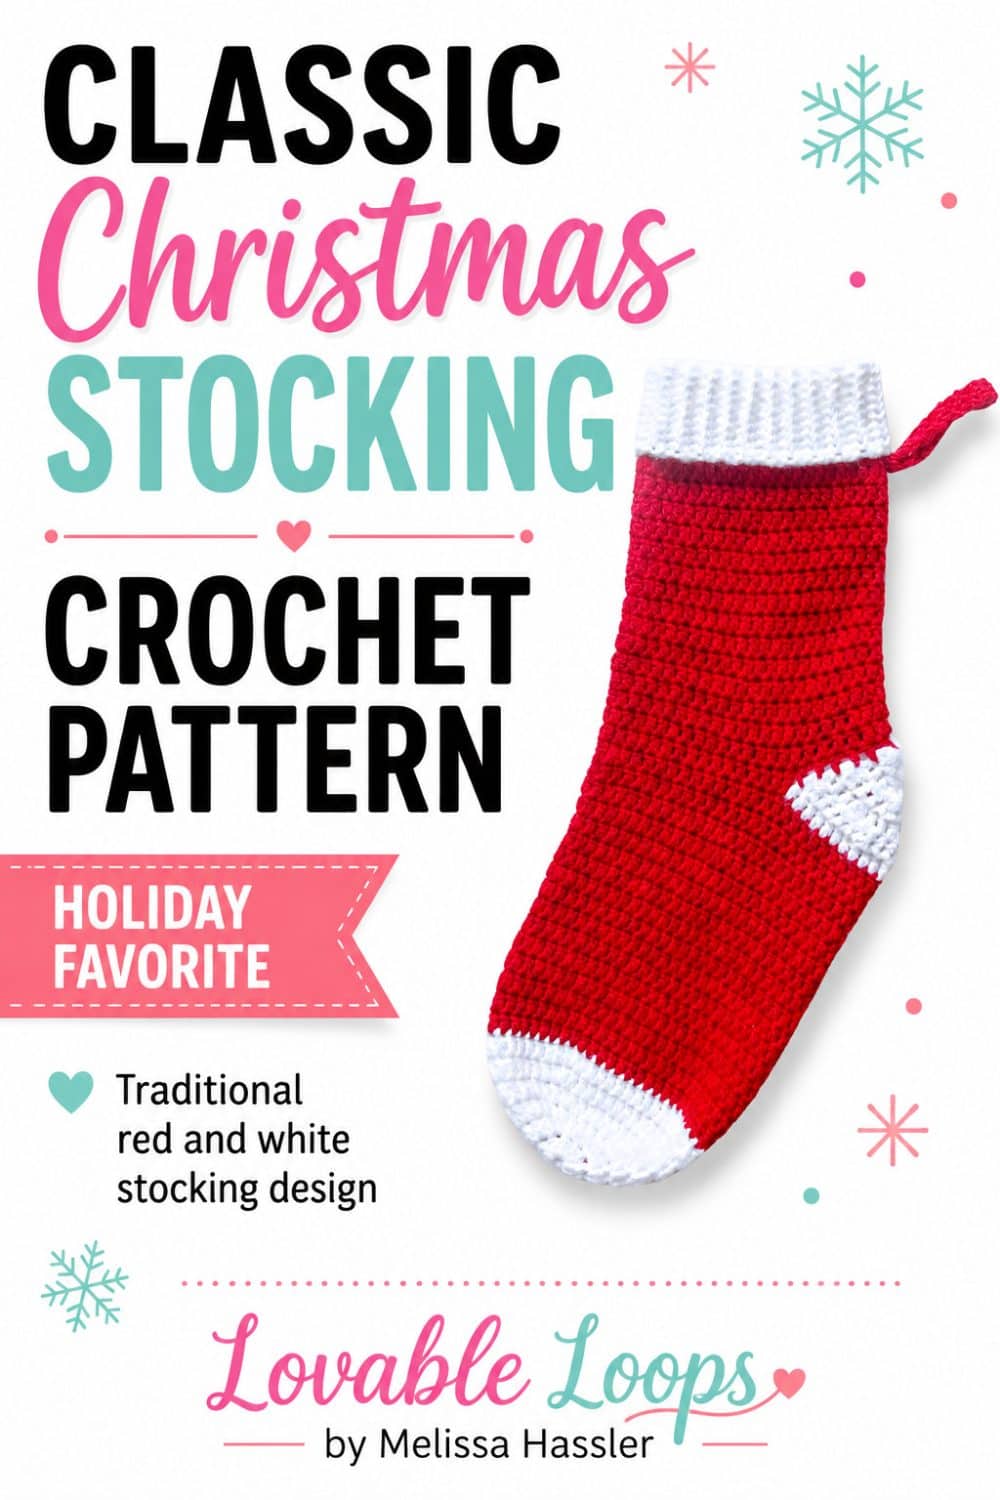
Classic crochet Christmas stocking pattern
Get ready to add a touch of holiday magic to your home with this free Crochet Christmas Stocking Pattern! This beginner-friendly pattern is the perfect way to bring the spirit of Christmas into your space.
Crochet Christmas Stocking Pattern Information
Here’s a quick overview of the materials, sizing, gauge, and pattern notes before you begin.
Skill Level
Advanced Beginners. This free pattern uses basic crochet stitches.
Crochet Project Materials Needed
- Crochet hook: H-8 5 mm or size needed for gauge
- Yarn: worsted weight yarn #4 in red and white. I used 1 skein each of Red Heart Super Saver in Cherry Red and White.
- Yarn needle: Use this to weave in your ends.
- Scissors: Use scissors to fasten off your yarn.
- Stitch marker(s): Optional. Use these to help keep track of your stitches.
Finished Size
17 inches total length from the toe to the top of the stocking.
Gauge
9 stitches and 5 rows = 2 inches
Crochet Terms
- dc = double crochet
- sc = single crochet stitch
- hdc = half double crochet stitch
- dc2tog = double crochet decrease
- st/sts = stitch/stitches
- sl st = slip stitch
- ch/chs = chain/chains
- rnd/rnds = round/rounds
- rem = remaining
- blo = back loop only
Crochet Pattern Notes
- The beginning chain does not count as a stitch.
- Join each round with a slip stitch (sl st) to the first stitch made in that round.
- The pattern is worked from the toe to the cuff.
- Repeat the instructions between the asterisks (*) for the rest of the round.
- The toe, foot, and ankle sections are worked in the round.
- The heel flap section is worked in rows.
- The ribbed cuff is worked in rows that are joined around the ankle section.
- The stitch count is indicated at the end of each row/round.

Crochet Christmas Stocking Pattern Instructions

Toe Section of the Christmas Stocking Pattern
Work the toe and foot sections in the round.
Begin with white yarn.
Rnd 1: Magic circle, ch 2, 11 dc, join with sl st to the top of the first dc (11 stitches)
Rnd 2: Ch 2, 2 dc in each st, join (22 stitches)
Rnd 3: Ch 2, *2 dc, dc in next st*, join (33 stitches)
Rnd 4: Ch 2, *2 dc, dc in next 2 sts*, join (44 stitches)
Rnd 5: Ch 2, *2 dc, dc in next 10 sts*, join (48 stitches)
Rnd 6: Ch 2, *2 dc, dc in next 11 sts*, join (52 stitches)
Foot Section of the Christmas Stocking Pattern
Use red yarn.
Rnds 7-22: Ch 2, dc in each st, join (52 stitches)
Heel Section of the Christmas Stocking Pattern
The heel section is worked in rows.
Use white yarn.
Row 1: Ch 2, dc 24, turn (24 stitches)
Row 2: Ch 2, *dc2tog, dc in 4 sts*, turn (20 stitches)
Row 3: Ch 2, *dc2tog, dc in 3 sts*, turn (16 stitches)
Row 4: Ch 2, *dc2tog, dc in 2 sts*, turn (12 stitches)
Row 5: Ch 2, *dc2tog, dc in 2 sts*, turn (9 stitches)
Row 6: Ch 2, *dc2tog, dc in 2 sts*, turn (6 stitches)
Row 7: Ch 2, *dc2tog, dc in 2 sts*, turn (3 stitches)
Ankle Section of the Christmas Stocking Pattern
The ankle section is worked in the round.
Use red yarn.
Rnd 1: Ch 2, dc in each st and in the side of each row of the heel, join (28 sts from the toe/foot, 3 sts from the heel, 14 sts from the heel sides: 28+3+14= 45 stitches)
Rnds 2- 15: Ch 2, dc in each st, join (45 stitches)
Cuff Section of the Christmas Stocking Pattern
The photos are from my toddler hat pattern, but the ribbing method is the same. The only difference is the longer starting chain and row length for this stocking pattern.

Use white yarn.
Begin where you left off for the ankle section.
Step 1: Ch 21, sc in 2nd ch from hook and in each rem ch, (20 stitches)
Step 2: Slip Stitch in the next two stitches.
Step 3: Turn your work clockwise
↑ Step 4: Do not chain, sc blo in each st, (20 stitches)
↓ Step 5: Ch 1, sc blo in each st, (20 stitches)
Repeat steps 2-5 all the way around.
Finally, use a tapestry needle to sew the seam where the two ends of the brim meet.
Fasten off, weave in all of your ends, and then fold the cuff down.
Hanging Loop for the Christmas Stocking Pattern
Use red yarn.
Row 1: Ch 3, sc in the 2nd ch from the hook, sc in the next ch, turn (2 stitches)
Row 2: Ch 1, sc in each st, turn (2 stitches)
Rows 3- 25: Repeat row 2 (2 stitches)
Fold in half and then use a tapestry needle to sew the two ends together. Attach on the backside of the stocking to the last round made with red yarn.
Finishing the Crochet Christmas Stocking Pattern
Weave in the ends.

Christmas crochet decor patterns
Looking for more festive projects to make? Browse my favorite Christmas crochet decor patterns, including ornaments, pillows, garlands, appliques, stockings, and other cozy holiday makes for your home.
You can also visit my full collection of home decor crochet patterns for even more handmade ideas to decorate every season.
Let’s connect!
I’d love to see what you’re making! Share your finished project and follow along for more free crochet patterns and tutorials.
📌 Don’t forget to pin this pattern for later!
Happy crocheting! 🧶
— Melissa